Einleitung

Getting repairs on tech can be expensive. Charging ports are no exception. This guide will save you a few hundred dollars in the long run. This short and simple guide will take you through the steps of replacing the charging port on your HP Mobile Thin Client.

  1. gaKXdvnfM2OsI6ij
    gaKXdvnfM2OsI6ij
    uAVmpHHsBtABBMEc
    nkIXGHj1HowRkh5w
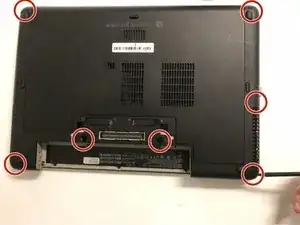
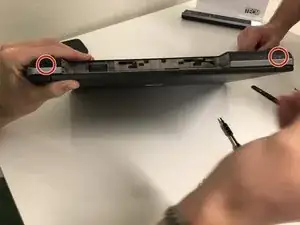
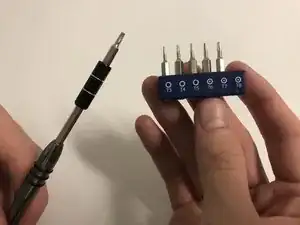
    • Remove the nine screws that keep the back cover secured.

    • We recommend removing the battery first. Refer to the "Battery Replacement" guide to learn how to remove the battery.

  2. ekCEFxW5MdA2gHUH
    ekCEFxW5MdA2gHUH
    vfjJjNoy6jAhWypS
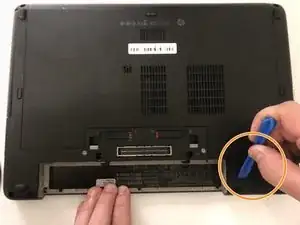
    • Remove the middle plate with the iFixit opening tool.

    • May require a bit of force. If it is not coming out try the other side.

  3. niL1H1WNKu2RMqr6
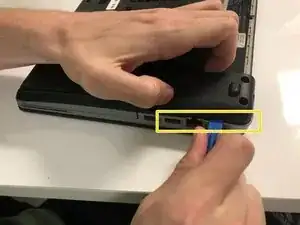
    • Using the iFixit opening tool, go along the seam of the back cover to pop it from its latches.

    • Gently, please! The plastic can crack.

  4. 6kdQ1TNerkarx4sU
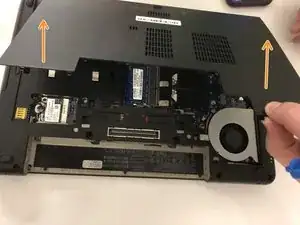
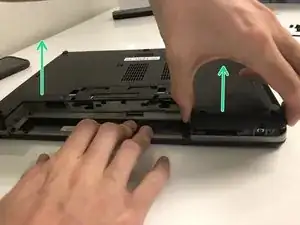
    • Once all corners are unclasped from their latches. Gently, lift the back cover.

    • Lifting the cover should not require much force.

  5. 1auSxnP4qOAErfyh
    • Locate the charging port.

    • refer to the "Lower case disassembly" guide to show you how to safely remove the back of the laptop.

  6. 6PYPuPjbwCMTbeaQ
    6PYPuPjbwCMTbeaQ
    sGVCypOPRJ2URyux
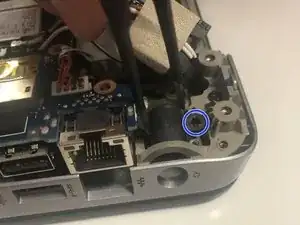
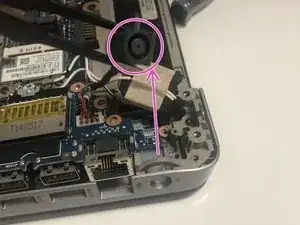
    • Using the screwdriver, unscrew and remove the screw located next to the charging port.

    • Gently pull out the charging port.

  7. w1XXoxNZkWXLRuVe
    w1XXoxNZkWXLRuVe
    eBjGVckTg3lSRnrj
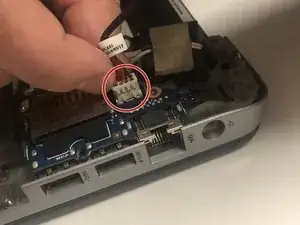
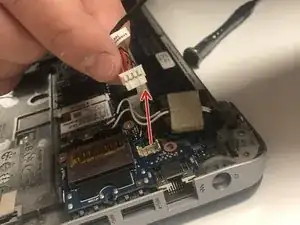
    • Unplug the connector shown in the image.

    • This should not require much force.

Abschluss

To reassemble your device, follow these instructions in reverse order.
Raul Rodriguez

Mitglied seit: 27/02/18

289 Reputation

0 Kommentare