Einleitung

Use this guide to replace the keyboard in a HP Omen 15-5002xx. The keyboard is the main way to enter information into your computer.

  1. uVHsDJpukL3LYh4N
    uVHsDJpukL3LYh4N
    OrvHdDeNYOgPDCE2
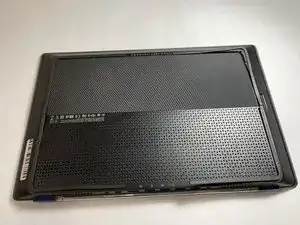
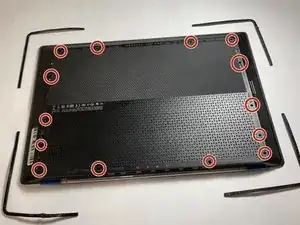
    • Flip the laptop upside down so the backside is facing up.

    • Use a spudger or your fingers to remove the thin rubber strips that are attached from the edges of the laptop.

    • Remember where each thin rubber came from and set them off to the side.

    • Unscrew all 14 screw with the J00 JIS Screwdriver.

  2. NGEGyWE6rQYvUFqC
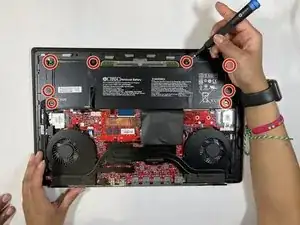
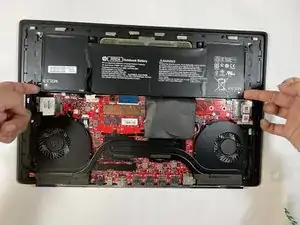
    • Open the case slowly from opposite sides of the laptop.

    • Use the J00 JIS screwdriver to remove eight screws securing the battery.

  3. DmZxIAja3WDYtEO4
    DmZxIAja3WDYtEO4
    IWypWhgKpovgfwW2
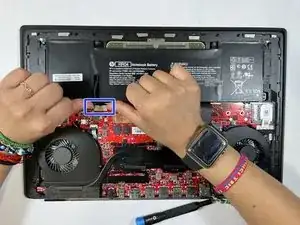
    • Carefully remove the battery connector that is attached to the motherboard by slowly sliding it towards the battery with two fingers.

    • Remove the battery by lifting it up and out.

  4. IRWOlLOscOIcRhYP
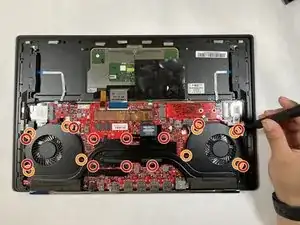
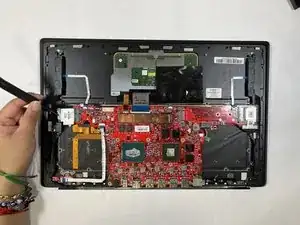
    • Remove the twelve big screws with the J00 JIS screwdriver.

    • Remove all eight small screws with the 1.5 flathead screwdriver.

  5. jPOkrqBJw3oGLymd
    jPOkrqBJw3oGLymd
    bKJKoRI1BrVGvQgL
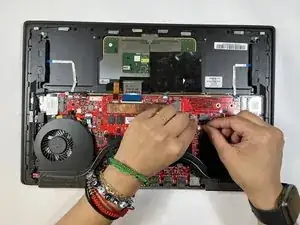
    • Carefully detach the fan connector that is attached to the motherboard by slowly sliding the connector out with two fingers.

    • Remove the battery carefully.

  6. earVMuOeBELeFmdh
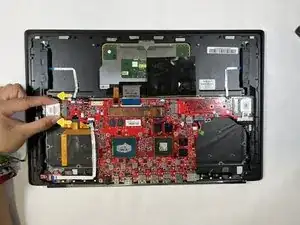
    • Use the Phillips #00 to remove one screw securing the Wi-Fi Card.

  7. KLCVGeRMNq5lrFbJ
    • Carefully remove the Wi-Fi Card by slowly sliding the card sideways away from the motherboard.

  8. POHPvkFvOuI4GPxA
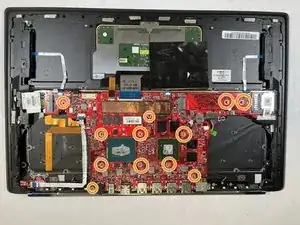
    • Use the 1.5 flathead screwdriver and remove the twelve screws from the motherboard.

  9. TP2hGQXGI3FoE3LG
    TP2hGQXGI3FoE3LG
    LMXdZSuUydJfCQEC
    j4DnV5PQPkAE5FaF
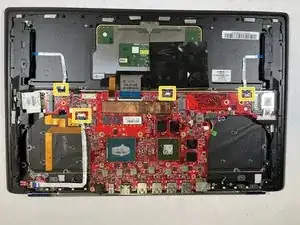
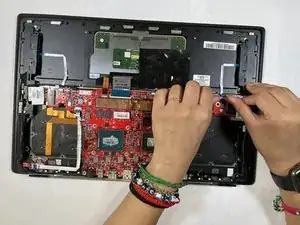
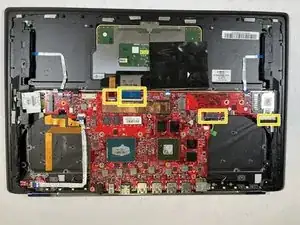
    • Disconnect the four cables attached to the motherboard.

  10. eJUFCXwrmTTyMKV6
    eJUFCXwrmTTyMKV6
    HMDEBKGHReURfqm6
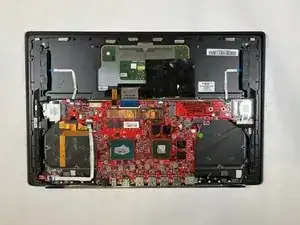
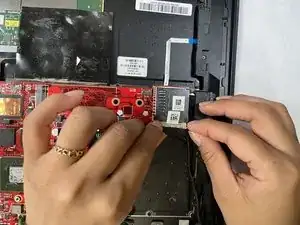
    • Disconnect the remaining four connectors from the motherboard.

    • Remove the motherboard.

  11. 4gOA6Ne6AosB2C6p
    • Remove all 51 screws using the 1.5 mm flathead screwdriver from the underside of the keyboard.

    • All necessary screws are numbered from 1-51 on the side of each screw hole.

  12. yVS2ypMHdHeM3BHH
    yVS2ypMHdHeM3BHH
    iGsXVQ6a3LKF4yID
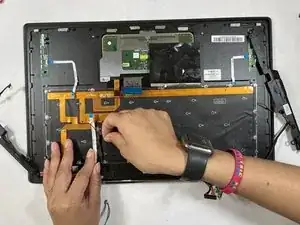
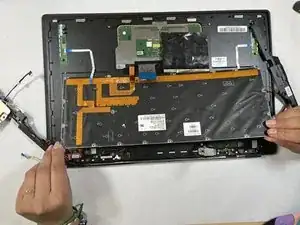
    • Slowly pull the electricity tape off of the computer.

    • You are able to replace the electricity tape or keep the tape attached with the wire.

  13. dDtPVajkdpEkYJah
    dDtPVajkdpEkYJah
    kjxNHJcuJLljSqc6
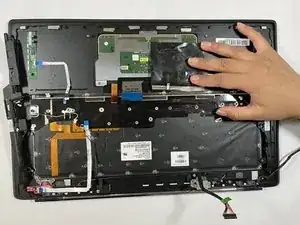
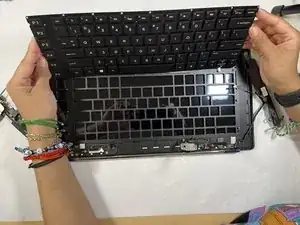
    • With two hands, lift the keyboards from the sides.

    Phew, I have exactly one key that doesn't work (the "A" key). Any chance to get it working again without disassembling everything?

    Have already tried pressurized air and contact spray from above.

    David -

Abschluss

To reassemble your device, follow these instructions in reverse order.
Hassan Isse

Mitglied seit: 01/09/21

97 Reputation

0 Kommentare