Einleitung
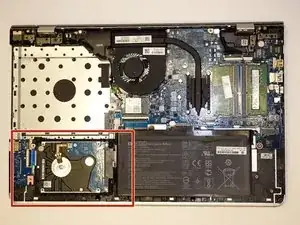
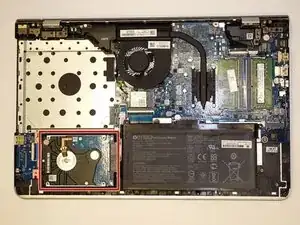
Use this guide to replace your hard drive in your HP Pavilion 15 laptop.
The hard drive is considered part of your computers hardware in which it stores and collects data in your computer. If the hard drive fails or does not work properly it can cause your computer a whole lot of trouble and yourself a lot of frustration. Some of the errors that may appear on your screen when you try to do certain tasks include, “File Not Found,” “Hard Drive Not Found Error,” “Hard Disk Read Error Occurred,” or “Disk is Full.” In other cases, if your hard drive decides to fail completely, then your computer is bound to not boot up at all.
If your having any of these problems or any other issues in which you may think it could be your hard drive, then please review the troubleshooting page before taking any actions or tearing apart your computer.
A few other common reasons why you may want to replace your hard drive may be because you are running low on storage, or you just simply want to upgrade your hard drive to one that is better, faster, and has more storage. In case you were wondering how to check to see how much storage you have on your current hard drive, then please follow these instructions.
A very important mistake that any rookie could make before replacing their hard drive is not backing up it before hand. It is very important to back up your hard drive in case you have any valuable information stored in it. In case you were wondering how to back up your hard drive to an external device these instructions should help you.
Make sure all power is fully disconnected before the rear laptop cover is removed.
Werkzeuge
Ersatzteile
-
-
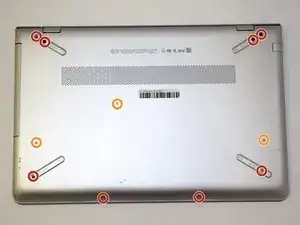
Turn the laptop over so the back is facing up. Use a Phillips #0 screwdriver to remove the 11 screws from the bottom cover. Rotate the screws counter-clockwise.
-
Eight 5mm screws.
-
Three 10mm screws.
-
-
-
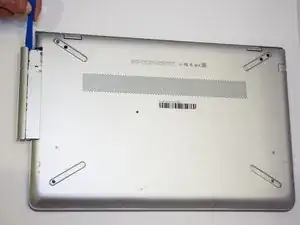
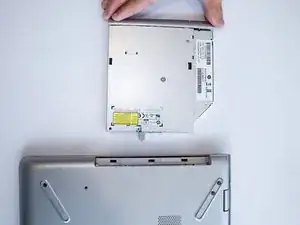
Gently remove the CD-ROM drive by using a plastic opening tool and sliding it out of the laptop housing.
-
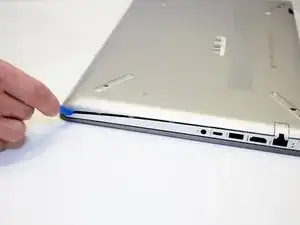
Using the opening tool, gently pry open the back panel of the laptop. Slowly work around the edge of the laptop with gentle pressure.
-
Remove the back cover from the laptop.
-
-
-
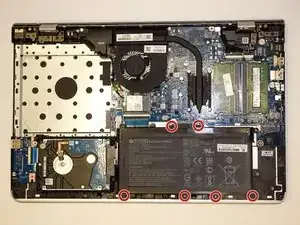
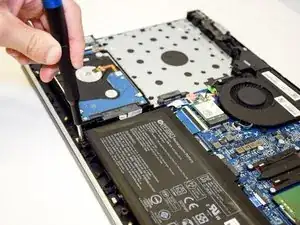
Remove the six 5mm screws securing the battery using the Phillips #0 screwdriver.
-
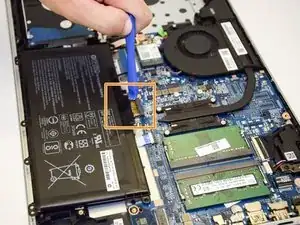
Gently disconnect the battery from the motherboard with a plastic opening tool and remove it from the device.
-
Charge it to 100% and continue to charge it for an additional two hours. Next, unplug the charger and use the laptop normally to completely drain the battery. Wait at least five hours and recharge the battery to 100%.
-
-
-
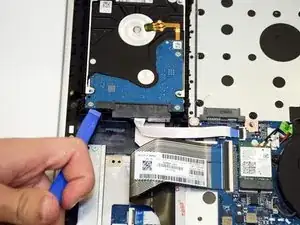
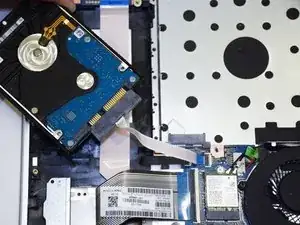
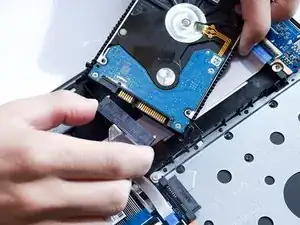
Disconnect the ribbon cable connecting the hard drive to the motherboard.
-
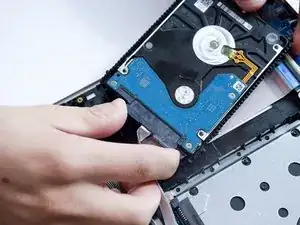
Remove the hard drive from the device.
-
To reassemble your device, follow these instructions in reverse order.
