Einleitung

Use this guide to replace your keyboard.

There are many possible reasons as to why you may need to replace your keyboard. Before beginning to take apart your computer be sure to check out the troubleshooting guide for possible issues and solutions to your keyboard problems.

Some of the issues that may cause you to replace your keyboard include multiple keys not functioning, messages not appearing on screen, or simply the keyboard is old and faulty.

As always before beginning the tedious task of breaking down the laptop be sure that all power supply is disconnected from the computer.

  1. UjqbeFEBgSrtoEPj
    • Make sure to power off the laptop before proceeding with the guide.

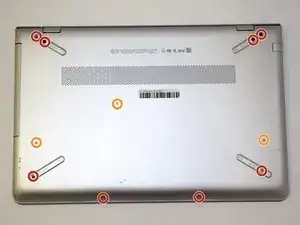
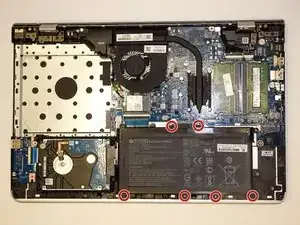
    • Turn the laptop over so the back is facing up. Use a Phillips #0 screwdriver to remove the 11 screws from the bottom cover. Rotate the screws counter-clockwise.

    • Eight 5mm screws.

    • Three 10mm screws.

  2. WPoeREnIauC1sqHJ
    WPoeREnIauC1sqHJ
    CiEXmEmDmNkhG6cg
    qWBK1uJL54Q5dEp4
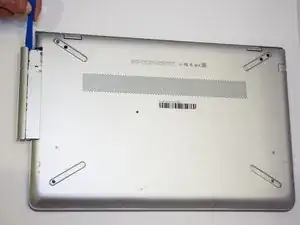
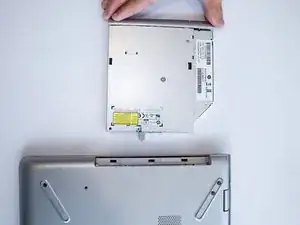
    • Gently remove the CD-ROM drive by using a plastic opening tool and sliding it out of the laptop housing.

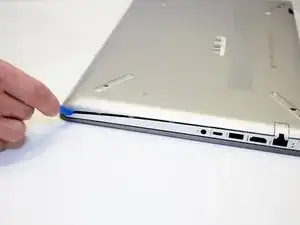
    • Using the opening tool, gently pry open the back panel of the laptop. Slowly work around the edge of the laptop with gentle pressure.

    • Remove the back cover from the laptop.

    Taking the cover off is probably the most difficult part of all this. The cover is fragile and probably easy to break if removal is not done properly. There should be more instruction on how to do this.

    Jim Rowan -

    Working along the DVD-rom drive side, and working along the back, and the full length side then lifting the back off seemed to work much easier than trying to ‘fight’ the front edge. Our factory sealed laptop had only 3 screws for the battery once we got underneath as well.

    Jagdt Mirage -

  3. cKHJvWUd3qTPsgAR
    cKHJvWUd3qTPsgAR
    dHmOo4lo5WNlxM5U
    ET2TAltqAlpwnwuf
    • Remove the six 5mm screws securing the battery using the Phillips #0 screwdriver.

    • Gently disconnect the battery from the motherboard with a plastic opening tool and remove it from the device.

    • If you're installing a new battery, you should calibrate it after installation.

    • Charge it to 100% and continue to charge it for an additional two hours. Next, unplug the charger and use the laptop normally to completely drain the battery. Wait at least five hours and recharge the battery to 100%.

    Hello,

    Can someone help me find the location of the CMOS battery in hp pavilion 15 cc005ni

    jean paul mbiya -

    There is no CMOS battery

    Gregg Stanley -

  4. QOKTaBN6XiCl4GUQ
    QOKTaBN6XiCl4GUQ
    KfSxL1mPZNhLkn4N
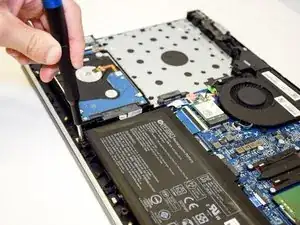
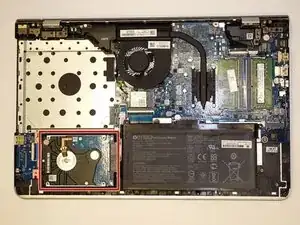
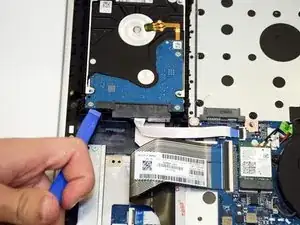
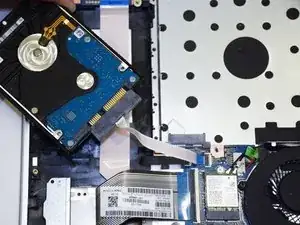
    • Use the iFixit opening tool to pry out the hard drive.

    • Do not completely remove the hard drive yet since it is still connected to the ribbon.

  5. UkWW2RR1TM1RtdMN
    UkWW2RR1TM1RtdMN
    jjDKsjl6xj5ZJZPK
    DBNXfI6vjByeIBar
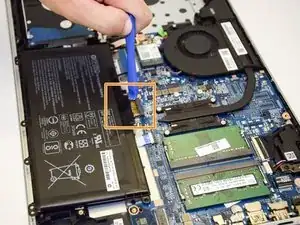
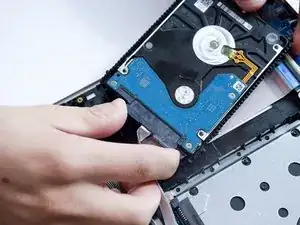
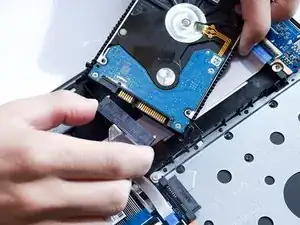
    • Disconnect the ribbon cable connecting the hard drive to the motherboard.

    • Remove the hard drive from the device.

  6. lKVNhI6MoEYma1F6
    lKVNhI6MoEYma1F6
    MfFM2tMEb5ItDunU
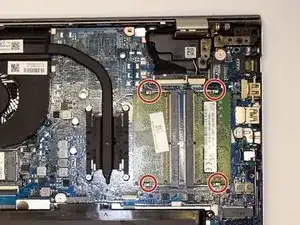
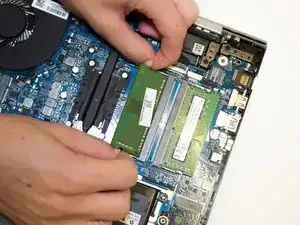
    • Release the metal tabs on each side of the RAM module by pushing each tab away from the module simultaneously .

    • The metal tabs secure the RAM stick in place and will allow you to pull the RAM stick up.

  7. gZApPMtZQiY3tTgT
    gZApPMtZQiY3tTgT
    FFjgCIlY5BLF3u3y
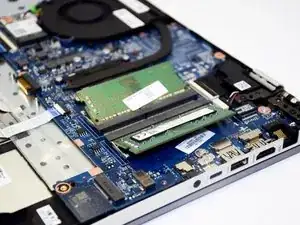
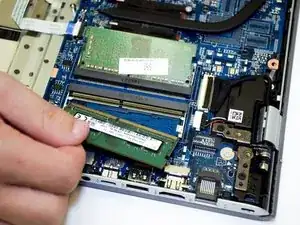
    • Once the metal tabs are released, it'll cause the RAM module to "pop" up.

    • Pull the RAM module directly out of its connector.

    • If there are two RAM modules installed, repeat the above procedure for the second module.

  8. MPNWOEvBLLkFDVP2
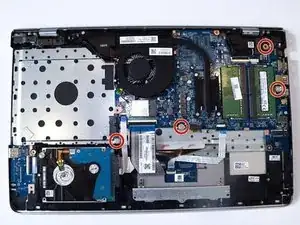
    • Remove the four screws securing the motherboard using the Phillips #0 screwdriver.

  9. rSJucfyqTJ1UDohx
    rSJucfyqTJ1UDohx
    dDiFVsjQ2E2jBITN
    QHMZbFLQQWuFGKgN
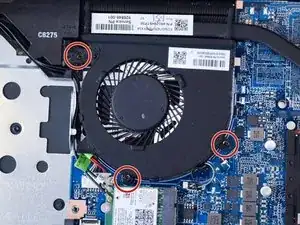
    • Remove the three screws securing the fan to the motherboard using the Phillips #0 screwdriver.

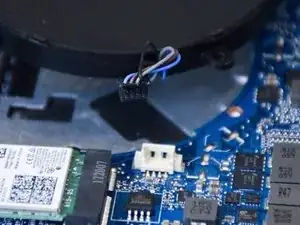
    • Unplug the cables that run from the fan to the motherboard and remove the fan.

  10. EvapSEMBJ2SUK6SY
    EvapSEMBJ2SUK6SY
    JTCEZkiRFgxIwGRX
    d155e1KHKEF5HKBH
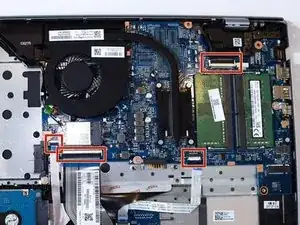
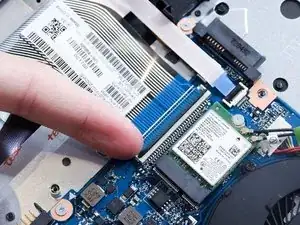
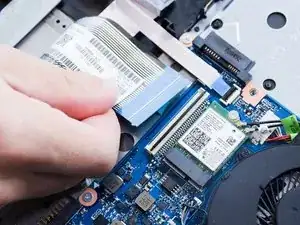
    • Remove the four ribbon cables attached to the motherboard by lifting the black clip.

    You will also need to remove the connector to the right of the video cable as well as the cable connector to the SD/USB daughter board on the lower right corner of the computer.

    Gregg Stanley -

  11. vOKfXboUATjpFBlK
    vOKfXboUATjpFBlK
    TWhcR6c65vKQKMdH
    u41DhhgZSAwfNLrC
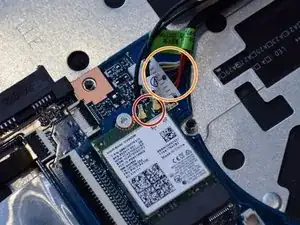
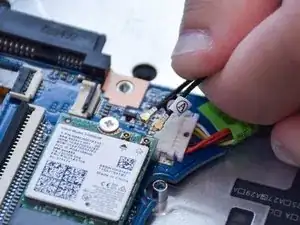
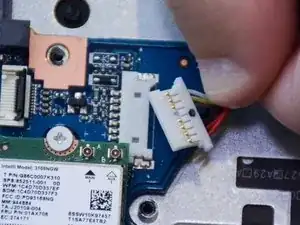
    • Remove the wires attached to the WiFi card.

    • Pull the wires straight and directly parallel to the motherboard.

  12. JpKfEant2RRBWDtn
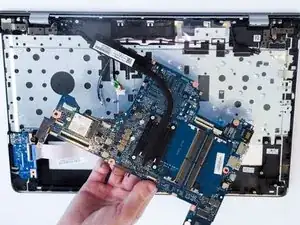
    • Pull the motherboard back and up in order to remove it without it getting caught by the innards of the outlets on the side of the laptop.

    Be careful of the metal shield that covers the USB-C jack on the right side; it's not attached and will fall off (right between the USB and headphone jacks).

    Gregg Stanley -

  13. uvDpPriFtW4OjLww
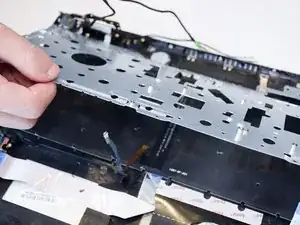
    • Lift the silver plating from the back of the keyboard enough so that the keyboard is visible.

    • It does not need to be completely removed from the hinges of the computer.

    Not on this laptop I'm repairing now! Exact same model. The plate is totally locked down by 20 or 30 plastic rivets.

    Steven Taylor -

    There is also a plastic sheet that is adhered lightly in some areas that needs to be removed before this step. And as Steven mentioned, there are 62 plastic rivets that anchor that plate down; you will have to cut the tops off of each one in order to lift the plate up. You can use a flat edge chisel exacto blade and a small hammer; but be careful you down cut anything in the way. You will also have to unscrew the remaining hinge screws on the hingesTwo on each) in order to remove the plate for full keyboard access.

    Gregg Stanley -

  14. uFAC4KYXCk2wJI4h
    uFAC4KYXCk2wJI4h
    TInmI1UtPMwdYITy
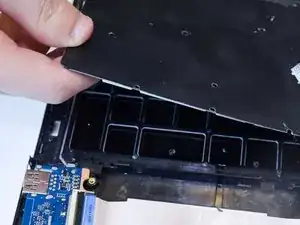
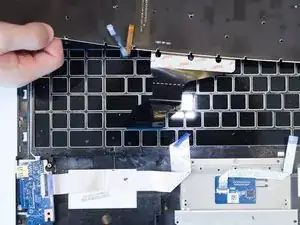
    • Grab the corner of the keyboard, then lift and remove the keyboard from the computer.

    There are also many more plastic rivets attaching the keyboard and light barrier material to the case; these will also need to be removed.

    Gregg Stanley -

Abschluss

To reassemble your device, follow these instructions in reverse order.
Josiah Soto

Mitglied seit: 16/09/19

151 Reputation

0 Kommentare