Einleitung

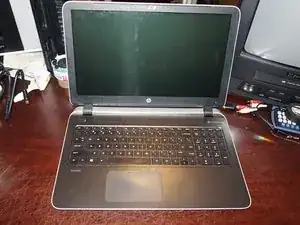
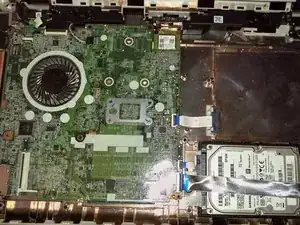
Wenn du Probleme mit der Tastatur oder dem Trackpad hast, oder Zugang zum Gerät benötigst - zum Reinigen des Lüfters oder für andere Reparaturen - dann zeigt dir diese Anleitung, wie du die Handauflage ausbauen kannst.

Bemerkungen

  • Das Kabel zur Tastatur ist ziemlich lang, das Kabel zum Trackpad aber wesentlich kürzer. Du musst deswegen beim Lösen des Steckers am Trackpadkabel

besonders sorgfältig sein.

* Arbeite dich von oben nach unten, achte darauf, dass die Tastatur, das Trackpad und die Einschalttaste vor dem Ausbau der Handauflage abgetrennt sind.

  • Diese Reparatur ist recht aufwändig. Halte eine Sortierhilfe bereit, z.B. eine Magnetmatte, um die verschiedenen Typen von Schrauben zu ordnen.
  1. QCrPTDYLCBf36Zh5
    QCrPTDYLCBf36Zh5
    Jd4OjkdY1h4pqSyL
    tfC24TIHNIiNhify
    • Fahre den Computer vollständig herunter. Entferne den Akku nicht, solange nicht alle Lichter aus sind.

  2. U1voM6erQwEfZff5
    U1voM6erQwEfZff5
    HCLYfYgVLhoTYaBT
    SMnJL5bjl21Hw6Gb
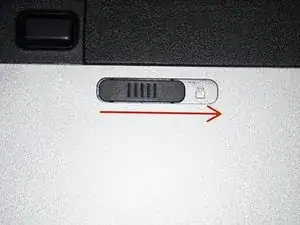
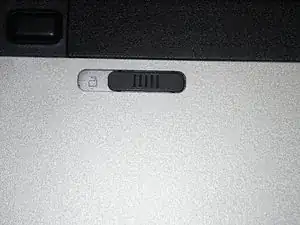
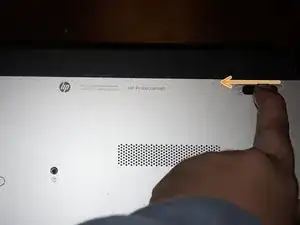
    • Wenn der Computer ganz aus ist, dann kannst du den Akku entfernen. Schiebe die Entsperrtaste in die Stellung "Offen".

  3. NTpA6elav5TyoLAv
    NTpA6elav5TyoLAv
    5lVAiSsnfFhJxCos
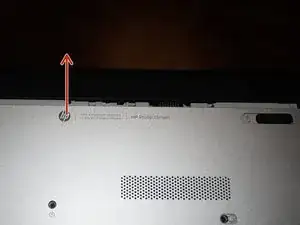
    • Ziehe ihn nach vorne und hole ihn heraus. Entferne ihn vom Laptop.

  4. OoErKhBKLXSLZ4Xo
    OoErKhBKLXSLZ4Xo
    CRH34by2FTkFPFEP
    tqO6geSscbfZVTjh
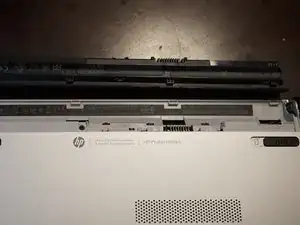
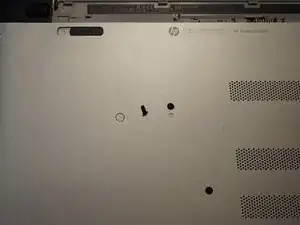
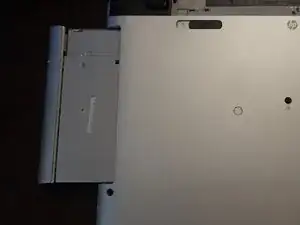
    • Entferne die einzelne Kreuzschlitzschraube #0, welche das optische Laufwerk befestigt. Schiebe danach das optische Laufwerk heraus.

  5. yDyRxsVYCsvcw3Xm
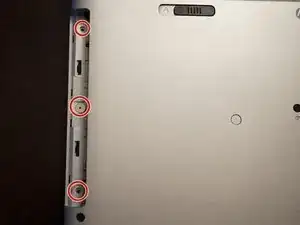
    • Je nach Modell kann hier eine oder mehrere Schrauben befestigt sein.

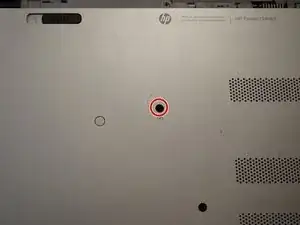
    • Drehe die Kreuzschlitzschrauben unter dem optischen Laufwerk heraus. Verwende dafür einen Kreuzschlitzschraubendreher #00.

    If I'm having troublds removing this screw what should I do? Using a Phillips #00

    mjsbak -

    Try a Phillps #000 screwdriver. It worked for me with a #00, but #000 is a better fit when I revisited this.

    Nick -

    Mine has been worn out due to excessive use. What should I use to remove this screw?

    Ahmed Khan -

  6. OTP1BsEDWcVrwmil
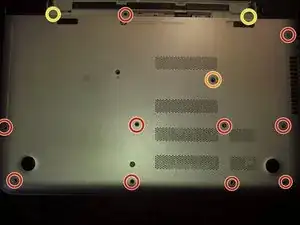
    • Sobald der Akku und das optische Laufwerk ausgebaut sind, kannst du die 11 Schrauben entfernen, mit denen die Handballenauflage befestigt ist.

    • Diese Schraube ist durch einen Aufkleber verdeckt. Bei Verlust/Beschädigung handelt es sich um einen Schönheitsfehler.

    • Bei einigen Modellen (aber nicht bei allen) befinden sich in diesem Bereich Schrauben. Wenn du hier Schrauben siehst, müssen sie entfernt werden.

    Caution: There are two additional screws on some models in the battery pack area on the far left and right of single screw shown in the picture above. Make sure to remove those screws as they are also securing the back of the palm rest to the computer.

    David May -

    Good catch. I made the assumption all machines in the P series come apart the same way since multiple chassis in the same line are rare. What model machine do you have?

    Now that I’ve looked at my picture, I think I know what you’re talking about. I think you’re taking about the square areas that were never used on my machine?

    Nick -

    I added a marker to account for this. I meant to do it sooner, but it slipped past me. Let me know if I put the markers in the wrong location. I have not seen one of these, so I don’t know with 100% certainty.

    Nick -

  7. OoBlbI2H2FoECOD3
    OoBlbI2H2FoECOD3
    mkQhThhk6Hm3b4sx
    qQmyRnSdQHjS6eQl
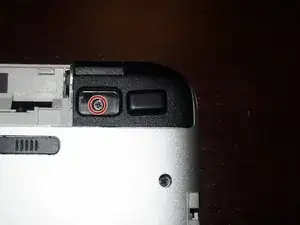
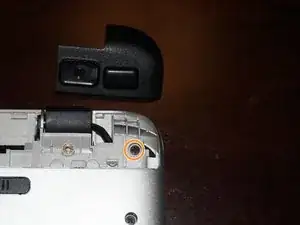
    • Wenn du die originalen Puffer weiterverwenden möchtest, kannst du sie auf die Scharnierabdeckungen kleben, sie bleiben dadurch klebefähig.

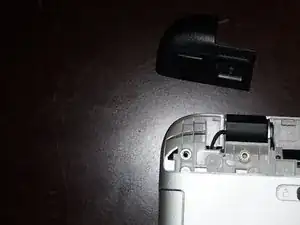
    • Entferne die Scharnierabdeckungen . Entferne dazu die Gummipuffer. Benutze einen Kreuzschlitzschraubendreher #0.

    • Entferne darunter die Kreuzschlitzschrauben #0.

  8. nidZSi3wWBteFx1l
    nidZSi3wWBteFx1l
    jOMEyYNT6wE5Sje6
    efriUUICNApAkAHd
    • Entferne die Handauflage noch nicht. Die Einschalttaste ist immer noch angeschlossen.

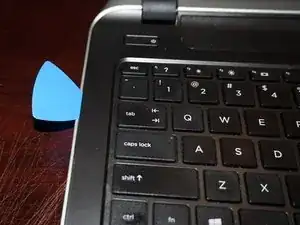
    • Wenn sich die Handauflage nicht leicht löst, hilft ein Plektrum weiter.

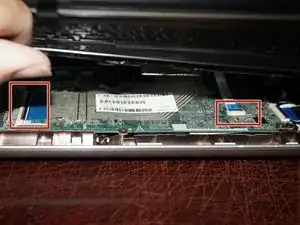
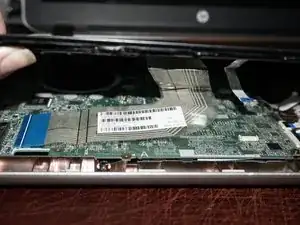
    • Heble die Handauflage an drei Seiten mit einem Plastiköffnungswerkzeug hoch. Hebe sie dann an der Vorderseite etwas hoch und löse die Kabel der Tastatur und des Trackpads. Klappe dazu zuerst die schwarzen Kunststoff-Sicherungsbügel an den Anschlüssen hoch und ziehe die Kabel heraus.

    • Wenn die Tastatur und das Trackpad abgetrennt sind, kann die Handauflage hochgehoben werden. Benutze, wenn nötig, ein Hebelwerkzeug.

    >Step 8 Remove the palmrest

    >Do not remove the palmrest.

    lolwut

    Toynbee Idea -

    Not sure if you’re being serious or sarcastic. If you’re serious, it says it in the line you quoted that from why it has to wait.

    Nick -

    This is very difficult to remove. I managed to get the hard drive removed without removing it completely. The corners would not come loose and I didn’t want to risk cracking the palmrest.

    Hollow Hills Ranch & Homestead -

    The trick I’ve used on this HP chaissis is I will go over the back tabs with more attention then the rest, and then go over it again just to be sure.

    The alternative is to buy anything else that isn’t awful to service, but sadly if you own it you can’t do much about it.

    Nick -

    NOTE! The ONLY cloning tool that created bootable (HP Pavillion) clone was DiskGenius software's "OS Migrate" button. I spent tens of hours with other software only to experience BSOD's (Blue screen of death) during the boot-up. Windows 8.1 install DVD's standard Command line boot repair tools could not fix the issues that other cloning tools created. The cloning tools tried were Acronis, Clonezilla, Macrium Reflect but they produced unbootable laptop. DiskGenius is not the cutest software but I wish I had it in the beginning. My two cents..
    - Teemu Parkkunen

    Teemu Parkkunen -

    EDIT: On my previous comment I mentioned that DiskGenius was the the only working option for this Windows 8.1 Pavillion cloning. Now it turned out that the target SSD was faulty. There was bad sector on boot area. This may have contributed to the fact that cloning was a hit or miss process. So feel free to try any cloning sofware.

    Teemu Parkkunen -

  9. PVoOPWjuXn3JBRFE
    PVoOPWjuXn3JBRFE
    DHg5qgZ3UmsXavLY
    fFn3xgYFeM1Fs4GU
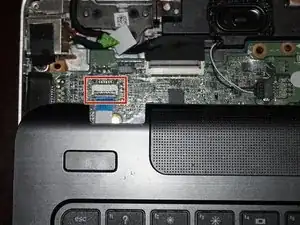
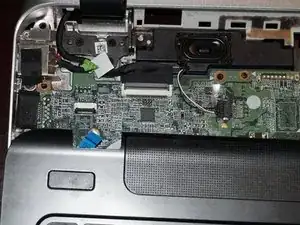
    • Nachdem dieTastatur und das Trackpad abgetrennt sind, musst du auch noch die Einschalttaste abtrennen. Klappe die schwarze Lasche hoch und entferne die Handauflage.

Abschluss

Um dein Gerät wieder zusammenzusetzen, folge den Schritten in umgekehrter Reihenfolge.

Nick

Mitglied seit: 11/11/09

82170 Reputation

Ein Kommentar

My power button is bad and my mouse track stopped working. I couldn't find a replacement for it. What can I do?
Trevor Gilbert -