Einleitung

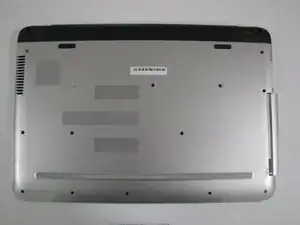
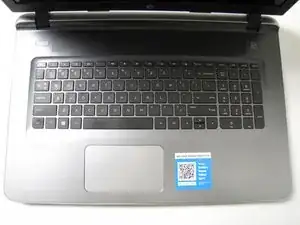
The hard drive can cause the device to run slow. In this guide, you will learn how to replace your HP Pavilion 17-g119dx laptop's hard drive. To perform the replacement, you will need a Phillips head screwdriver and a plastic opening tool to pop open the keyboard.

  1. 5fFOqVXpLihmrALp
    • Close your laptop and turn it over so that the bottom is facing up.

    Stap 1 gedaan

    Willem Zweedyk -

  2. pwOC3HMHUxhcUmPk
    pwOC3HMHUxhcUmPk
    bMbUREW4PNQcHbIB
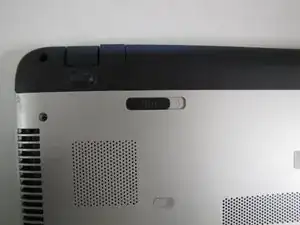
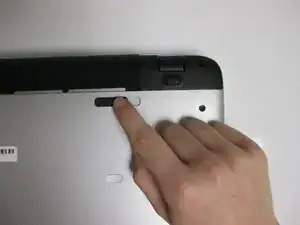
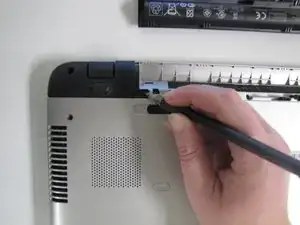
    • In the upper left hand corner, slide the bar with the lock icon to the right. This will unlock the battery.

    Stap twee gedaan

    Willem Zweedyk -

  3. tlKV4YQKVARNBV3D
    tlKV4YQKVARNBV3D
    IxlZdHdhOa5oXmGy
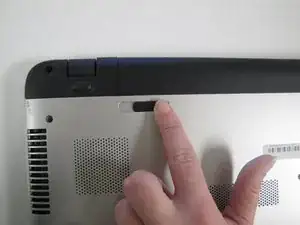
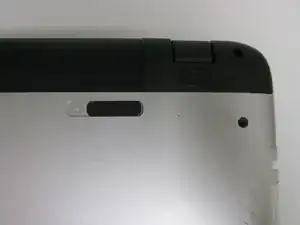
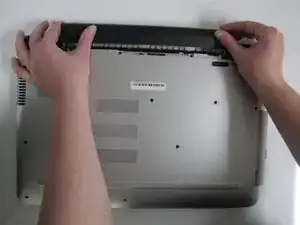
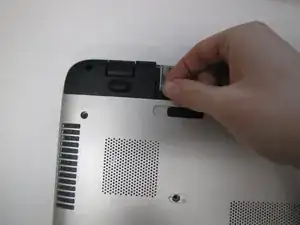
    • Slide the bar with the battery icon, on the right of your laptop, to the left to release the battery.

    Stap drie gedaan

    Willem Zweedyk -

  4. ZLqBxgNyaVbqIeRI
    ZLqBxgNyaVbqIeRI
    FPAMXxZkIyDDMZnW
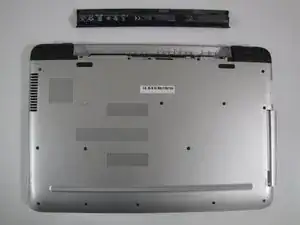
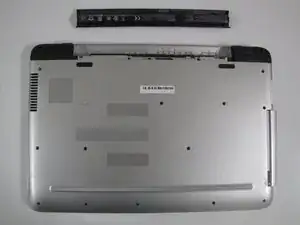
    • Grab the battery and remove it from the laptop.

    Stap 4 gedaan batterij verwijderd

    Willem Zweedyk -

  5. ibJoKiZkWXtlJp1E
    ibJoKiZkWXtlJp1E
    BON5HReJGnUgUAA4
    opX4D3WZqlusF6Dd
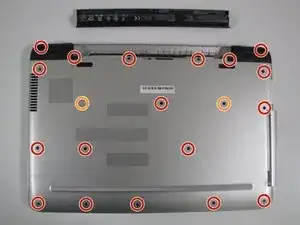
    • Remove the twenty 6.5mm screws using the Phillips #00 screwdriver.

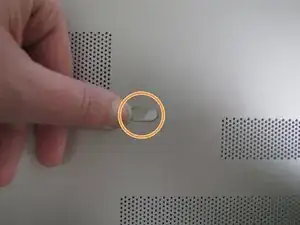
    • Two of these 6.5mm screws are covered by a silver sticker. Remove the sticker by gently scraping your finger nail under the sticker and then remove the screws.

    20 schroeven verwijderd vastgeplakt op blauw kleedje plaatsen gemarkeerd op de laptop en op het kleed en een foto gemaakt twee stuks.

    Willem Zweedyk -

  6. 5Khcrpa4rEsabKga
    5Khcrpa4rEsabKga
    Pvm2qeMCO4rLNr2N
    GnwoOE4MYd4lPmlx
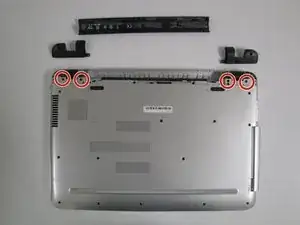
    • Remove the black corner covers on either side of the battery to reveal four additional 6.5mm Phillips #00 screws.

    Twee schroeven van elk scharnier verwijderd gedaan

    Willem Zweedyk -

  7. woHE3jY3JQnrUmIa
    woHE3jY3JQnrUmIa
    5HpQVsOLQKkDy1CD
    vVEAJeXTNTFWUr1h
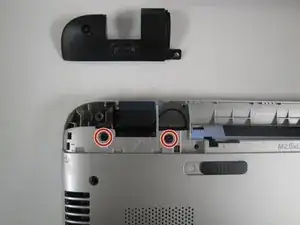
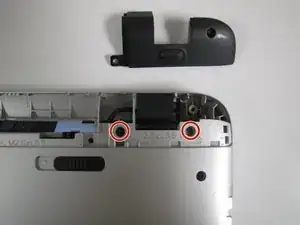
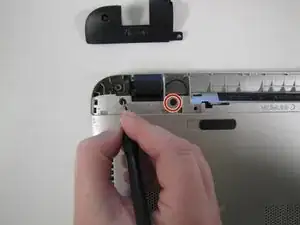
    • Remove the four 6.5mm Phillips #00 screws that were underneath the black corner covers.

    Stap 7 gedaan twee schroeven verwijderd

    Willem Zweedyk -

  8. ryChVYW1FUGKp1CH
    ryChVYW1FUGKp1CH
    3pHHP4LorArHblYj
    iKBcZpi3OTLeQBdN
    • On the right-hand corner of the laptop, remove the CD-ROM by pressing the small button on the side. Pull it out of the laptop, and set it to the side.

    The button to press can be accessed by a small paperclip through the tiny round hole — not the rectangular normal release button. (The picture shows the rectangular button being pressed.)

    There is some resistance to pulling the CD-ROM out of the laptop, but as long as its screw is removed, it will not break

    TCATDI -

    Stap 8 de cd-rom verwijderen door de knop in te drukken lukt niet 1 2 3 ik kom er straks op terug we gaan even verder kijken

    Willem Zweedyk -

    Stap 8 CD ROM verwijderen is gelukt uiteindelijk

    Willem Zweedyk -

  9. RLau6vRCr3yr5RAw
    RLau6vRCr3yr5RAw
    2S5S1XmhxsimX3hq
    TmIN4XtUrTAgAT3V
    • Make sure that all screws and the CD-ROM Drive are removed before trying to complete this step to prevent damaging your laptop. During this step, you will likely hear loud crackling noises. This is normal.

    • Flip the computer back over with the screen facing up and open the laptop.

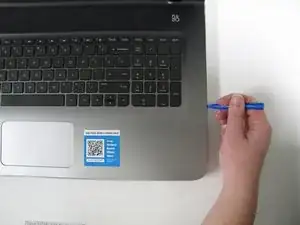
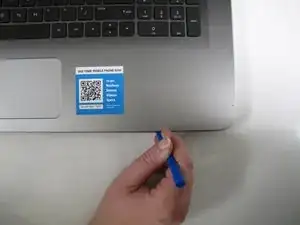
    • Use the Plastic Opening Tool to separate the face plate from the backing.

  10. BPCtr6EgScqR235B
    BPCtr6EgScqR235B
    6qQYSaABMIomDdXc
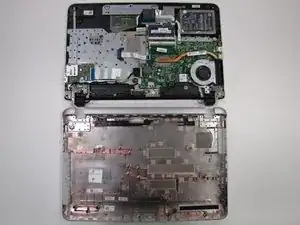
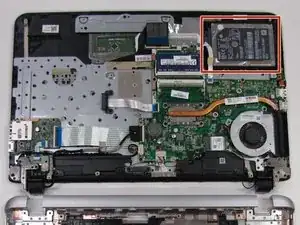
    • After running the opening tool along the sides, you can gently pop the keyboard open to access the Hard Drive.

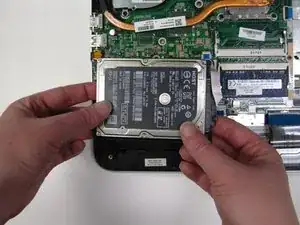
    • The Hard Drive is located to the right of the RAM and above the Motherboard.

  11. rPFyoLyZ4T6Y2lFX
    rPFyoLyZ4T6Y2lFX
    B1SDNJfrcEtIvuMs
    1cKf4QiHWqR1bQjI
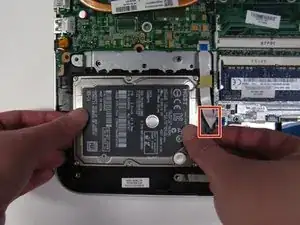
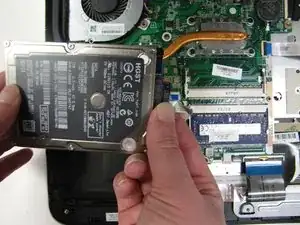
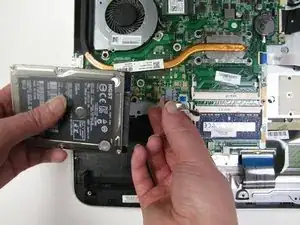
    • To remove the Hard Drive, disconnect it from the cable by pulling out the base. Do not pull on the ribbon.

Abschluss

To reassemble your device, follow these instructions in reverse order.

Kathryn

Mitglied seit: 31/10/17

766 Reputation

2 Kommentare

Very helpful, thank you!

TCATDI -

Thnx indeed very helpful.
Willem Zweedyk -