Einleitung
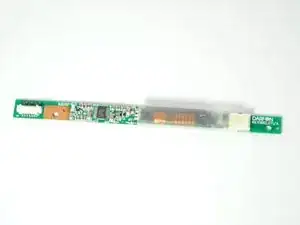
The inverter powers your laptop's screen, making it easy to see. If you're having issues with the visibility of your screen, like flickering, dimming, or even faint buzzing noises, the inverter could be faulty. Follow the steps in this guide to access your computer's inverter and replace or repair it.
Werkzeuge
-
-
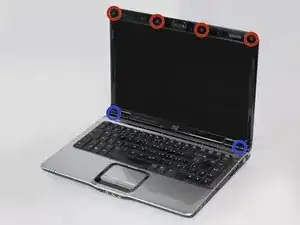
Remove the 6 rubber screw covers and screws, found around the edge of the laptop screen, surrounded in red and blue.
-
Use the plastic opener tools to remove the screw covers. Just apply firm pressure to the edges to pop the screw covers out, they are attached with a light adhesive.
-
There are four 2.5mm X 4mm-L Phillips #0 screws along the top.
-
There are two 2.5mm X 8mm-L Phillips #1 screws along the bottom.
-
-
-
Slide a plastic opener tool along the outside edges of the front screen panel, separating it from the screen. You may need to apply some firm pressure.
-
Once the panel is separated from the screen, gently pull it off and set it aside.
-
-
-
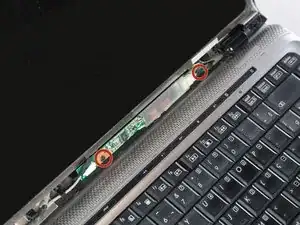
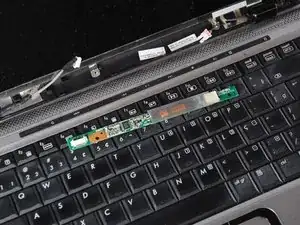
The inverter is located underneath the screen.
-
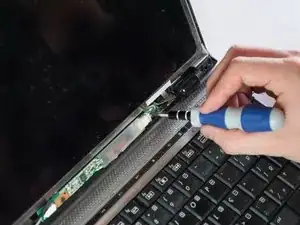
Unscrew the two 5mm Phillips #0 screws holding it in place, one on each end of the inverter.
-
-
-
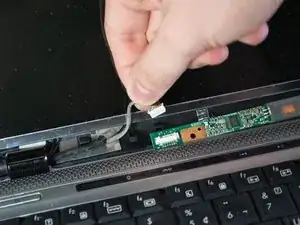
Disconnect the grey LCD cable on the left side of the inverter by holding the inverter in place and pulling firmly on the connector.
-
Disconnect the backlight plug cable on the right side of the inverter by holding the inverter in place and pulling firmly on the connector.
-
To reassemble your device, follow these instructions in reverse order.
Ein Kommentar
Thank you for enriching my knowledge.
Hope to meet you again.
