Einleitung

This guide aims to teach you how to replace a motherboard, a necessary step if your computer has overheated and shorted the board. It is a fairly complex process, but through clean pictures and concise steps it should help guide you through the process.

  1. OUFxJerPe1j1PWv5
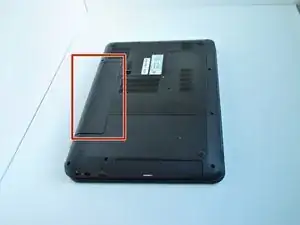
    • Flip the computer so that the bottom side is facing up, and locate the battery above the screen hinges.

  2. sRsmvKcosdqwKMMa
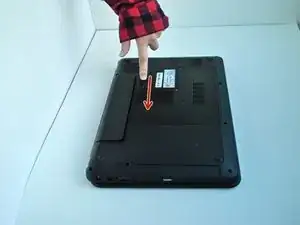
    • Slide the switch under the battery compartment to release the battery.

  3. EuGNp2ugGFuKxNgD
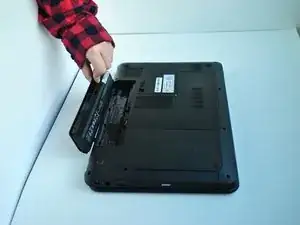
    • Remove the battery.

    • The battery will have popped out of the compartment when it was released.

  4. 4YgKCdXjJEbIKClb
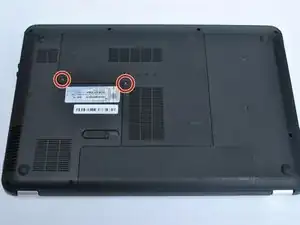
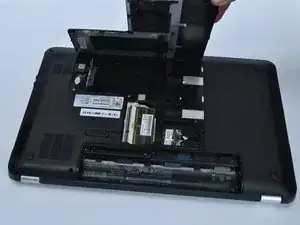
    • Unscrew the two silver screws holding the protective cover in place until they make a clicking noise.

    • The screws do not remove from the cover.

  5. 6aoQNYiaBnh1arXX
    6aoQNYiaBnh1arXX
    CvQYHre5p1ytB3jY
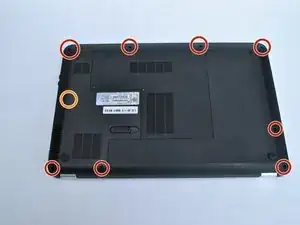
    • Unsnap the Cover by lifting the edge along the battery compartment.

    • Remove all of the body screws.

    • Remove the rubber cap and the screw underneath it.

    There are 10 body screws plus one that holds the hard disk cover!

    Eveline Bernard -

    “Remove the rubber cap and the screw underneath it.”

    I assume you mean the rubber feet at the four corners? Which of the rubber feet hides that screw?

    Eveline Bernard -

    There are body screws under the protective hard - disk - and - memory - cover! That cover has to be removed first!

    Eveline Bernard -

    Remove the hard disk (described much to late in step 11).

    There are 2 screws under the hard disk.

    The memory can stay in place.

    Eveline Bernard -

  6. FscO13nPcyRn4LOu
    FscO13nPcyRn4LOu
    SaQmIAqUBgWD2JAQ
    2WmYInIHjdBfCaU5
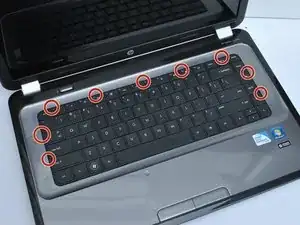
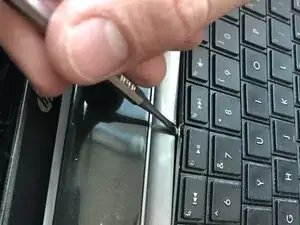
    • The keyboard is held in by nine tabs

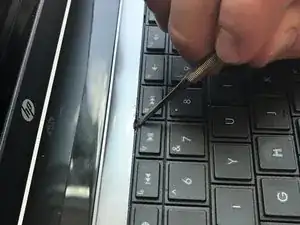
    • Using a metal tool, depress the center tab and pry up the keyboard by pivoting the tool towards the screen.

    A plastic card (credit card or the like) is handy to keep the keyboard up while opening the nine tabs.

    Eveline Bernard -

    Make sure you did remove the screw that is at the under side between the memory compartment and the radio compartment!

    A plastic card (credit card or the like) is handy to keep the keyboard up while opening the nine tabs.

    Eveline Bernard -

    The screw that is at the underside between the memory compartment and the radio compartment is the one screw holding the keyboard in place, apart from the 9 tabs.

    Eveline Bernard -

  7. bHTwwSnUWZ6xQ3tp
    bHTwwSnUWZ6xQ3tp
    FIZXCQxYAMpZue3y
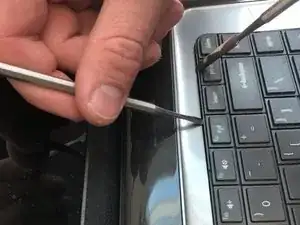
    • Slide the tool that is now under the keyboard sideways along the edge and use another tool to depress the other tabs along the edge of the keyboard.

    • As you depress the tabs, the edges of the keyboard will pop up.

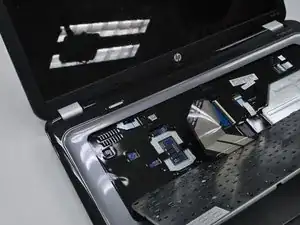
    • Lift off the keyboard

  8. KFeIQV6T1JRaOYn4
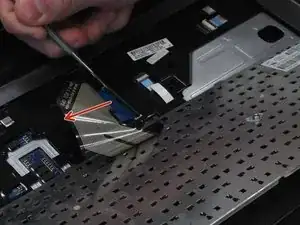
    • Flip up the black tab holding the keyboard in place via the ribbon cable and pull out the cable

  9. qWmNeBxJOVvJHbr2
    qWmNeBxJOVvJHbr2
    VbHuNAjG3E3UQXxK
    wOaJXQduodWKtgQR
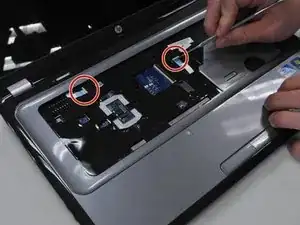
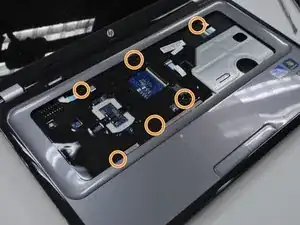
    • Remove the two remaining ribbon cables.

    • Remove the screws holding in the protective cover underneath the keyboard.

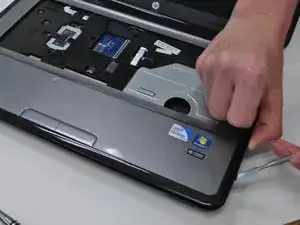
    • Pop the cover off using any flat metal tool, starting with where you took out the optical drive

    • It will be very sticky near the edge closest to the screen. This is where the sticker in the battery compartment is stuck to. just use a little more force.

    “Remove the screws holding in the protective cover underneath the keyboard. “ there are 6 of them, see image

    Eveline Bernard -

    “Pop the cover off using any flat metal tool, starting with where you took out the optical drive “

    When did we remove the optical drive? How?

    Eveline Bernard -

    “Remove the screws holding in the protective cover underneath the keyboard.” There is only one screw holding the cover protecting the hard disk and memory.

    Eveline Bernard -

  10. QZvuVy1NUHfJ5kqM
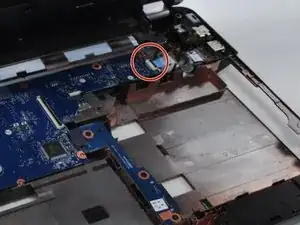
    • Unplug the ribbon cable on the right side of the motherboard.

    Before removing the top, the dolby speaker units and their cable of have to be freed!

    Eveline Bernard -

  11. HRIMs4ahKSTmfZMs
    HRIMs4ahKSTmfZMs
    5VlEvOXIAOvXOQNe
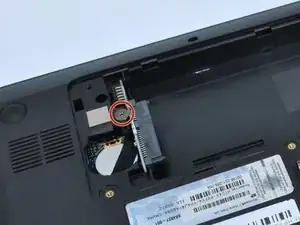
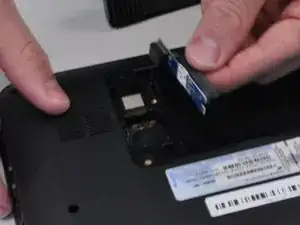
    • Underneath the computer, unscrew the hard drive connector screw, and pop out the hard drive plug-in.

  12. SgQPyFFan1yCpwaD
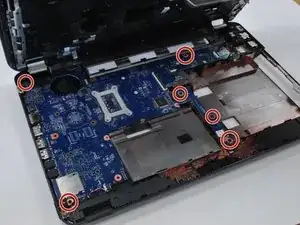
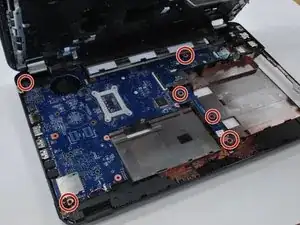
    • Unscrew all mother board screws and lift the motherboard out of the body.

    • For replacing the screen hinges and screen, skip this step

    For replacing the screen hinges, disregard this step.

    Calvin Kerr -

Abschluss

To reassemble your device, follow these instructions in reverse order.
Calvin Kerr

Mitglied seit: 05/04/18

872 Reputation

0 Kommentare