Einleitung

  1. gYjHTcKfxLLAZLso
    • Shut down the computer.

    • Disconnect the power and all external devices connected to the computer.

    • Working on your device while it is turned on may result in electric shock.

  2. SovjkqN66AjVjmjq
    SovjkqN66AjVjmjq
    ikon1NpYoVFHUbxW
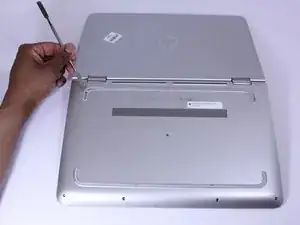
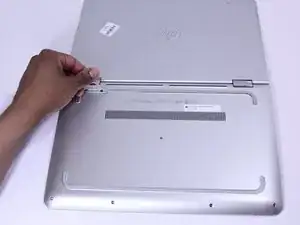
    • Use a Metal Spudger and remove the rubber foot closet from the bottom of the laptop.

  3. xO2oIVxVihIMUncV
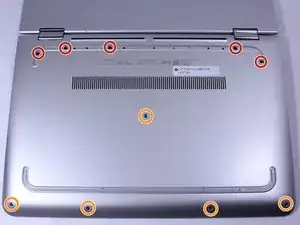
    • Remove all of the screws located on the bottom of the laptop:

    • 5 Phillips 2.4 x 5.7 mm screws

    • 5 Phillips 2.0 x 5.0 mm screws

    • Make special note of each screw and screw lock size and location during removal and replacement.

    “5 Phillips 2.4 x 5.7 mm screws”

    “5 Phillips 2.0 x 5.0 mm screws”

    I think the color for the sizes are mixed up, because the one near the screen bending part are the bigger ones, yet it says they are the “2.0 x 5.0 mm” but they are the bigger ones.

    If I’m wrong, tell me because I’m not sure if thats the ways they’re named because I’m not an expert at screw sizes.

    SomeRandomChild -

  4. Ol3BWZHvYObRMjw3
    • Turn the computer over onto its base, with the computer open and the keyboard facing upward.

  5. ySAp1JTGlC5IAsgH
    ySAp1JTGlC5IAsgH
    vJaw6GIZOCowQqxF
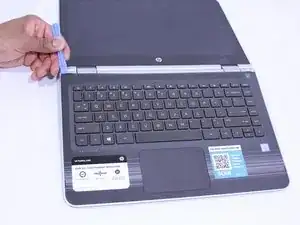
    • The keyboard is attached internally by clips. Use a small amount of force when removing the keyboard.

    • Use the Plastic Opening Tool to separate the keyboard from the base of the laptop.

  6. 6QdcixZ54hfSAaWW
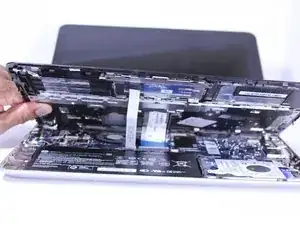
    • Raise the keyboard slightly to access the touch pad and keyboard cables.

    • Raising the keyboard too far or with excessive force may cause damage to the keyboard, touch pad cables, or their connectors.

  7. 1aDcZCZsqdBRT4Vf
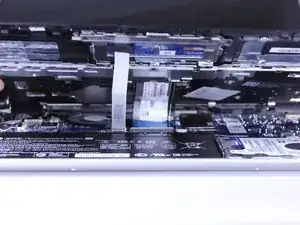
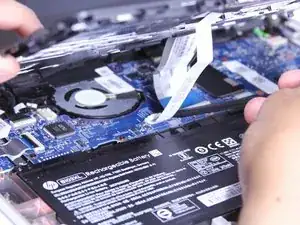
    • Disconnect the ribbon cables attaching the touch pad and keyboard to the system board (motherboard).

    • Using the Heavy-Duty Spudger lift up the plastic locks connecting the ribbon cable to the motherboard.

    • Use the blue plastic tab on the ribbon cable to pull it out from the lock on the motherboard.

  8. YOiNQ5J5dWZwvSgG
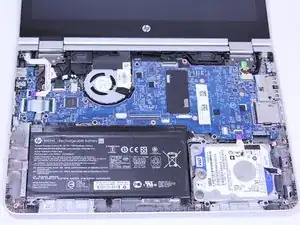
    • Lift the keyboard away from the base of the laptop.

  9. 2UAAkP1BlwGXK5Dx
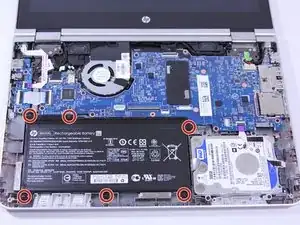
    • Using the Phillips 00 Screwdriver, remove 6 Phillips 2.0 x 4.6 mm screws from the perimeter of the battery.

    • Make special note of each screw and screw lock size and location during removal and replacement.

  10. xVkeRCgIawPWdweb
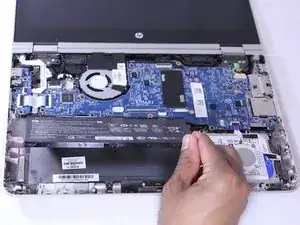
    • Carefully lift the battery up from lower right corner and disconnect it from the motherboard.

  11. 3WM6G1BjXIccMDpO
    3WM6G1BjXIccMDpO
    BFCTRFYngfvrPaGY
    viAFa6rduZOUbIhI
    • (You don't NEED to remove this shielding as you can remove the board with it still there.)

    • Remove the adhesive strip.

    • Lift the shield away from the base of the laptop.

    This step is not relevant or required...

    ETHREAL1 -

  12. iTfTRqfUs3LYPPvB
    iTfTRqfUs3LYPPvB
    yIXyYquYvTMmNyPV
    jBbYlaLfNx1k6NrE
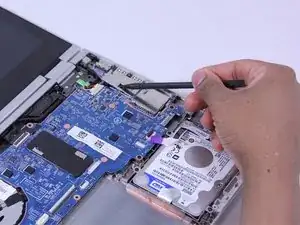
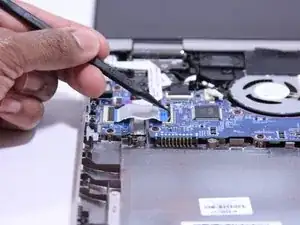
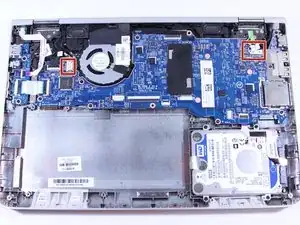
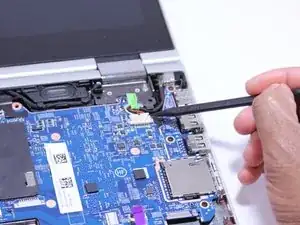
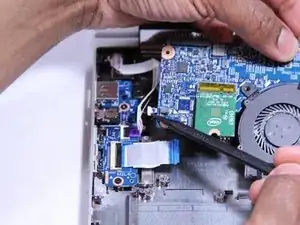
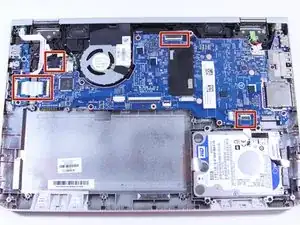
    • Disconnect the ribbon cables attached to the system board (motherboard).

    • Using the Heavy-Duty Spudger lift up the plastic locks connecting the ribbon cable to the motherboard.

    • Use the plastic tab on the ribbon cable to pull it out from the lock on the motherboard.

  13. kvOQypOvHviwWYrH
    kvOQypOvHviwWYrH
    b1dgMUV1RRp2ZJMv
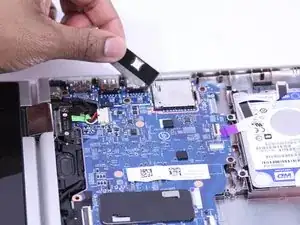
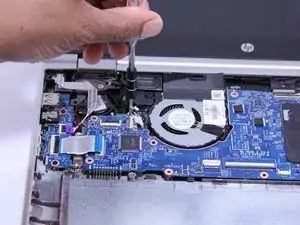
    • Disconnect the fastened cables from the system board (motherboard) by carefully pushing the cable's plastic edges using the Heavy Duty Spudger.

  14. tK1HM4BhZno2jPES
    tK1HM4BhZno2jPES
    JHvmABMUf52FXgN4
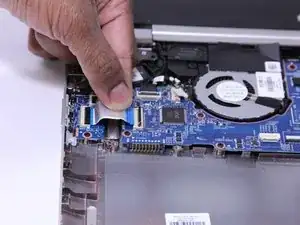
    • Pull the clipped cables from system board (motherboard).

  15. 3LJi2mDD36KjYRdU
    3LJi2mDD36KjYRdU
    cB1f5vLxqNAfkttD
    yN2amnwMeRZJfnsB
    • Remove the system board (motherboard).

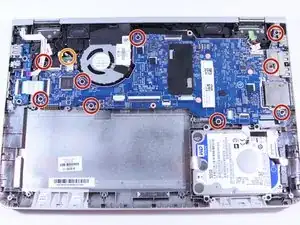
    • Using the Phillips 00 Screw Driver, remove 9 Phillips 2.0 x 4.7 mm screws with "M2L4" next to them.

    • Using the Phillips 00 Screw Driver, remove the silver screw.

    • Make special note of each screw and screw lock size and location during removal and replacement.

  16. 4PIALK3BctRndom6
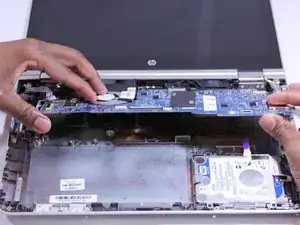
    • Carefully lift the front side of the system board (motherboard).

    this step i do not understand. because you do no have to remove the motherboard for a screen replacement.

    Akeem Scrubb -

    This is the procedure for replacing the FAN, not the screen, and the board absolutely must be removed to replace the fan.

    Dennis Fain -

  17. AbqvScdieaXeZquW
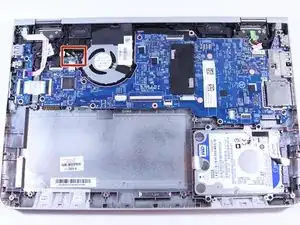
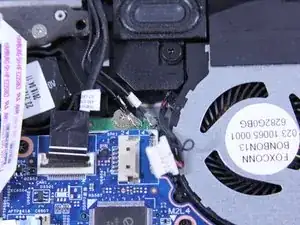
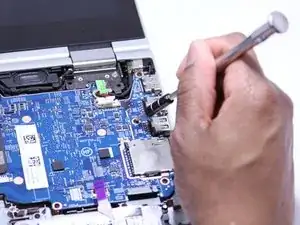
    • Using a Heavy Duty Spudger, disconnect the black and red RTC battery cable on the left side of the system board (motherboard).

  18. c6E3qrOexMtoSYjW
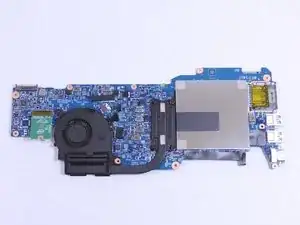
    • Release the system board (motherboard) from the base enclosure.

    • Place the motherboard somewhere safe since it is the most delicate and expensive part of the laptop.

Abschluss

Follow these instructions in reverse order to reassemble your device.
_ thinhh@uw.edu

Mitglied seit: 02/02/17

297 Reputation

0 Kommentare