Einleitung

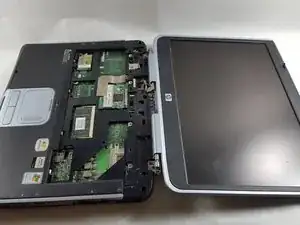
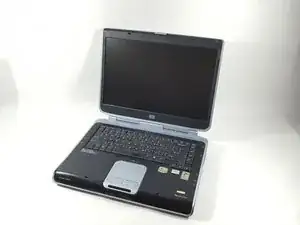
Are you having difficulty listening to media from your speakers? Do your headphones work but when you unplug them, no sound comes out? Have you already tried turning up the volume? If so, replacing the speakers may resolve these issues.

  1. iMc5GNeA1oLT2lJj
    • Make sure that your device is properly shut down and unplugged from any outlet.

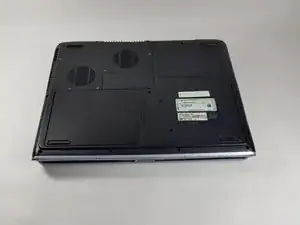
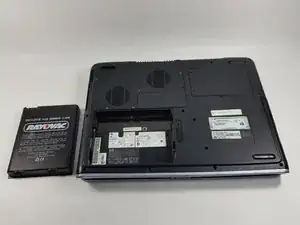
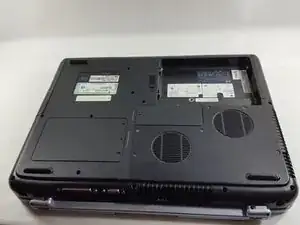
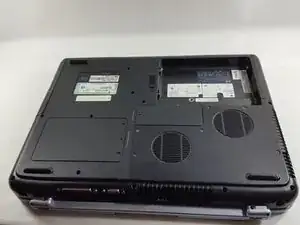
    • Flip Pavilion over so that the bottom faces up and locate the battery in the bottom left corner.

  2. M5uvopIeBfV4RErN
    M5uvopIeBfV4RErN
    vCLuRquEHrywPu3O
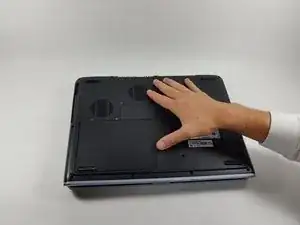
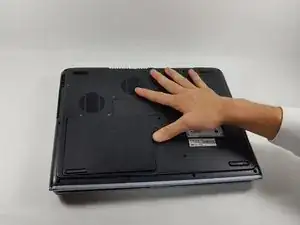
    • Press and slide up the battery release tab with your thumb until the battery pops out of place.

  3. 2COFmga31eB1ymOc
    2COFmga31eB1ymOc
    5cUV5WrIpVjlTkQJ
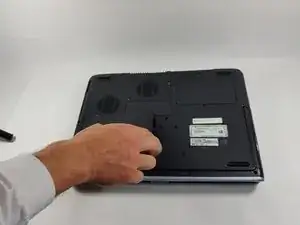
    • Using two fingers, pry the rest of the battery out of the socket.

  4. 4nAvMLgbmL35YMPM
    4nAvMLgbmL35YMPM
    SlAdZjI2ObTTBSAd
    • Make sure that the Pavilion is completely powered down and unplugged. Failure to do so may result in an electrical shock.

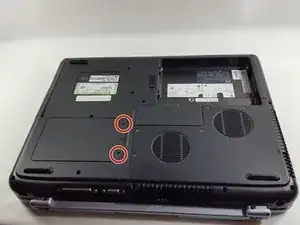
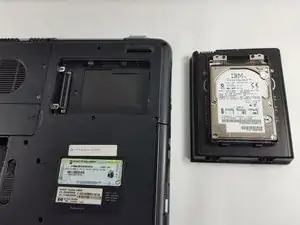
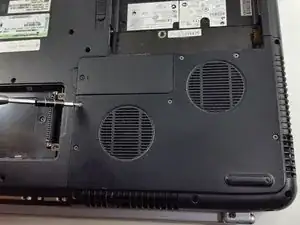
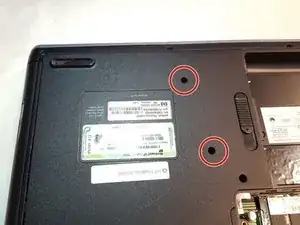
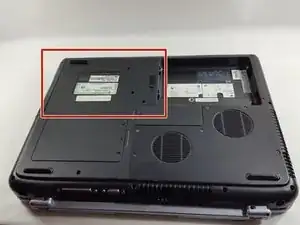
    • Using the Phillips #0 screwdriver, unscrew the two Phillips PM 2.5X6.0mm screws.

    • The two screws do not come out of the hard drive assembly, they simply disconnect the assembly from the laptop.

  5. iw6jNXMOTAAcoSWb
    iw6jNXMOTAAcoSWb
    4NpNKvAHbHVUssr5
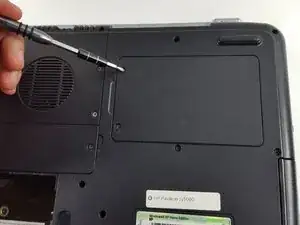
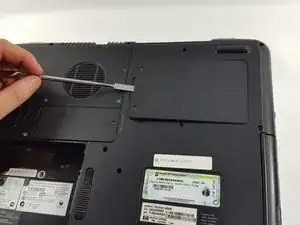
    • Place the spudger underneath the cover of the hard drive and push up gently until the hard drive pops out of place.

    • Completely remove the hard drive from its socket.

    • If the plastic spudger is not sturdy enough to pop the hard drive out of place, try carefully using the metal spudger.

    If you want to test the disk on another device like the BYTECC adapter kiy, you may have to remove the plastic adapter that covers the conector’s pins. Just pull it straight out and you wil get the normal pin config.

    Pierre B -

  6. t1jY4Zf2cuaJTJrn
    t1jY4Zf2cuaJTJrn
    2knpgir43B1gOhSH
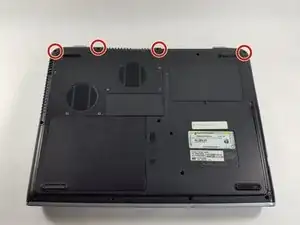
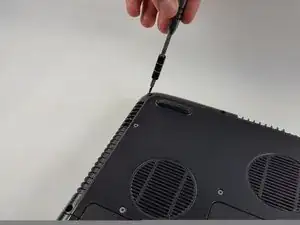
    • Using a Phillips #0 screwdriver, unscrew all four Phillips PM 2.5X13.0mm screws and place in a secure area until the end of the project.

  7. ODBuCNoaXNsUr5QQ
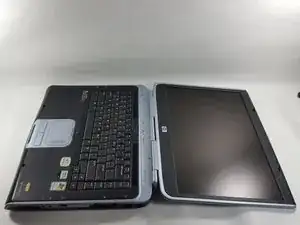
    • Flip laptop back over and open as far as it can go.

  8. 2VFt5jHatkNNq4HV
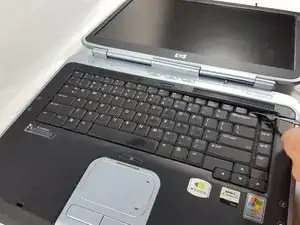
    • Use the flat edge of the plastic spudger inserted under the bottom of the strip cover and pry upwards to un-clip the cover, starting at the right and moving to the left.

    • If the plastic spudger is not doing the trick, try using the metal spudger careful to not pop any keys out.

  9. IxkYhLdDV5AJTp4g
    IxkYhLdDV5AJTp4g
    HVjVSy2WeAphiJ1c
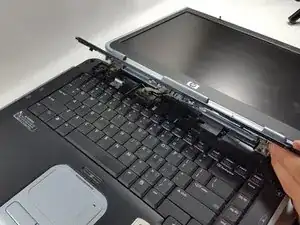
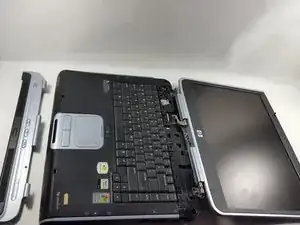
    • Use hands to completely lift off the strip cover and remove.

  10. 4RZAeNVPoHPQLgME
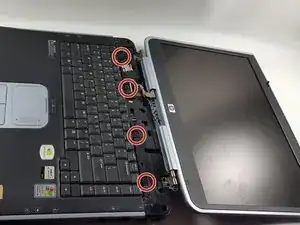
    • Use the Phillips #0 screwdriver again, unscrew all four Phillips PM 2.5X13.0mm screws from the top of the keyboard and set aside.

  11. pgoyQFuZiwPuGnTu
    pgoyQFuZiwPuGnTu
    3qAamKKFJGuDRXS5
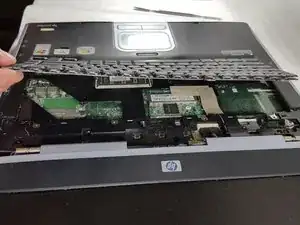
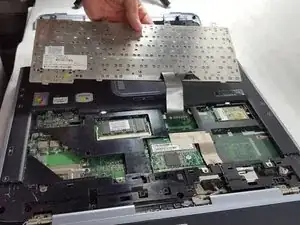
    • Using your hands, lift the keyboard up from the top towards yourself until the keyboard is resting in your hand.

    • Do not aggressively pull at the keyboard for risk of ripping the connector cable.

  12. pxGW16hKVMgwFHiI
    pxGW16hKVMgwFHiI
    ZsXWIQrybTZToGts
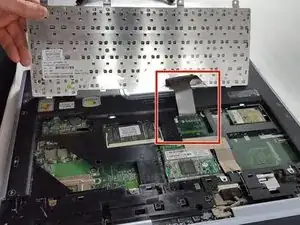
    • Gently slide out the connecting cable from the laptop to the keyboard.

    • Do not aggressively pull at the connecting cable.

  13. gFmJ3RQbTl116ZMg
    • Completely remove the keyboard from the rest of the laptop.

  14. KZWZrTCqAxVZTpxX
    • Flip the Pavilion back over on its backside.

  15. YyGeUZKT3lxtJTou
    YyGeUZKT3lxtJTou
    Y4tSKB6hbIYArESe
    4fiHd3CCB6VYbuUo
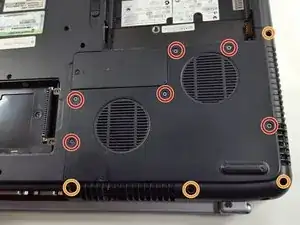
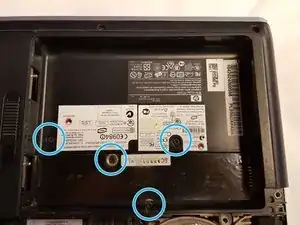
    • Using the same Phillips #0 screwdriver, unscrew the six Phillips PM 2.5X6.0mm screws.

    • Also remove the four Phillips PM 2.5X13.0mm screws to remove the thermal plate with the same screwdriver.

  16. iXSHb5DW3AxPg3eE
    iXSHb5DW3AxPg3eE
    6qpRVEQX6r4CmCOT
    • Flip the laptop back over and open the lid all the way.

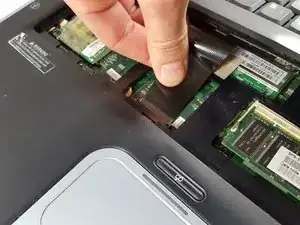
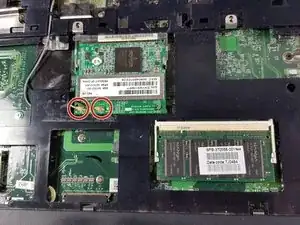
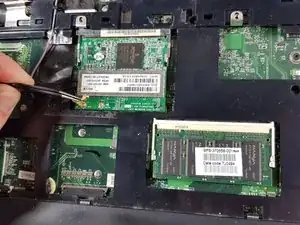
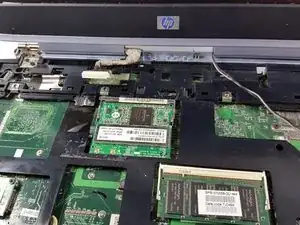
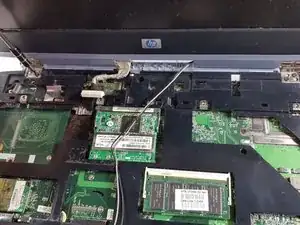
    • Using the flat edge of the plastic spudger, pry straight up to remove the Mini PCI Connector Cables from the board.

    • Tweezers can also be used to gently squeeze and pull up on the Mini PCI Cable Connectors to remove from the board.

    • When reinstalling, place the Mini PCI Connector Cables back in place and gently press straight down until they snap into place.

  17. cUGMZeIXUtaSwUPM
    cUGMZeIXUtaSwUPM
    AeYnD223MVrKNEx4
    PHUjivIAL2VZ1mGX
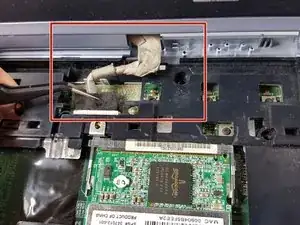
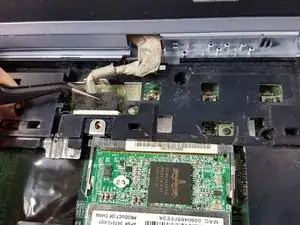
    • Using the tweezers, gently squeeze and pull backwards on the display cable until it is disconnected.

    • To reinsert, simply align the display cable to its proper spot and gently push into place.

  18. UfkqOruQN2rrtEGR
    UfkqOruQN2rrtEGR
    m4AyrbidghDdWrZr
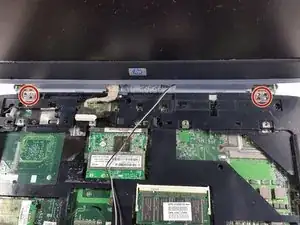
    • Use the Phillips #0 screwdriver again to remove the four Phillips 2.5X13.0mm screws that hold the clips for the screen into place.

  19. 4oDCHKlCkcx3XNBb
    4oDCHKlCkcx3XNBb
    NWsiLFbrRy1sGFkf
    • Turn the laptop around until the top cover is facing you. Keep the laptop in an open position.

    • Unscrew the four Phillips PM 2.5X6.0mm screws using the Phillips #0 that hold the clips of the screen on to the base.

  20. qXhMogWS5phZEJWX
    • Firmly grasp the top of the screen with your hands and pull towards you and upwards to remove the screen from the base.

  21. IQLxCpQV5vCNxBaB
    • Flip the back laptop over so the bottom of the laptop is facing up.

  22. ISg63lSdWBKf1PLJ
    ISg63lSdWBKf1PLJ
    wGX2jTkRCOPnSvhG
    • Unscrew the two Phillip PM 2.5X6.0mm screws in the top right that hold the optical cover in place using a Philips #0 screwdriver.

  23. KsE5GmJf4nPiKuIf
    KsE5GmJf4nPiKuIf
    GQJTYxPIMgYHyacF
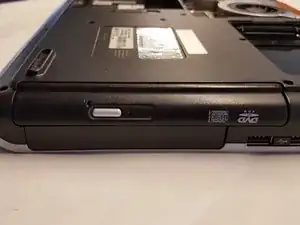
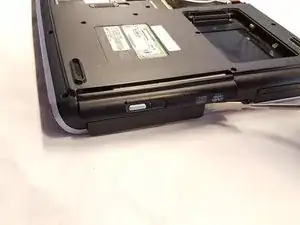
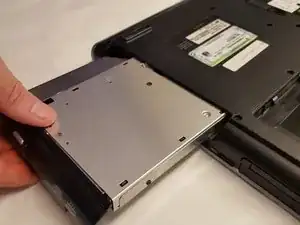
    • Use the plastic spudger and insert it into the side of the CD drive and push outwards to pop the drive out of place.

    • If the plastic spudger does not pop the CD drive out, try carefully using the metal spudger.

  24. xDL1JHFFcKYQ6Phq
    xDL1JHFFcKYQ6Phq
    ZxvrOxFZ62lMDoGd
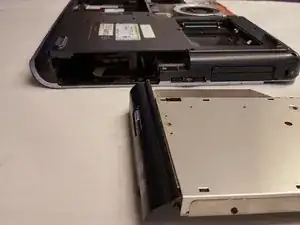
    • Using your hands, firmly grasp the CD drive and pull outwards until it is completely removed.

  25. DiqpbwrVETfBwE55
    DiqpbwrVETfBwE55
    IDnAgqU2RFHNP2Qj
    • After the CD Drive is removed, return to the back plate of the laptop.

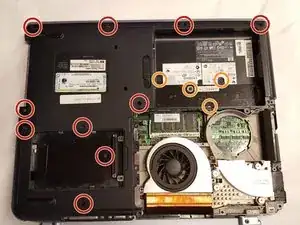
    • There are four Philip PM 2.5X6.0mm small screws.

    • There are ten Phillip PM 2.5X13.0mm long screws.

    • Using the same Philip's #0 screwdriver, remove all fourteen screws.

  26. daOa4dNpApHC3N1D
    daOa4dNpApHC3N1D
    PXaCyXnGanMABOgR
    IHFCrPNIoCpS3duK
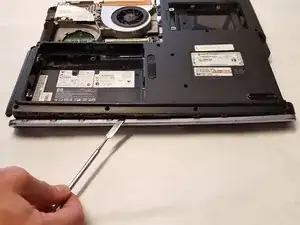
    • Insert the plastic spudger into the edge of the base plate and the side of the laptop directly above the battery space and gently pry the base plate loose from its clips moving from right to left.

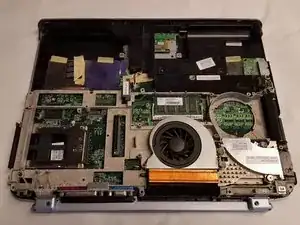
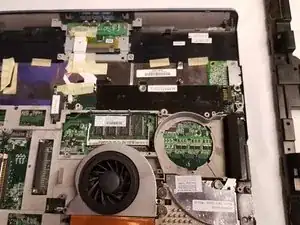
    • Once the clips are undone, lift the base plate up and off of the laptop.

    • If the plastic spudger is not sturdy enough to pop the clips out of place, carefully use the metal spudger.

  27. kcGysfEHjW2Pk4Vq
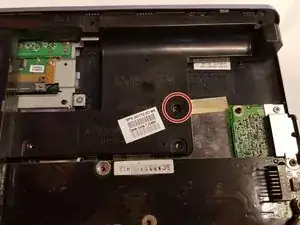
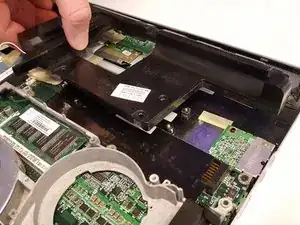
    • Unscrew the one Phillip 2.5X6.0mm screw using the #0 Phillips again holding the speaker into place but do not remove speaker

  28. M3BDJHN1whGvb65e
    M3BDJHN1whGvb65e
    UeevoT5liyhPmd4X
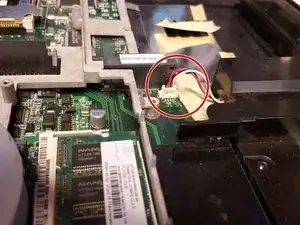
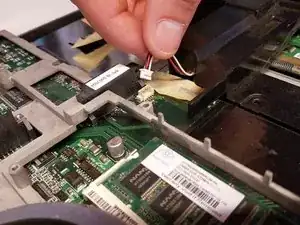
    • Using your fingers, firmly grasp the wires that connect the speaker to the board and gently pull the cable away from the connector in the same direction that the wires are running.

    • Apply even pulling force to all the wires so that no one wire is overly strained.

  29. rHunHaLtYILmYssO
    rHunHaLtYILmYssO
    PEGeGkttIIcLWwvk
    • Grasp speaker assembly firmly and pull towards you and up to remove the speaker completely from the laptop.

Abschluss

To reassemble your device, follow these instructions in reverse order.
Eliza Marks

Mitglied seit: 18/10/16

649 Reputation

0 Kommentare