
Einleitung
If your HP B210a has a clogged printhead, this guide can be used to try and clear the clog.
- IMPORTANT: This does not fix every printer. These steps will not work on failed hardware!
- Note: If the problem persists, it IS due to a hardware problem with the printhead in many cases. I am noticing more HW failures with these than I did at the time I published this guide where it was usually due to ink, so keep this in mind. Don't feel discouraged but it is beginning to happen more often. Time is not kind to entry-level printers, especially inkjets. This was originally published in 2010, hence the failure rate has increased now.
Guide Notes
- WARNING: THIS PROCEDURE MAY DAMAGE PRINTHEADS WITH EXISTING DEFECTS! Use caution if you suspect an HW issue that could be made worse and finish off the machine, or write it off before trying! I am noticing more and more attempts fail so it is likely many of these are now having a hardware issue with the printhead. If you keep having problems the printhead is likely bad.
- This guide is primarily made for the HP Photosmart Plus B210a and other REMOVABLE PRINTHEAD "564" printers.
- Non-removable printhead models (Ex: Photosmart 6520) require special attention to preserve the calibration. These may not survive a lost calibration if SETUP cartridges are required.
- If I have not tested your printer, I cannot guarantee the calibration preservation procedure will work.
- WARNING: IF YOU TAKE AN INTEGRATED HEAD PRINTER APART, YOU MUST KNOW HOW TO GO INTO THE SERVICE MODE AND BYPASS THE SETUP INK REQUIREMENT (trade ink disable) OR BE PREPARED TO THROW IT OUT! NOT ALL UNITS HAVE THIS!
Tested models for head setup bypass
- Photosmart C6380
- Photosmart Premium C309g
- Photosmart Plus B209a
- Photosmart Plus B210a
- Note: This procedure should work on MOST of these, but getting it wrong nukes the stored alignment (and you will need new ink). Pay close attention unless you can buy a set of ink if you miss it.
Ersatzteile
-
-
In addition to the parts listing, these items are highly recommended:
-
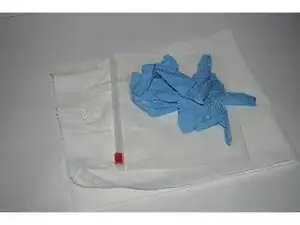
Ink protection: Plastic bag or ink caps
-
Strongly advised, not required if your ink is in good shape: Replacement ink for preparation process after cleaning (3rd party ink works, but very naggy), only use if your old ink gets burned out from the process.
-
Optional (Stubborn clogging): Gloves and 91% alcohol
-
-
-
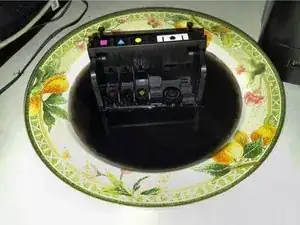
Before removing the printhead, hot water is needed. Remove the K-Cup holder and get a bowl of water.
-
-
-
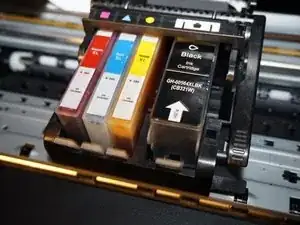
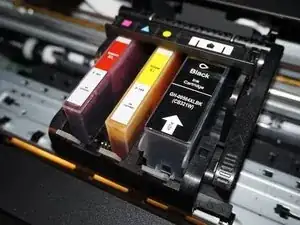
Remove the ink cartridges from the printer. Install the shipping caps or put them in a plastic bag.
-
-
-
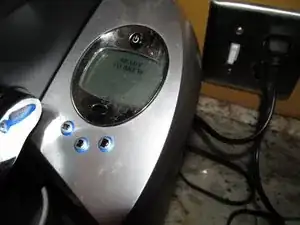
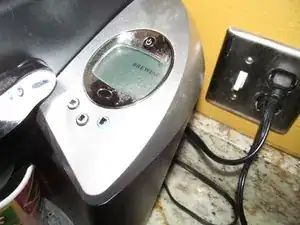
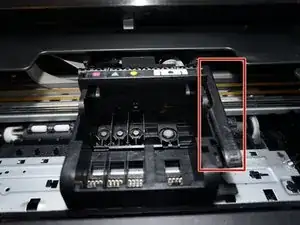
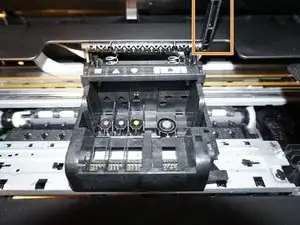
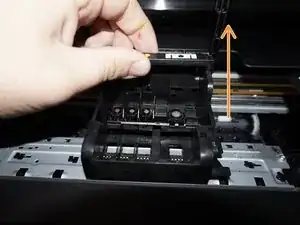
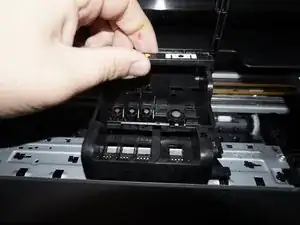
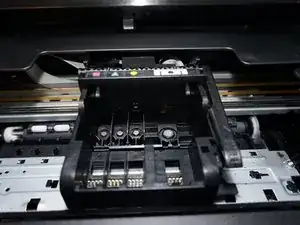
When the printer is unplugged, lift the lever up and remove the printhead.
-
Remove the printhead as shown. IMPORTANT: Leave the scanner lid open, or put a note near the printer.
-
-
-
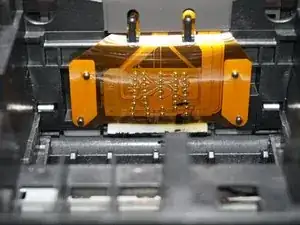
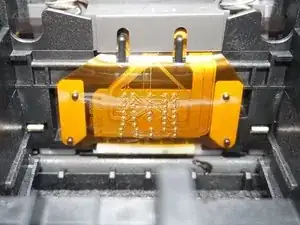
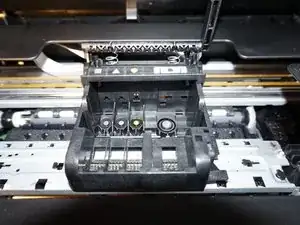
Using an alcohol wipe, clean the printhead interface to clear the Ink System Failure error.
-
-
-
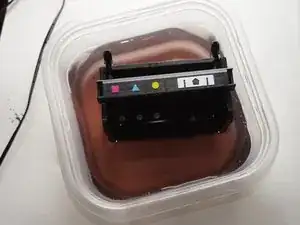
Put the printhead in hot water. Repeat until the printhead is reasonably clean. Change the cleaning water frequently.
-
Wipe the printhead contacts and nozzles by hand to ensure these areas are dry.
-
Before reinstalling the printhead, let it air dry for ~3-4 hours. Using a fan may speed this step up.
-
-
-
Once the printhead is satisfactorily dry, reinstall the printhed and ink in the printer. Plug the printer in.
-
-
-
After replacing the printhead, test the printer. Match the previous settings and check for improvement.
-


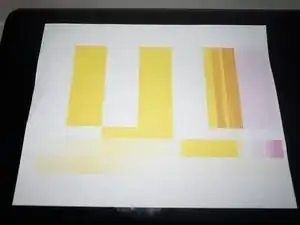
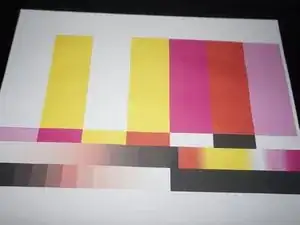
If your printer is working correctly, it was just a clog. Persistent issues usually total out the printer as a unit.
9 Kommentare
While/when soaking the printhead, I used a small intact artist's paint brush (no hairs falling out of it) to help loosen the globs of ink. I changed the water several times as there was a lot of ink.
Also, the first time I tried printing after soaking/cleaning the printhead (my issue was that the regular black cartridge showed it was NOT empty, but printing black documents wasn't working), I still had a blank page. Next I tried aligning the printhead but got a "failed," or similar, result. Next, I printed a "print quality report" from the printer's Tools menu and that seemed to be fine, so I tried printing the invoice I originally was having issues with, and voila, it worked!
Thanks.
Dave -
Thanks this worked and all is well again
The one things that I had to do: I put the machine back together when it looked dry and the machine would not work. It refused the print head and complained that the ink packets were used. I tired it about 4 times with the same results. So I set it all aside and let it dry out over night. Wha La it worked. I put it all back together, the machine did it's thing and suddenly everything worked perfect.
Thanks again for saving me from having to buy a new machine.
Barbara -
HI, I am glad to find your explanation. I have followed HP's instructions, which didn't include soaking the print head, but will try that, too. What I am having trouble with now is that the printer screen says that "the print head appears to be missing, not detected, or incorrectly installed". I've redone it 3 times with no change. Also, the HP instructions did not say to unplug it and leave the cover open, so I left it plugged in and put the cover down. Since the printer is not recognizing the head, I have no way of telling if the alignment settings are messed up or not. Do you have suggestions for getting the printhead to be recognized? Thanks a lot.