Einleitung

If the keyboard does not function when connected to the laptop display, or is operating in a faulty manner, then the docking port is defective. Use this guide to access, remove, and replace your docking port.

  1. ZSsYlOKyFgaQvaek
    • Carefully peel off the felt cover that is found beneath the display along the bottom of the device.

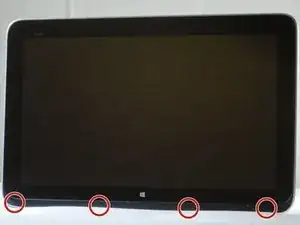
    • Use a spudger to gently scrape away the padding that hides the screws in each of the four locations.

    • Remove the four 4-mm Phillips #0 screws.

    • Run a spudger along the crease of the entire laptop and slowly pry off the back panel of the device, beginning with the bottom edge.

    • You will hear popping noises as the clips separate from each other.

  2. IQ4poYpkbFNLESy3
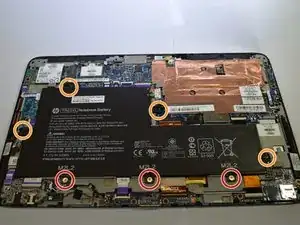
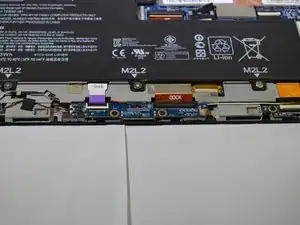
    • Remove the three 6-mm Phillips #0 screws.

    • Remove the four 4-mm Phillips #0 screws.

  3. ONUovffcBgKAhUSy
    ONUovffcBgKAhUSy
    xvYSU1lbYTJJnutg
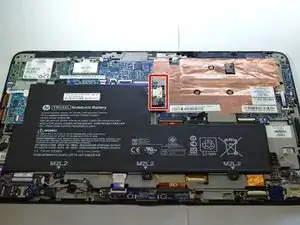
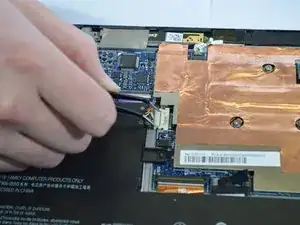
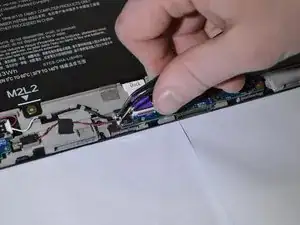
    • Remove the white connector clip from the connector port using a sturdy tweezers.

  4. iTeNU3cF1eogTkOP
    iTeNU3cF1eogTkOP
    SWwUmdi2EpIysAaD
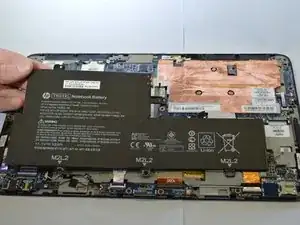
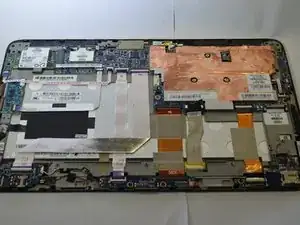
    • Lift the battery away from the device.

  5. P3lHGGgGsNmchZev
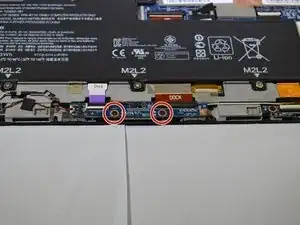
    • Remove the two 4-mm Phillips #0 screws.

  6. yZDePtUNNm26qEs3
    yZDePtUNNm26qEs3
    RkMLMsV5w5gP1FXR
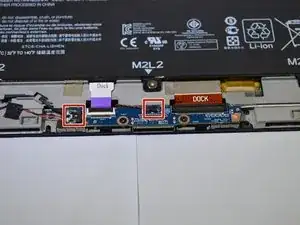
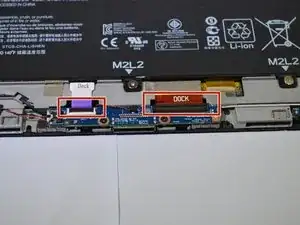
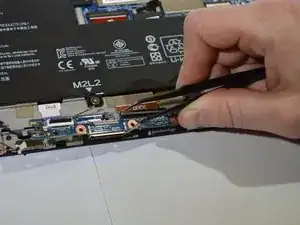
    • Remove the clips from the docking port board with a sturdy pair of tweezers.

  7. gXjT1TWPyowbFqxR
    gXjT1TWPyowbFqxR
    41hPkjIhtpeCgfLg
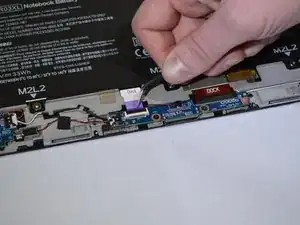
    • Remove the two ribbons labeled "Dock" at the top of the docking port board using tweezers or a sturdy plastic opening tool.

  8. WDKM3Eix43BEuFTB
    • Lift the docking port away from the device.

Abschluss

To reassemble your device, follow these instructions in reverse order.
Darian Devries

Mitglied seit: 26/02/19

495 Reputation

0 Kommentare