Einleitung

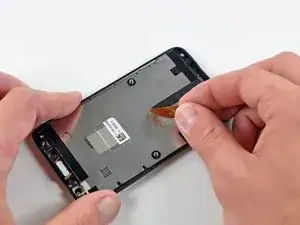
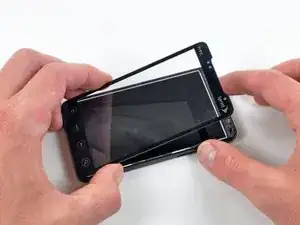
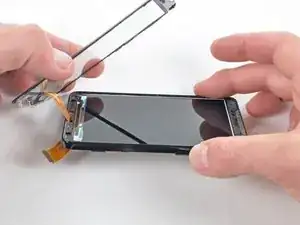
Remove the glass front panel to access your Evo's internals.

  1. RsTEHhpE4efGmQEq
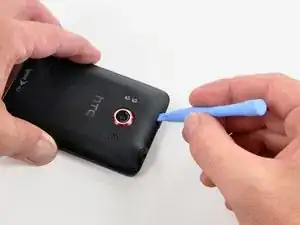
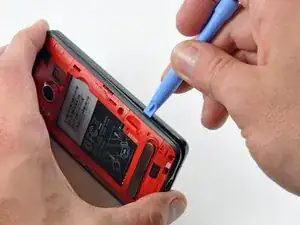
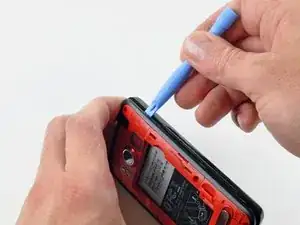
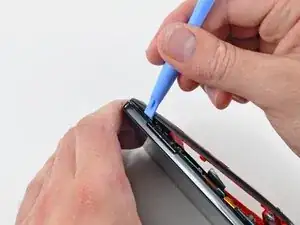
    • Gently insert an iPod opening tool between the rear panel and the inner rear frame near the headphone jack.

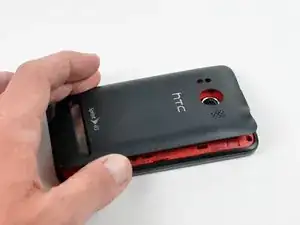
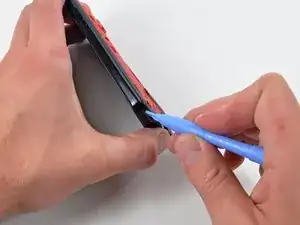
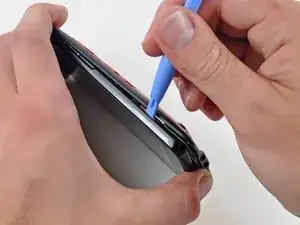
    • Use your iPod opening tool to pry up the rear case around the perimeter of the Evo.

  2. OPBB4BSI2y56BGwF
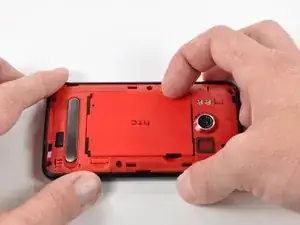
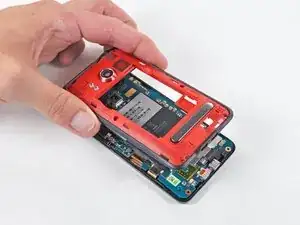
    • Lift the rear panel off of the inner rear frame.

  3. b66MPxLFnVWKYahN
    b66MPxLFnVWKYahN
    SdyIRykFCTBmGhWh
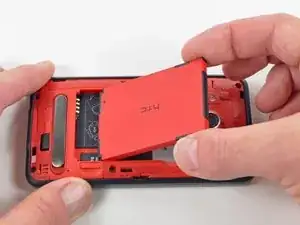
    • Using the tip of your finger, lift the battery from the end closest to the camera.

    • Remove the battery from the rear inner frame.

  4. EckYRLYLBQN6CWM5
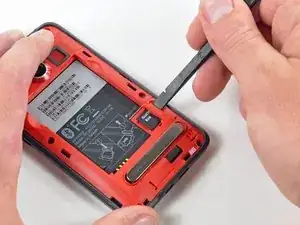
    • Use the flat end of a spudger to pry up the red MicroSD retainer attached to the inner frame.

    • The retainer will move about 1 mm and stop. Do not attempt to completely remove the MicroSD card retainer.

  5. k5TPuNNfWsJuqKOR
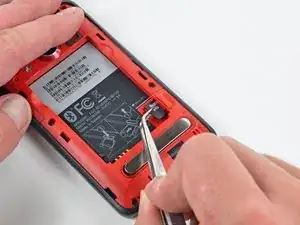
    • Use a pair of tweezers to carefully pull the MicroSD card out of its slot in the inner rear frame.

  6. jIcr6EMVCdWATySi
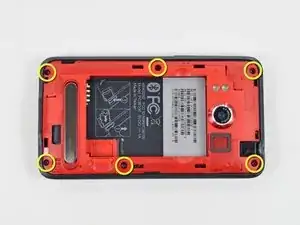
    • Remove six T5 Torx screws securing the rear inner frame to the inner case.

  7. qWTfOEDm1kiD2y4V
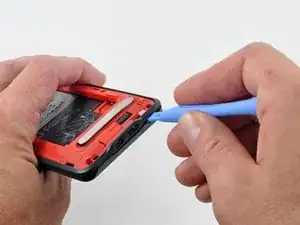
    • Gently insert an iPod opening tool between the rear inner frame and its plastic surround near the Micro HDMI port.

    • Carefully pry the top edge of the rear inner frame away from the front surround of the Evo.

  8. YyRxMwIB2KnXaGt1
    YyRxMwIB2KnXaGt1
    StpZRqfaknjKOKYN
    • Insert the iPod opening tool between the rear inner frame and its plastic surround and pry up at several points along the left edge of the Evo.

  9. CnmpxcQIlGOPpCm2
    CnmpxcQIlGOPpCm2
    cyZFk1V3vGL3I2DL
    xmsuSKroskqHURxJ
    • Continue the prying procedure, now focusing on detaching the plastic surround from the bottom of the Evo.

    • Pry up the rear inner frame along the right edge using the method described in previous steps.

    • Eventually work around the entire perimeter of the rear inner frame until it is lifted slightly from the inner case.

  10. 5WFTBBBydtHHsdRY
    • Remove the rear inner frame from the rest of the Evo.

  11. 2fVbcT4yfQxc6PsV
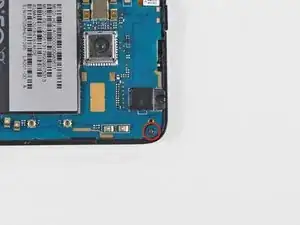
    • Remove the single Phillips screw securing the motherboard to the inner case near the headphone jack.

    Philips 000 Screw

    mike -

  12. mZpJhApieeHhJXQX
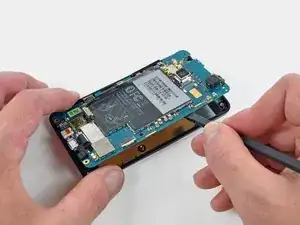
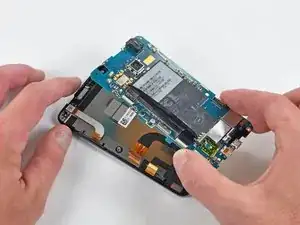
    • Use the flat end of a spudger to pry the motherboard off the posts securing it to the metal display tray.

    • Do not try to completely remove the motherboard just yet. It is still attached by three ribbon cables.

  13. GRkjt3VWvXJfgw5I
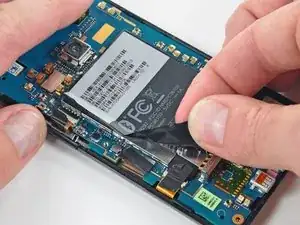
    • Carefully peel the device information sticker off the left edge of the motherboard and EMI shield to reveal three connectors covered with tape.

    • It is not necessary to peel the entire device information sticker off the EMI shield.

  14. ZYHLZwIIVhjilEpT
    • Fold the device information sticker up against the top of the motherboard to keep it out of the way while you work.

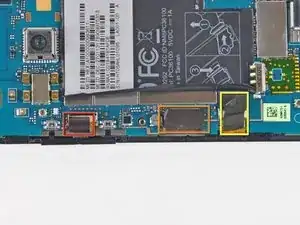
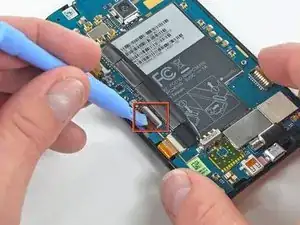
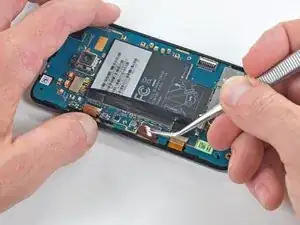
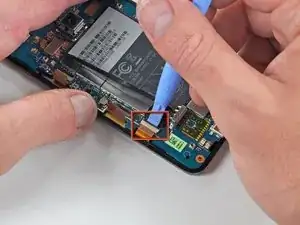
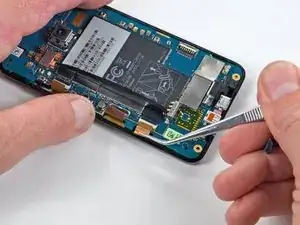
    • Remove the pieces of tape covering the following ribbon cables:

    • Front-facing camera

    • Front panel ribbon cable

    • Display ribbon cable

    I'm not sure why the dimensions I added to the display cable width were not approved for Step 14 (9/32" vs. 17/32"). Maybe I entered it in the wrong section? The reason I added it was because you cannot see the part number on the ribbon without removing the LCD, and I did not want to completely disassemble the phone at that time, rendering it completely inoperable before the part arrived.

    I continually ran across "advise" from customers on Amazon (and elsewhere on the interwebs) stating "make sure you buy the LCD with the right width cable". This information, while well meaning, is utterly useless, since none of the advice I came across had the actual dimensions. It should be included somewhere in the teardown manual.

    After some searching, I found the dimensions on the LCD product descriptions at www.repairsuniverse.com. I measured my own LCD ribbon, and can verify the 'wide' dimension is accurate:

    http://www.repairsuniverse.com/htc-evo-4...

    http://www.repairsuniverse.com/htc-evo-4...

    martymcgrail -

  15. ZPu36ALLZceNQgPb
    ZPu36ALLZceNQgPb
    UUw2kKcJE4eeZepT
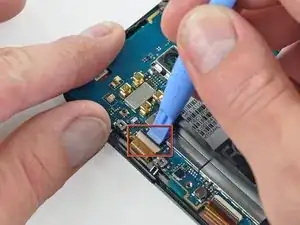
    • Using the tip of an iPod opening tool, flip up the front-facing camera ribbon cable retaining flap.

    • Be very careful and gentle with these flaps. They are very easy to break or dislodge and equally difficult to reinstall.

    • Use a pair of tweezers to pull the front-facing camera ribbon cable straight out of its socket.

  16. 5OJDtrhvqgqFVP4r
    5OJDtrhvqgqFVP4r
    XvsBRNTbe1JYOAQk
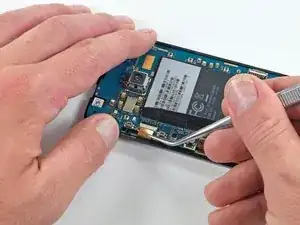
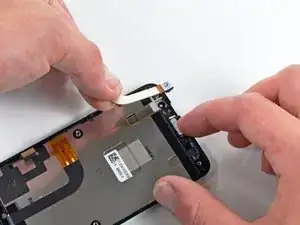
    • Using the tip of an iPod opening tool, flip up the front panel ribbon cable retaining flap.

    • Use a pair of tweezers to pull the front panel ribbon cable straight out of its socket.

  17. XxviEGOORLYgLiO3
    XxviEGOORLYgLiO3
    orZXuXtU5T5FCFMZ
    • Using the tip of an iPod opening tool, flip up the display ribbon cable retaining flap.

    • Grasp the display ribbon cable with a pair of tweezers and pull it straight out of its socket.

  18. cYXviBaC3VYYNGqR
    • Carefully lift the motherboard out of the inner case, minding any cables that may get caught.

    • Be mindful of the top power button and side rocker switch, which may fall out of the front case when the board is removed.

  19. 2AGCT6mULN1BWSi2
    • Gently lift the front-facing camera out of its recess in the inner case and remove it from the Evo.

  20. pUumEObZCgje6EFD
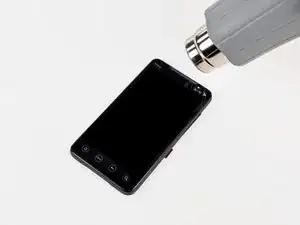
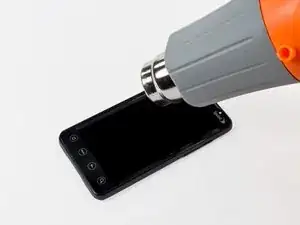
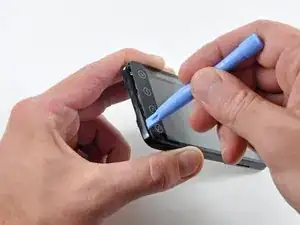
    • In the following steps, you will use a heat gun to soften the adhesive securing the outer black border around the underside of the front glass panel to the inner case.

    • With the heat gun set to low, start by heating the outer black border near the upper left corner of the glass panel.

    • Try not to excessively heat the outer plastic edge of the Evo.

    • Due to the heat applied, it is normal for a layer of condensation to develop on the inside of the glass panel and/or the outside of the LCD. It can be removed with glass cleaner once the glass is separated from the display.

  21. xwYkdUD6qKExf2Mm
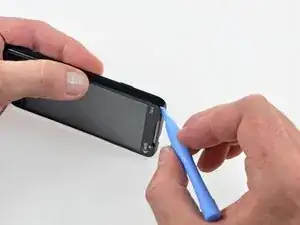
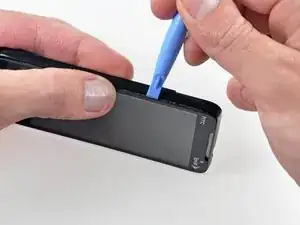
    • Gently insert an iPod opening tool between the glass front panel and its plastic surround near the upper top left corner of the Evo.

    • Carefully pry up the glass, being careful not to bend it excessively.

    • The key is to work slowly and gently to avoid breaking internal components.

  22. UdBZVrkTmTHpXtG4
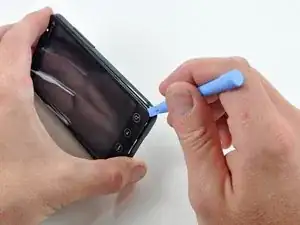
    • Use a heat gun to soften the adhesive along the left side of the front glass panel.

    I was able to achieve the necessary heat by using a heating pad set on high(Evo wrapped inside)

    Jermaine -

  23. iRvP3LkemxVsy1Cr
    iRvP3LkemxVsy1Cr
    xXDkSanOggRG4bXE
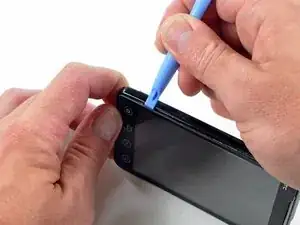
    • Insert the iPod opening tool between the front panel and its plastic surround and pry up at several points along the left edge of the Evo.

  24. JOQDHroL3MMWuHcL
    JOQDHroL3MMWuHcL
    yPOUBuvpR6F2T6OG
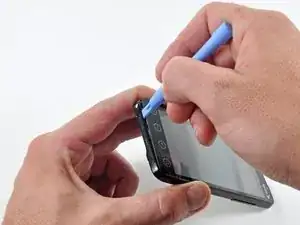
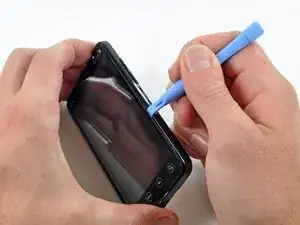
    • Continue the heating and prying procedure, now focusing on detaching the bottom of the front panel from the plastic surround.

    • Pry along the bottom edge of the Evo to further separate the front panel from the rest of the device.

  25. OfWSNF2LMejerQPX
    • Use a heat gun to soften the adhesive along the right side of the front glass panel.

  26. ilUFQ1iRCopJL2yO
    ilUFQ1iRCopJL2yO
    EoXbNbpVLK2MvGs5
    GY3msWoioogWYMvI
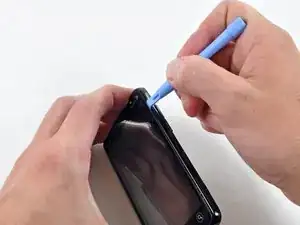
    • Pry up the front panel along the right edge using the method described in previous steps.

    • Eventually work around the entire perimeter of the front panel until it is lifted slightly from the inner case.

    • Don't try to completely remove the front panel just yet. Its ribbon cable is still attached to the inner case.

    Instead of separating the front-panel glass, I managed to de-laminate the LCD display: the LCD layer, the polarizer, and the backlight (diffuser).

    Oops.

    I didn't have a heat gun or hair dryer, so I used a sock filled with dry, uncooked rice heated in a microwave oven for a few minutes. That did soften the adhesive, but may it didn't get hot enough?

    Otherwise, I had no trouble at all thanks to this great guide! Seriously thanks.

    (Full display assemblies can be had on eBay for same price as the bare LCD, so no worries there. I love taking things apart.)

    Boyd Waters -

  27. VXmcXDEvxOPM1RZR
    • Peel the front panel ribbon cable off the adhesive securing it to the metal underside of the inner case.

  28. TRNNnENQ4pdqxdbM
    TRNNnENQ4pdqxdbM
    DahkovZ6sJMvIuwQ
    • Lift the front panel out of the inner case, minding the cable still routed through the bottom of the Evo.

    • Carefully de-route the front panel ribbon cable through the slot in the inner case.

    • Remove the front panel.

    • Notice the four (4) clear plastic hooks that are adhered behind the menu buttons. Look closely. Each one is shaped differently and in a particular orientation.

    • If the replacement front panel does not have these installed already, carefully remove and transfer them from the old panel to the replacement.

Abschluss

To reassemble your device, follow these instructions in reverse order.
Walter Galan

685540 Reputation

0 Kommentare