Einleitung

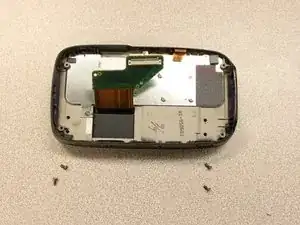
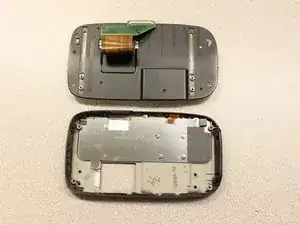
This guide will explain how to remove and install the keyboard slider on the HTC Wizard 200.

The keyboard slider slides out from the right side of the phone to reveal a QWERTY keyboard. The main use of the keyboard is for texting, as well as all typing on the phone.

The keys should type out the correct letter when typing and not repeat letters when pressed once. The slider should smoothly move in and out of the body without catching or sticking. If these symptoms are present, then the keyboard slider needs repairing.

  1. GauhfFXWK5KLTSlL
    GauhfFXWK5KLTSlL
    XlCuwUISUsa1O5Zr
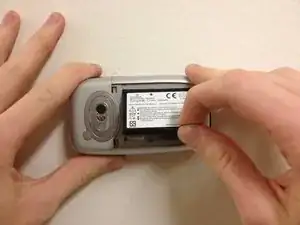
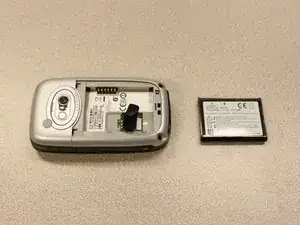
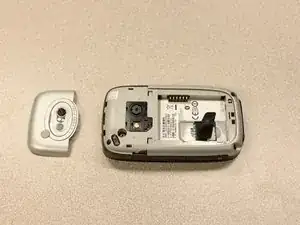
    • To expose the battery, remove the outer case with your fingernail.

    • Remove the battery by pulling the black tab.

  2. sE6E1ZyBsijxyq4O
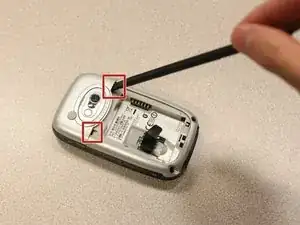
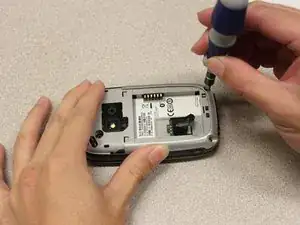
    • Insert the flat end of the spudger into the two notches on the back of the camera cover and pry them up.

  3. wHVMY2W3FtFEwncD
    wHVMY2W3FtFEwncD
    jdMSwEVjx5veEjJI
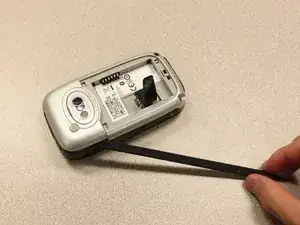
    • Work the spudger around the edges of the camera cover until it comes off.

  4. lkLZ2NdABKFtUKAu
    lkLZ2NdABKFtUKAu
    HWNjOJZFQSZyhJB1
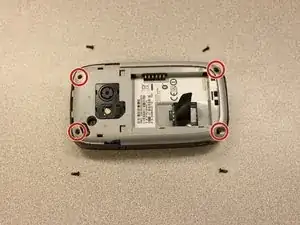
    • Remove the four 6 mm screws with the T5 Torx screwdriver.

    • One of the screws is under the "void" sticker.

  5. jqbOZTMNGN5QgHCy
    jqbOZTMNGN5QgHCy
    O1wgPM3aLFwUMlZP
    1peypbbeZ3352Lti
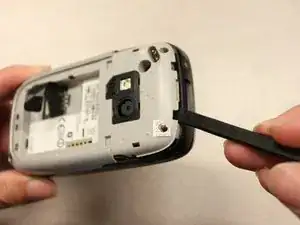
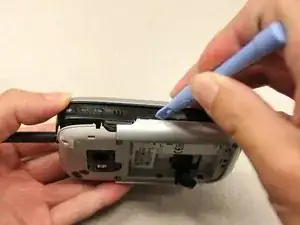
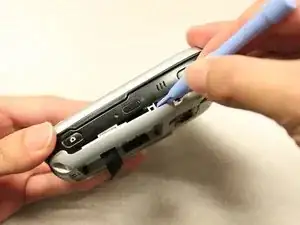
    • Insert the flat end of an iFixit opening tool between the side and inner covers to create a gap.

    • Work the tool around the edges until all the clips release.

  6. QHJ25swWJOBHtsiA
    QHJ25swWJOBHtsiA
    PsoD3MvrNHNmeAQE
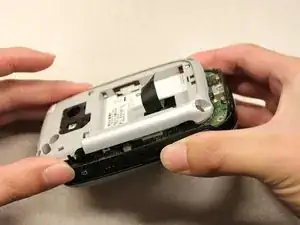
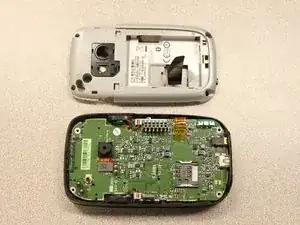
    • Once all the clips are open, remove the inner panel from the phone.

  7. CPWWwg5g3BQDVYQw
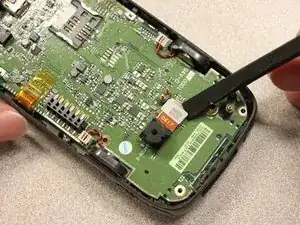
    • Use the spudger to pry the camera off.

  8. ATltjHt6ERinFZGN
    ATltjHt6ERinFZGN
    siHOCqb3uOtayxhm
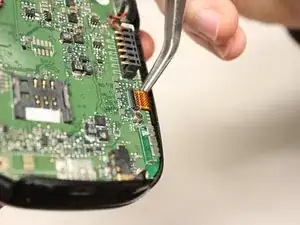
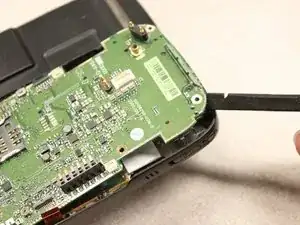
    • Using tweezers, flip the connector latch away from the motherboard.

    • Detach the flexible connection from under the connector latch.

  9. 2DPu1syJMtul5XPp
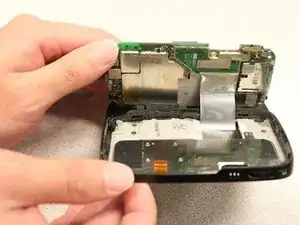
    • Slide the keyboard into the open position.

  10. CPoCVF62p2SDORVE
    CPoCVF62p2SDORVE
    QTyyTWXmEYPhNLrR
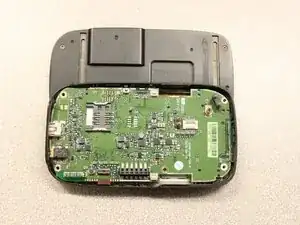
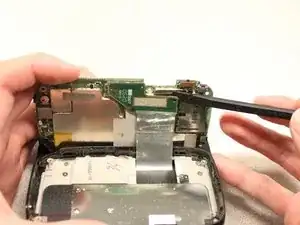
    • Lift the motherboard out of the case using the spudger.

    • Expose the underside of the motherboard using your hands.

  11. jSGXQBrfGaGhASWC
    jSGXQBrfGaGhASWC
    vQh2oJydx1VTtLSX
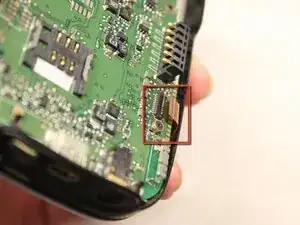
    • Remove the flexible connection from the motherboard.

    • Caution: Removing the connection too fast may cause damage to the connection and cables.

  12. eRQnmHP1hNgugWqX
    eRQnmHP1hNgugWqX
    3FpxbDPDlOlaMPdO
    uBRUDGQp2XH3hZrF
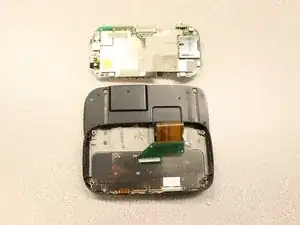
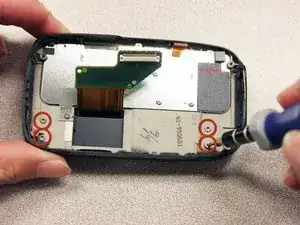
    • Remove the four 5mm screws with the T5 Torx screwdriver.

    • Remove the keyboard slider from the main body.

Abschluss

To reassemble your device, follow these instructions in reverse order.
Kyle Champ

Mitglied seit: 03/10/11

225 Reputation

0 Kommentare