Einleitung
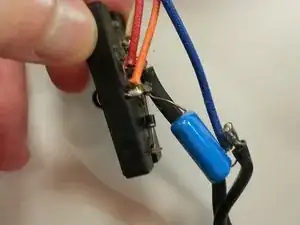
Is your hairdryer not producing the right amount of heat as it used to? This guide will show you step-by-step how to carefully replace its switchboard from an old to a new.
Before you start, please turn the hairdryer off and unplug it prior to this repair and get the following tools: a Philips #1 Screwdriver and a plastic opening tool to remove parts of the hairdryer as seen in Steps 2, 5, and 6. Have a Soldering Workstation at the ready as well.
Pay Close Attention To:
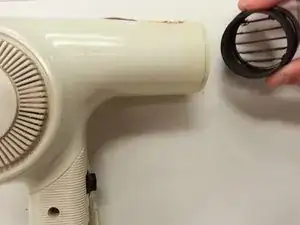
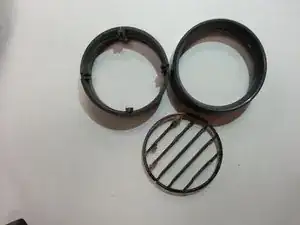
Step 2: Removing the grate will allow you to proceed to step 5 and 6, which leads to 7. If you don't, you won't be able to open the hairdryer properly.
Step 6: Utilize a plastic opening tool at step 6 to reduce the risk of cracking or damaging the hairdryer cover.
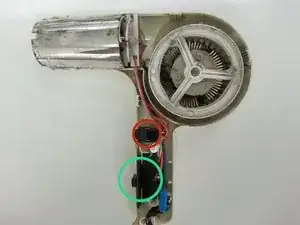
Step 7: In the photo, you can see a red circle around where the TURBO button is and a green around the SWITCHBOARD. Next to that, you'll see a circular device above a red wire - that is the internal fan that controls the heating system. In front of the fan is the motor and a heating element cover. Please be careful around these parts. If you need extra guidance or support going forward, ask a professional.
Step 8 & 9: Use the desoldering wick and a soldering iron as found in the Soldering Kit to fix the switchboard and, possibly, the turbo button. This step must be done with caution given the wiring and the process of desoldering and soldering to establish electric flow in the device.
Werkzeuge
-
-
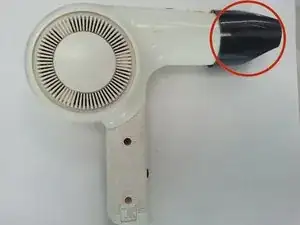
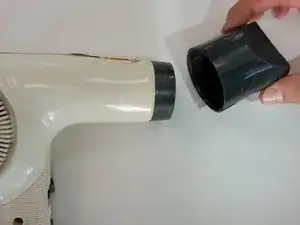
Remove the black air concentrating nozzle (shown in the red circle) by gently twisting and pulling the nozzle.
-
-
-
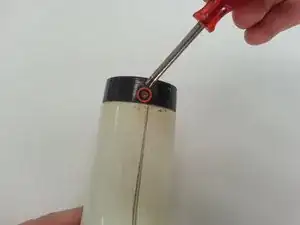
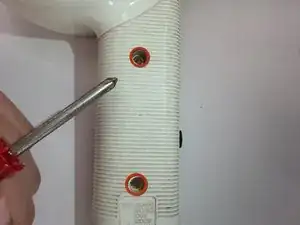
Using a screwdriver, remove the screw located underneath the air concentrating nozzle. This screw attaches the hair dryer body to the hair dryer grating.
-
-
-
Detach the hair dryer grating from the body by gently twisting the grating from side to side.
-
-
-
The hairdryer is now disassembled. The fan, motor, heating element cover, and internal wiring are exposed.
-
This is the TURBO button.
-
This is the SWITCHBOARD button.
-
-
-
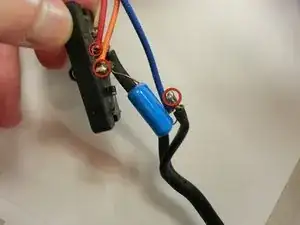
Using a desoldering wick and a soldering iron, desolder the wires (shown in the red circles). This will help with the electrical connection issues that may be occurring.
-
To reassemble your device, follow these instructions in reverse order.
Ein Kommentar
I have a hairdryer with loose wire. Can you help me to find where the wire should be welded?
