Einleitung
If your Hamilton G5 Ventilator has battery warnings, use these steps to replace either the internal or extended battery. The internal battery is 12V/120W, while the extended battery is 11-14V/95W. Before replacing a battery, it is important to run checks to ensure they do need to be replaced. Be cautious, as there is a large amount of power in them and there are many small parts involved. Before starting, make sure the ventilator is powered off and unplugged. To replace the battery, you will need an Allen Wrench.
For more information about replacing the battery, please refer to section 10 in the service manual.
Werkzeuge
-
-
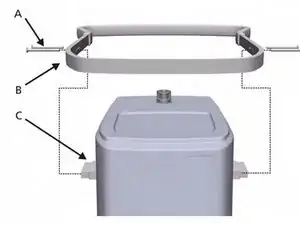
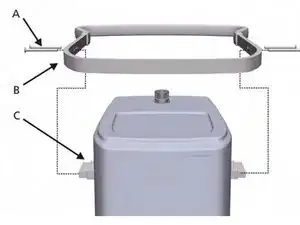
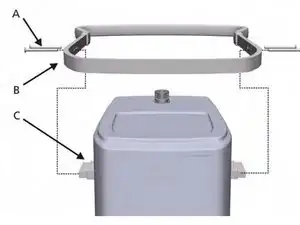
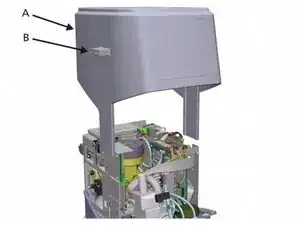
Lift the Main Cover (A) from the Ventilation Unit using the Standoff Brackets (B) attached to the Main Cover.
-
-
-
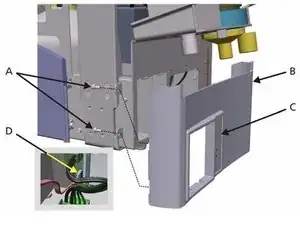
Unscrew the 4 Hex Allen M4x8 screws (A), 2 on each side of the cover.
-
Lower the Front Cover (B) to remove it.
-
Disconnect the Alarm Status Display Connector (D) and set aside.
-
-
-
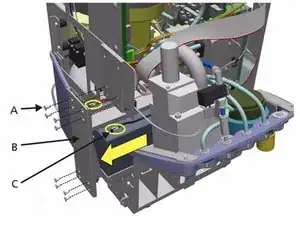
Remove the 8 Hex Allen screws M4x8 (A) located on the side of the ventilator.
-
Locate internal battery (B) and slide it out.
-
Disconnect battery cable (C) and fully remove battery assembly.
-
-
-
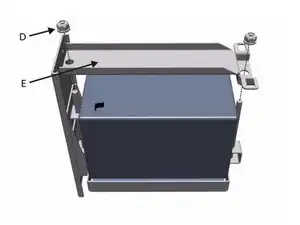
Remove 2 Hex Nuts, Washers, (D) and Cross Bar (E) from assembly.
-
Slide internal battery out from battery assembly.
-
-
-
Extended Battery
-
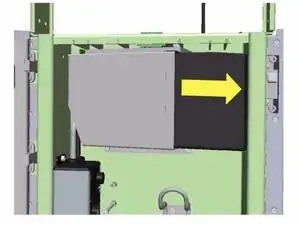
Depress battery latch on right side (follow yellow arrow in image).
-
Slide the battery out of bracket to remove.
-
To reassemble your device, follow these instructions in reverse order.
