Einleitung

Replace your dirty or broken dust cup filter with these easy steps!

  1. DcGBnHoYMMlFU3JZ
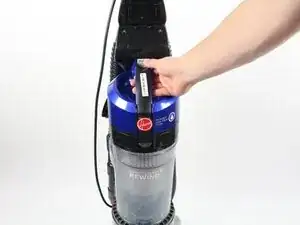
    • Press button on the top of the dust cup and pull back.

    • Remove dust cup from vacuum

  2. UMeMVUhZQXC6PbZe
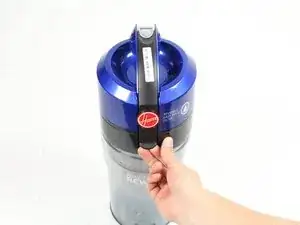
    • Pull back on black lever and rotate dust cup lid back.

  3. dEBNrfR2HIvnbrPH
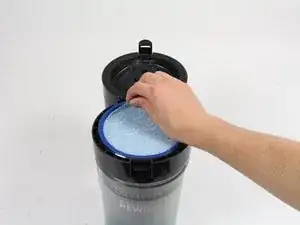
    • Lift up on fabric flap to remove filter from vaccum

    • If you wish to clean the filter rather than replace it, it can be washed under a faucet.

    • If washing the filter, make sure it fully dries out before re-installing.

  4. QmUWJsOhUxO3wnL5
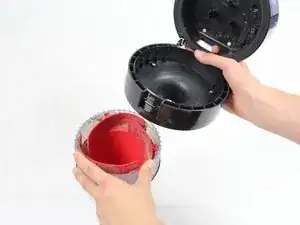
    • Holding onto both the top handle and dust cup body, twist the two components apart following the instructions printed on the back.

  5. 6m1W4SwvmZsNCVLr
    6m1W4SwvmZsNCVLr
    1bgWyvOIEehTThEX
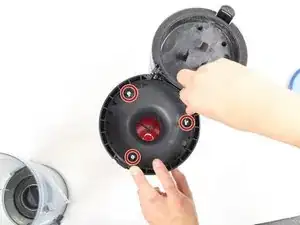
    • Unscrew the three 4 cm Phillips #3 screws located inside the dust filter compartment to detach the dust filter system.

    The cyclonic dust filter is made up of two parts:

    - The clear outer cone with holes

    - The red inner part with the “cyclonic fins”

    Hoover says if this part becomes clogged, to only brush it out and not wash it. If it gets really clogged Hoover suggests replacing the cyclonic with a new part. That’s really unnecessary. The cyclonic unit can be disassembled.

    Different models vary so this is for the Windtunnel 2 specifically.

    Sheldon Carpenter -

    Part 2: Disassembly of the cyclonic unit

    1) An attached clear tube extends about 4 inches from the bottom of the cyclonic unit cone. It has a black gasket on the end where it inserts into the bottom of the “dirt cup” canister.

    2) Where the tube joins the cone of the clear, outer cyclonic piece there is a clear, circular collar that surrounds the tube. If you grip the collar it should rotate in place.

    3) If you look closely, you can see three black screws that join the extension tube to the cyclonic assembly. They are blocked by the collar.

    4) Placing the cyclonic unit on a table with the extension tube on the surface, gently bump the collar with both hands downward. It should unsnap from the bottom of the cyclonic unit allowing you to slide it off the extension tube.

    5) Unscrew the 3 screws that hold the unit together. The extension tube will detach and the red cyclonic fins part will slide out of the clear part.

    6) Wash in hot, soapy water, using a plastic brush to clean.

    Sheldon Carpenter -

    Part 3: Reassembly

    1) Reassemble the cyclonic unit the same way you disassembled it.

    2) Insert the red cyclone fins into the clear cone. Rotate it until it slides into position

    3) Place the cone on a table with the small end up and attach the extension tube with the three screws

    4) Orient the collar with the concave side up. Press down on it with your palm until it snaps back into position. You may have to gently bump it to get it to seat.

    That’s it! You now have a nicely clean, fully-functional cyclonic unit ready to go. Insert it back into the canister, attach it with the screws as shown in Step 5 and your vacuum should function like new.

    Sheldon Carpenter -

Abschluss

To reassemble your device, follow these instructions in reverse order.
Chino Cruz

Mitglied seit: 23/01/18

135 Reputation

0 Kommentare