Einleitung
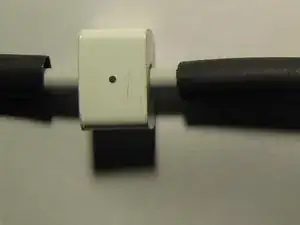
Magsafe cables are known to break off close to the connector. This article explains how to dismantle the magsafe and re-connect the cable to it.
Werkzeuge
-
-
Open the jaws of the vice so the metal shell of the magsafe just fits between them. Place the magsafe between the jaws with the cable upwards and the white plastic housing resting on the jaws.
-
Cut off the cable as close to the housing as possible.
-
Use a cross-head screwdriver to force the metal section of the magsafe out of the plastic housing
-
Gently prise apart the strain relief metal band around the remains of the cable and put it aside for later.
-
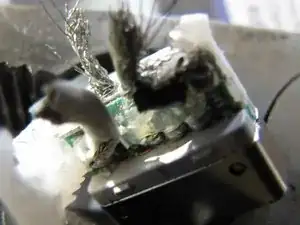
Cut down one side of the soft plastic inner and peel it away from the wires and circuit board. You are very unlikely to be able to re-use it so don't worry if it tears.
-
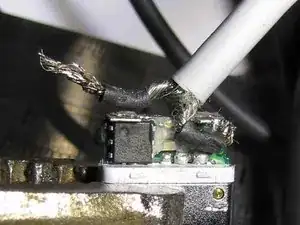
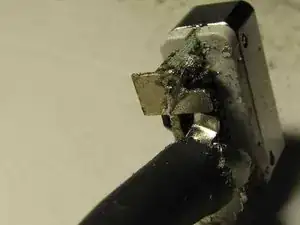
The image shows roughly what you should now have. The braid is soldered to two places (one on each site of the circuit board at opposite ends - middle and right in the picture); the white core is soldered in just one (left in the picture).
-
-
-
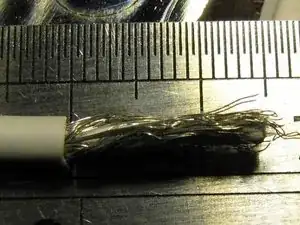
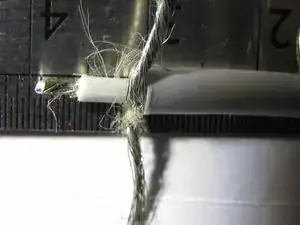
Cut back 15mm of sleeve from the cable.
-
Peel back the braid
-
Tease out the fibres that are contained within the braid
-
Split the braid in to two equal parts and twist together.
-
-
-
You will probably want three strips of heatshrink. They will need to fit over each other shrunk in place so likely need to be different sizes.
-
Cut the smallest diameter sleeve to 2cm long. Once shrunk into place the white plastic outer will need to fit over this. You might wish to check that this will work, as otherwise you will need to enlarge the hole in the housing (now, not later!).
-
Cut the others a little longer each e.g. 2.5cm and 3cm.
-
Slide the largest diameter heatshrink over the cable.
-
Slide on the next largest size
-
Push the remains of the strain relief out of the white plastic outer housing. Now slide on the plastic outer part of the magsafe connector. Make sure that you get it the right way round!
-
Finally, slide on the smallest piece of heatshrink.
-
-
-
Peel back the braid
-
Tease out the fibres that are contained within the braid and then cut them off as close to the cable as possible.
-
Split the braid in to two equal parts. Twist each part separately to make two neat wires.
-
Strip back 3mm of insulation from the inner core. Twist the core by hand and then tin the end.
-
-
-
Solder the core on to the opposite side to the chip (in the opposite corner).
-
Cut two pieces of the smallest heatshrink - roughly 4mm long.
-
Slide on to the braid leaving roughly 3mm of braid free at the end where it joins the cable.
-
Shrink in to place. If your heat gun is a bit powerful, use the soldering iron to supply the heat.
-
Cut off the braids leaving about 3mm free beyond the heatshrink.
-
Solder the first braid on to the chip side in the opposite corner to the chip.
-
-
-
Make sure that the cable comes off the centre of the circuit board so the housing will fit over it.
-
Also check that there is about 3mm of stripped cable on top of the circuit board as the strain relief has to fit here (see next photo)
-
Solder the other braid on the other side, in the opposite corner to the core. Try not to extend beyond the edge of the circuit board
-
Carefully file off any solder or cable that extends beyond the end of the circuit board.
-
-
-
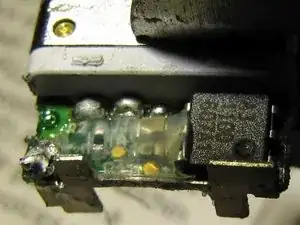
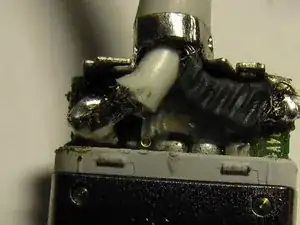
Reattach the strain relief. It needs to fit under the two lugs on the circuit board above the solder points for the braid and core.
-
This is just visible on the left hand side of the core in the picture. The right hand tab is a bit short of the tab on the right because I didn't get the cable decently centred!
-
-
-
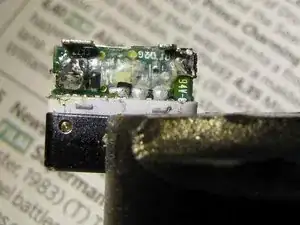
Slide down the first bit of heatshrink and shrink down.
-
(You can see the right hand side of the strain relief is short of the tab in this picture.
-
I have since found (and others too) that the heatshrink doesn't stay in place that well and so is not so great as strain relief. More in step 10.
-
-
-
Slide the housing back over the magsafe connector. It goes on either way round (there is a hole for the led on both sides.
-
Squeeze in place with the pliers. If it doesn't fit over the circuit board fairly easily, check that you don't need to file down the solder joints some more.
-
Slide the first of the pieces of heatsink up against the plastic housing.
-
Keeping it tight, shrink it in place. This is important to help avoid a future failure.
-
Repeat with the outermost piece of heatshrink.
-
Try powering it up! Remember that it will take a few seconds before the LED illuminates.
-
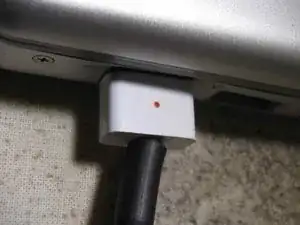
Orange light - success!
-
Abrading the top of the casing and applying a big blob of hot-melt glue seemed to provide more permanent, if less elegant, strain relief!
-
To reassemble your device, follow these instructions in reverse order.
24 Kommentare
This is great! Very useful, and nice zoomed in photos. Thanks for putting it up!
Zitat von Kyle Wiens:
This is great! Very useful, and nice zoomed in photos. Thanks for putting it up!
Thanks. I think that the strain relief needs more work though as it is still not standing up well enough to my daughter working on her lap! I have some ideas but need to try them out.
Hi Dave
My MagSafe is broken inside the wires, close to the power supply.
Do you have any tips on how to open the power supply?
Is it glued together in the white plastic?
(60W for MacBook white)
thanks Hans Henrik
I do believe they are glued. Opening the cable management tabs (not sure what they're actually called) we'll give you access and room to attempt to pretty it apart. There are videos on YouTube, and most likely a tutorial here on iFixit.
