Einleitung

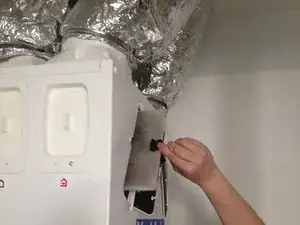
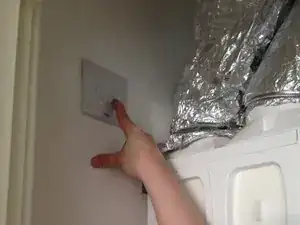
This guide will show you how to clean the heat exchange cell which Vent-Axia advise should be done once a year.

Remember apart from when you clean the heat exchange cell it should never be turned off.

  1. Jit1yED3LQs2m3oE
    • Turn the heat recovery system off at the wall.

  2. VqliZtM4J1Beqhe2
    VqliZtM4J1Beqhe2
    EJn3fMBGWWSlRcTO
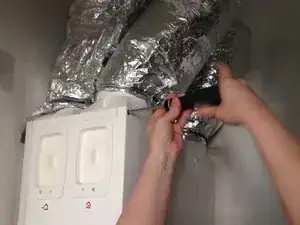
    • Remove the 6 screws from the heat recovery panel.

    • You may need a friend to help you lift the panel off and hold the screws for you!

  3. KLkajaTYiEdmGZGa
    KLkajaTYiEdmGZGa
    SdasNQMpjxmELlxa
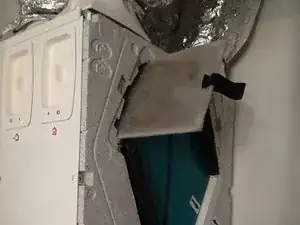
    • Remove the internal filter on the left hand side using the pull tab

    • Repeat for the external filter on the right hand side of the cell.

    • If required clean them using a hoover.

    • Do not wash in water under any circumstances

  4. CVUCsEqNBXasv4ei
    CVUCsEqNBXasv4ei
    4ZccyuoICv2Fl5dX
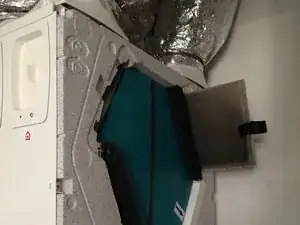
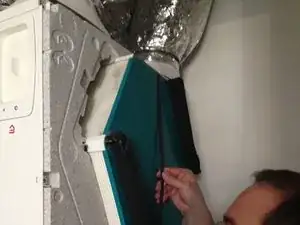
    • Gently take the cell by the pull tab

    • You may have to rock it gently to get it out.

    • Gently and slowly is the most important step here.

    • The cell will begin to slide out

    Be careful, the cell will have 500ml of water in the bottom normally. Keep the cell horizontal until you can tip the water out safely.

    John Partington -

    Hi John,

    I have never had any water in the bottom. Is your drain pipe blocked on the machine? The cell has been slightly wet after snow but not standing water. The service manual attached to the guide talks about the drainage.

    It could also depend on where you live / environmental conditions I guess but might be worth checking with vent axia support to be sure.

    Best wishes,

    Tom.

    Tom -

  5. LiRwLO5KyfI3MHuV
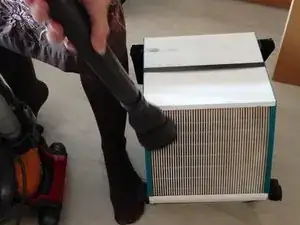
    • Clean the cell on each side with a hoover to remove any dust

  6. nwvJri3nDAFWgqsW
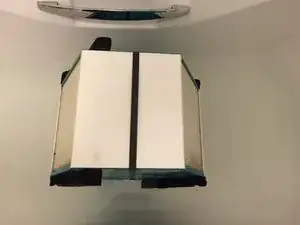
    • Fill a bath with warm water and add a small bit of fairy liquid or similar.

    • Place the cell into the water

    • Gently hold the cell

    • Rock the cell from side to side. Ensure the cell is not scraping the bottom

    • Lift the cell up and let the water drain out.

    • Repeat for each side of the hexagon

    • Remove from the bath and leave to dry

    • Vent Axia tehnical support told me the cell can be a little damp but ensure all water is out the cell.

  7. clMt1ST5wrrKq5pj
    clMt1ST5wrrKq5pj
    XjVONGYRVpN5TOJa
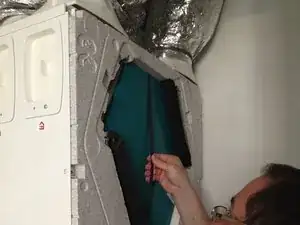
    • Clean inside the heat recovery system with the hoover

    • Remove any dead flies

    • Check the fans for any build up of dust

    • If you have the summer bypass fitted (the white grill) Don't yank it, as its attached via a cable.

    • Gently lift it to clean the fan behind

    It isn’t clear how to move the summer bypass to reach the fan behind!

    Nathan Comben -

  8. ZtfvVtYQMIDorR6H
    ZtfvVtYQMIDorR6H
    ABTnKRgZDcj6HTAh
    aUh4M532DldFFLgB
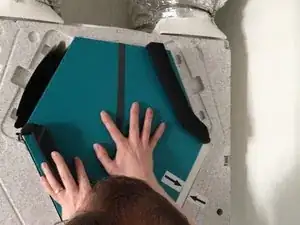
    • Begin to insert the cell back in.

    • Slide using the plastic tab

    • Ensure the two black arrows meet

  9. WRXTPRW6Mp6yaABC
    • Put the cover back on

    • Insert the screws and secure the cover to the MVHR.

    • Leave the internal and external filter out for now

    • We will slide them through the filter flaps later.

  10. qWtMnxJVRbLh5HAW
    • Insert the filters into each flap (clean if needed using a hoover)

    • Close the flap

  11. PhsRxQJZAMOrNqsE
    • Turn the heat recovery back on

    • It will go through its initial power on so don't expect the fans to start immediently.

    • If you have a message on the screen saying check filters you can clear it (once the filters have been cleaned) by:

    • Waiting until Normal airflow xx% is displayed on the screen

    • Press and hold the up and down arrows for 5 seconds

    • This will reset the cycle for the filter clean. Whenever you see the check filter message clean the filter (remember this is separate to the cell).

    • Keeping your MVHR cleaned to the Vent-Axia recommendations gives you the best chance of having many years of trouble free service.

Abschluss

Your heat cell is now clean. Vent-Axia recommend you clean the cell once a year.

Remember to clean your filters as needed. If you want any extra information all appropriate manuals are attached to this guide.

Tom

Mitglied seit: 04/05/14

1492 Reputation

30 Kommentare

Nice guide! I also found a cool website where you can by replacement air filters for mvhr systems https://filtermate.co.uk

Martin Smith -

Yes, this was an extremely useful guide. The maintenance manual simply says “withdraw the heat exchanger”, but it was as tight as a gnat’s a**e. Tom’s guide gave me the confidence to use a bit of gentle persuasion. Thanks :)

Terry Ellison -

Hi

I followed this great guide on a vent axia unit installed in a council property,the arrows however did not correspond I.e black to black red to red before I extracted the cell.Has it been incorrectly installed all this time(10 years)?Which way around do I insert it now?

Andy

andrew -

the same as he was removed (or in the correct way). it’s your choice

Damien c -

As far as I know the arrows are there to note which way round the installer decided to fit the unit. If you were to take the back off on my unit the other side would have red arrows. I don’t know what the impact would be but as long as the ducting is connected properly I doubt it would be a huge problem. You could ask Vent Axia support, they are very helpful. Its been going strong for 10 years so it can’t be that bad!

In terms of the correct way round I would say arrow to arrow should be fine. I assume that’s the way you took it out?

Tom -
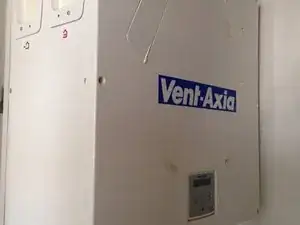
Thanks for the prompt reply Damian,I realise now I should have explained that no amount of insertion combinations will allow the arrows to line up correctly,maybe it's just a case of whomever carried out the initial installation stuck the arrows on back to front ,so it only lines up black to red .Is there any way to determine the correct placement of the cell if the arrows are wrong?Sorry for rambling

andrew -

This guide is wonderful followed to the letter . My vent axia sentinel B . Gave me full confidence to fully service my unit . I cannot thank you enough . Posted Jan 2020. X

cctvfootage16 -

Thanks SO much, the guide that comes with the MVHR is rubbish but your guide gave me the confidence to wash the cell & inside. One question, is a fine layer of dust ok on the fans as I am finding it very fiddly to get inside to clean as my unit is in a cupboard. I hoovered them & tried getting the fine layer of dust off using a damp microfiber cloth but so awkward…do I need to persevere or is a fine layer of dust ok do you think? Thanks again

Grace -

Hi Grace, I’m glad the guide helped. If there is a small bit of dust I would have thought it would be fine, as long as its not a heavy build up. As a rough guide if the fans spin freely it sounds like it should be fine. Cheers, Tom.

Tom -

Hello, thank you for this detail it’s great - can I ask a question about the summer bypass grill - the grill/fins look to be open in the open position in your above picture, do you know if this means the summer bypass is on or off? - I’m unsure because mine was set to off, and the fins were closed, I removed it to clean as it was very dirty, when I reconnected it and I change summer bypass on and off the grill does not move - so I’m curious as to how it should look when stitching it on or off. Thank you!!

Nick O'Donoghue -

Hi,

It was actually switching over which is why there all open and part is slightly learning, as they were closing. I did it that way to make it easier to photograph.

When the summer bypass is on the fins on the inside (that cover the cell will close the fins one the outside will open. When the summer bypass is off the fins will close on the outside but open the ones that are covered by the cell. This is because when the summer bypass is closed it forces the air round to avoid the heat exchange process. If you think nothing is happening its either the temperate is set wrong or the summer bypass is faulty. Most of the time its the temperature. You can find the temperature settings in the front screen menu.

Hope that helps.

Tom -

This is SO helpful, thank you. The instruction manual is terrible. This was easy to follow. We've been in a new build for one year, ours was working like a treat until a month ago when it became considerably noisier. This maintenance has helped somewhat.

In the instructions it says to clean the condensate drain tube - but of couse no guidance on how to do that! Does anyone know?

Thanks again.

Gina North -

Hi Gina, glad it helped. Usually just checking there are no blockages should be sufficient.

Tom -

Many thanks for the guide, i tried it today and all worked well. Just one question if you don't mind. How far in should the cell go, I noticed in your photo it was pushed in about an inch or so….I should have taken a photo before I started. Cheers Tony

Anthony Stack -

Hi,

It should fit snug and the cover can go back on like in step 8.

Cheers,

Tom.

Tom -

Hi. Thanks for this. Infinitely better than the VA guide. I’ve not cleaned the cell yet but will use this guide for sure. However I have just removed the filters: the left hand side was mainly grey and dry, the right hand filter was very black and also damp? Is this normal?? Thanks.

Geoff -

Hi Geoff,

Yes this is normal for the outside. Mine is the same. Glad the guide helped.

Cheers,

Tom

Tom -

Hi Tom, this guide has been great and I’ve cleaned out all the build up in my system. Brilliant job documenting everything.

I’m having trouble understanding the summer bypass notes and hope you can help me understand. The grills look like there’s a left and right side. All of them are open regardless of putting the bypass into off or on. It’s freezing cold right now, so if something has broken is it better to have them lying open or closed until I can get someone in to service it to keep any heat in?

lucy stanbrough -

Hi Ian, if yours has the summer bypass open is good as it’s not bypassing. You want the air to go through the cell when it’s cold. This is normal. Summer mode can be found through the main menu. You can use the manual to check this. If the fins don’t change with summer bypass is on the temperature is probably wrong. Failing that you can confirm your machine has the summer bypass by turning it off at the wall. Wait 20 seconds and turn back on. As the machine starts up it will show summer bypass on the screen and if it is fitted or not. Hope that helps.

Tom -

Realised I badly phrased my question. In step 7 you’ve got the summer bypass grill on the right. The individual fins on that look like they are all open (they don’t lie flat effectively blocking that hole off). Mine stay like that all year round regardless of whether summer bypass is set to off or on. Now it’s winter should they all be closed to keep the heat in or open? In your answer to one of the questions above I couldn’t work out if half should be open and half closed. Reaching out to vent axis as well!

lucy stanbrough -

Hi Tom i was wondering what temperature settings should i use , my geothermal heat pump is set to 20° at the moment and the Vent axia mhrv is set to Indoor 23° and outdoor is set at 14° (default setting) i also have the summer bypass with is set to normal , i was never walked through the use of the control panel ,so I'm learning as i go , Thanks in advance Jay

jason kavanagh -

Hello, Tom, I washed all the filters and replaced them with new ones, but I have a problem because I still have a check filter, even after a reset

wrobelistowel -

Hi, I had that issue once. I simply turned the machine off. Waited 20 seconds turned it back on. Once the fans spun up and it went through its startup sequence I held down the up and down arrows and it did it. I’m not sure why it happened. As I say it’s only happened once and not had it since.

Tom -

Thanks I will try

wrobelistowel -

Thank you for a very useful article.

My own Sentinel Kinetic was installed about three years before, so a clean was (over)due.

I followed your instructions with one variation.

I half filled a bath of water, say 200L, and popped in a Instachlor PR1000 tablet. By my own reckoning, that is a 5mg/litre chlorine solution.

Before dropping the exchanger in, I partly filled a spray bottle to clean and wipe down the inside of the main unit.

Anyway; I swilled the exchanger around in the bath. Used a new nylon cleaning (washing up) brush to gently brush off the really nastly deposits and it all came up very well. The bath water was a bit mucky afterwards. Lastly I rinsed it off and drained off what I could.

The PR1000 solution was found in the instructions with a Vent Axia Integra Plus. Maybe chemicals aren't mentioned anymore because of worries over safe handling?

I treated it to new filters, which I normally change once a year with a vacuum after six months.

Thank you again for a very clear article.

Jonathan -

Your very welcome. Thanks for sharing. That's really interesting on the cleaing. Our machine is coming up to nearly 10 years old, they have improved the kinetic system over the years. The Integra specifally looks newer, I can't see a reason it won't work and going to try it on its next clean. I don't have any problems with smells but it makes sense that it would keep it in tip top condition.

Tom -

Thank you Tom, I shall look forward to hearing your own thoughts. I didn't actually notice any smell, certainly nothing that lingered.

Jonathan -

Hello Tom. This guide is so useful. I have in the past washed the filters under water and let them dry thoroughly before I put them back in (more than 24 hours). I've noticed your guide says never to wash the filters in water. I wonder what the impact of this might have been. Any ideas? Thanks.

Sheena Vella -

Hi,

Glad it helped. It was vent axia themselves who said to hoover not wash. My best guess is the water may make the fibres tighter making it harder for the air to pass through.

Cheers,

Tom.

Tom -

Hi Cameron,

Glad it helped. You don’t (and shouldn’t) take the cell to pieces, just wash it through. I will adjust this to make it clearer. The water will come out the other side itself. The black foam is ok to get wet, it will simply dry.

Cheers,

Tom.

Tom -