Einleitung
If your Kindle Voyage is stuck in a boot loop, this might fix it. However, it is somewhat challenging and involves soldering, so make sure you read the entire guide before beginning.
Werkzeuge
Ersatzteile
-
-
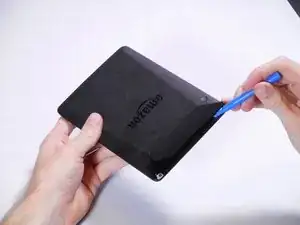
Insert a plastic opening tool between the plastic panel shown on the device.
-
Use the tool to pry the plastic away from the device.
-
-
-
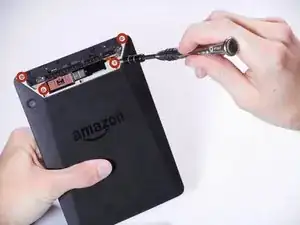
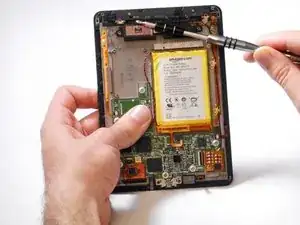
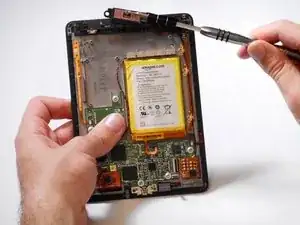
Use an aluminum driver attached with a Phillips head size #00 to remove the four 3mm screws shown in the picture. For reassembly, note that the top two and bottom two screws are different sizes.
-
-
-
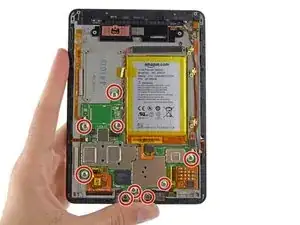
Make sure to remove all connectors, then remove all the screws.
-
You should be able to remove the motherboard from the case.
-
Remove the battery connector first.
-
-
-
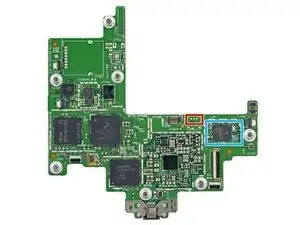
The three wires should go on the pads outlined in red.
-
From left to right, the pins are TX, RX, and GND.
-
If you are finding it difficult to solder to the ground pin, try soldering to one of the shields, which would normally be where the blue outline is.
-
-
-
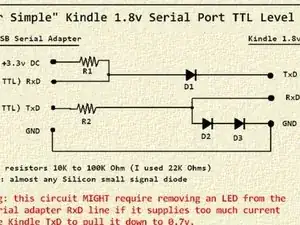
Using the resistors, diodes, USB serial adapter, and breadboard wires, build this circuit on the breadboard.
-
If you don't know how to use a breadboard, YouTube is a great place to learn.
-
Sorry for the stupid cropping of the image, iFixit doesn't like it. See the full image at https://www.mobileread.com/forums/showth...
-
Then, using alligator clips, connect the wires on the "kindle" side of the schematic to the appropriate wires from the Kindle.
-
-
-
Plug your USB serial adapter into the computer.
-
Start your serial terminal program (like Minicom). Make sure to disable "Hardware Flow Control".
-
-
-
Connect the kindle battery.
-
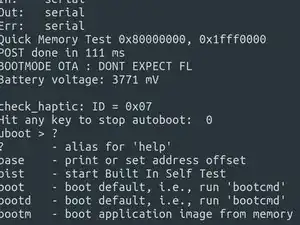
You'll start seeing text in the serial terminal. When it says "Hit any key to stop autoboot" press a key.
-
Type in "bootm 0xE41000 " and press enter.
-
-
-
Tap "U - USB Export" on the screen.
-
Plug your Kindle into your computer through the Kindle's USB port.
-
Download the Kindle firmware from https://www.amazon.com/gp/help/customer/...
-
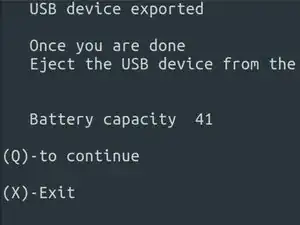
Open the Kindle drive on your computer and drag the .bin file into it.
-
Eject your Kindle and unplug it from your computer.
-
Press "Q" either onscreen or in your serial terminal.
-
Tap "Reboot or Disable Diags", or type "D"
-
Tap "Reboot System", or type "R"
-
-
-
The Kindle should now be booting into the regular OS.
-
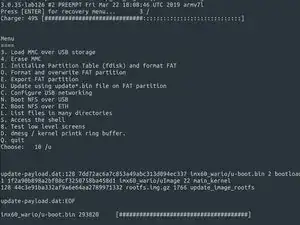
When the serial terminal says "Press [ENTER] for recovery menu...", press enter.
-
Type "u" and quickly follow that with the enter key.
-
Your kindle will restore the firmware you copied over previously.
-
At the end of this process, your Kindle should be showing its bookshelf screen.
-
-
-
Unplug the USB to serial adapter, and remove the wires from the kindle.
-
If your wires are thin enough, you may be able to break them away from the pad, but be careful to not tear the pad off.
-
If you can't do that or just want to be safe, remove the motherboard and desolder the wires, then re-install the motherboard.
-
To complete the repair, close the device by following the process detailed in the beginning in reverse.
Ein Kommentar
Merlin04, you do an excellent job at breaking down the tasks and guiding a person through the process!!

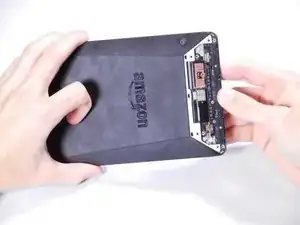
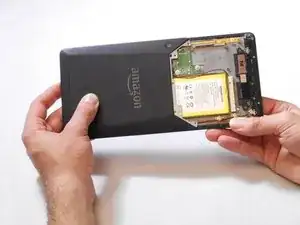
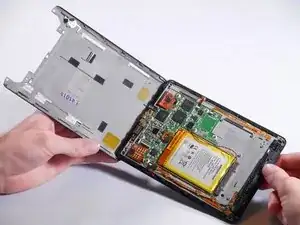
This is not the best way to do this. The plastic panel snaps in on the lower/center part and slides into notches in the top. When you do as this instructs it breaks the tabs that connect on the top. If you can slide a few of the guitar picks into the lower part and get all the glue disconnected and get it to get past the snaps on the bottom you can then slide it upward and remove it without damaging the panel.
sam -
Thank you for a very helpful hint
baggins -
Definitely agree with this, and would clarify a bit. If the piece to be removed is at the top of the Kindle, the only purchase for the Opener Tool is the seam along the top edge. Start at either corner, and pry just enough to insert a pick, and repeat the process to work your way along the slanted edge towards the bottom edge; the adhesive releases easily. Continue along the bottom edge, then lift the bottom edge clear of its retainers. The whole piece can then easily be slid off.
gring40 -