Einleitung

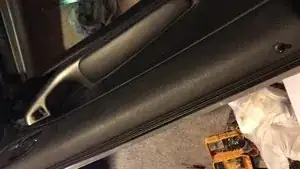
Does your door sound noisy and rattly when closing, like this? Here's how to fix it!

  1. 52XcH2aKJT2xTLQu
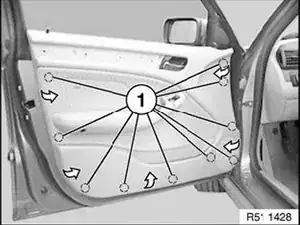
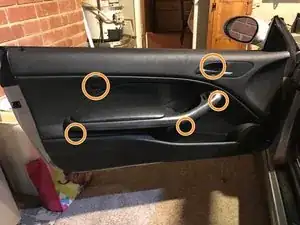
    • The door card is held securely in place with 5 screws.

    • Keep in mind the door card has up to 3 wire bundles attached to it. Be careful when removing it! Be prepared to support it while dealing with the wires.

    To avoid the risk of an airbag light, disconnect the negative terminal from the battery before removing the door card.

    Michael Johnson -

  2. rcXCZqcVApPKKVbF
    rcXCZqcVApPKKVbF
    x6mHnloPZYYobOFL
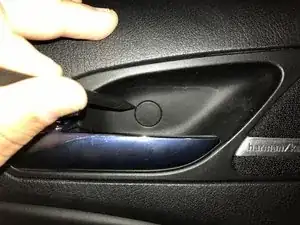
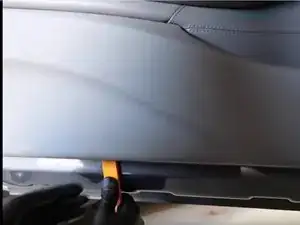
    • Using a spudger, work off the cap of the first screw. The cap is tight; you may need a jimmy or metal spudger.

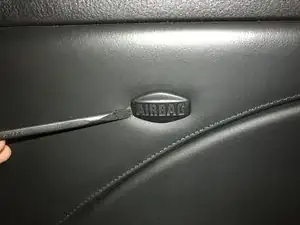
    • Using the flat end of a spudger, remove the airbag emblem. The emblem has clips on the top and bottom -- work carefully.

    To remove the cap shown in the first photo, you can use the blunt end of the spudger or ever your finger and press on one side of the cap. Half of the inside of the cap is recessed, so the edge of it will pop up when pressed, allowing you to remove it with your fingers, and reduce the risk of scratching it.

    Michael Johnson -

  3. V6Q2uRPS5PYhTEN3
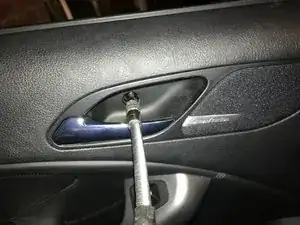
    • Using a T20 Torx driver with extension, remove all 5 bolts.

  4. JR6KRjjlJHmVgScQ
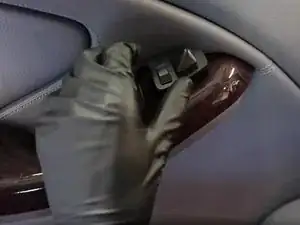
    • If you're working on the driver side door, remove the mirror control module. Disconnect it from its wiring plug.

  5. xOlU2MNLuLyRJLJb
    xOlU2MNLuLyRJLJb
    PnntYi5VIXrrdSYJ
    • Using a trim tool or similar, begin at the bottom of the door card and pop the card away from the door frame.

    • After you've released the bottom clips, work your way around.

    • You will need to lift the door card from the door frame in order to fully release it. Be careful!

    Have some spare door card clips ready, as, due to age, they can break easily when removing the door card.

    Michael Johnson -

    • Disconnect the following from the door panel:

    • Unlocking cable

    • Speaker cable(s)

    • Set the door panel aside.

  6. ADDrKBCpd1lF1cDY
    • The door panel is now removed.

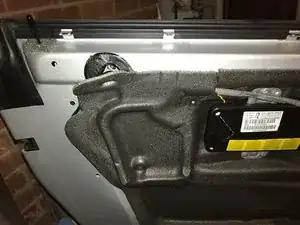
    • You will see the airbag module, vapor barrier, and other components.

    Do you know the screw sizes for door card

    Andrew Harrower -

  7. 3wqAfdorUfwAIdQ2
    3wqAfdorUfwAIdQ2
    ZQVKUdYhIAs1AQCJ
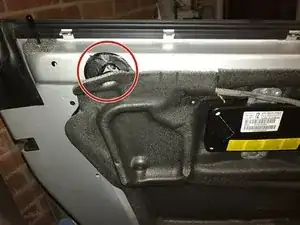
    • Very gently, peel back the vapor barrier to expose the retaining bolt.

    • Roll the window up.

    • The tar-like substance used to seal the vapor barrier to the door frame WILL release itself to a gentle pull, but it is EXTREMELY sticky, and too much pulling will tear your barrier. Slow and steady is the name of the game!

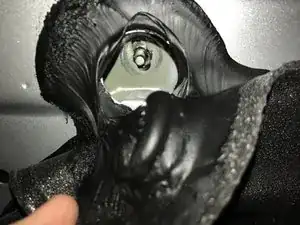
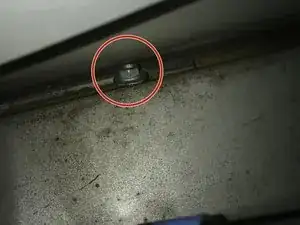
    • Inspect the bolt. It is probably missing a nut!

  8. dhLFeiE1OpA3Ivr3
    • While you're in here, inspect and tighten the bottom bolt.

  9. JUEAeQN5NTGIbIGa
    • Look in the bottom of your door and locate the nut that fell off that top bolt.

    • Replace the nut onto the upper bolt and tighten.

    • In a pinch, you can use a little bit of that tarry substance to temporarily paste the nut to your fingertip in order to screw it on to the bolt.

  10. Ta da! Now closing the door sounds great!
    • Ta da! Now closing the door sounds great!

    Thanks. Your instruction aligns with another I saw. This is good. I’ll give this a try.

    Rick Haupt -

Abschluss

To reassemble your door, follow these instructions in reverse order.

Dom Santangelo

Mitglied seit: 19/09/16

559 Reputation

Ein Kommentar

What is this bullshit? Ever think people may have both bolts there and tightened down still? Ever think other ifixit $@$* may still need to occur? And this is all you have to offer? Awesome thoroughness…
spamaccount420 -