Einleitung

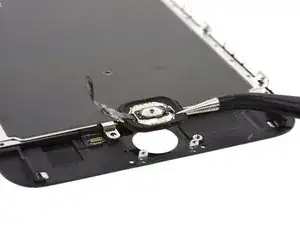
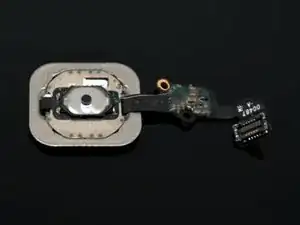
There is yet another issue that is starting to be more common among the iPhone 6 and 6S variety phones. The home button no longer registers a click, but the touch ID still works.

Symptoms may include:

  • Only registers click occasionally.
  • Only works when the home button bracket is not attached to the LCD.
  • Only works if the button is held or twisted a certain way.
  • Will not register click at all.

3U tools should still be able to recognize the home button, and Touch ID should still work. If they do not, this guide will not fix those problems.

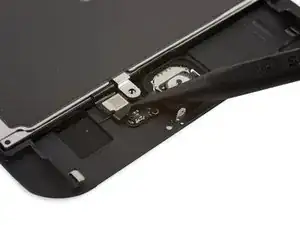
  1. hkSBCMyybHiyFjDE
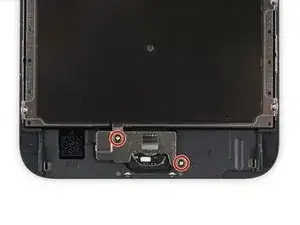
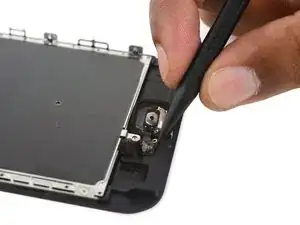
    • Remove the two 1.9 mm Phillips screws securing the home button bracket.

    Maybe this should be totally obvious, but it took me a minute or two to realize that this step is performed on the DISPLAY ASSEMBLY that was just removed, rather than the main body of the phone, which is the part on which all the previous steps were performed.

    Tom -

    The new display came with a 1.9mm screw installed (the top left one above). This must be removed before putting back the home button bracket. It took me way too long to realize why I couldn’t thread the old screw back into the hole.

    Brandon Mathew -

    If you bought a screen assembly with a home button but have not ever set up touch ID can you set up touch ID on the new screen’s home button?

    Andrew Shircel -

    The home button and logic board are usually married. So if it’s a new home button paired with the original logic board, the Touch ID won’t work.

    Brittni Gange -

    do not over tight the screw or the lcd will get damaged

    764349 -

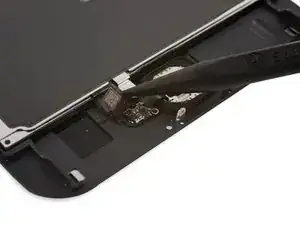
  2. 66QbHYUXyDNipfQc
    66QbHYUXyDNipfQc
    ckcoXAcnDTqUWKDH
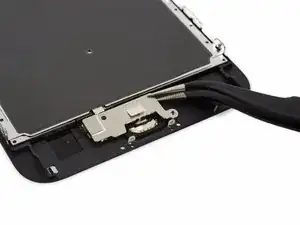
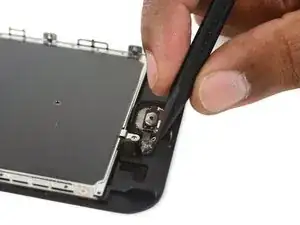
    • Remove the home button bracket.

    My home is wiggley I do not like it

    can you put home button adhesive

    Riley -

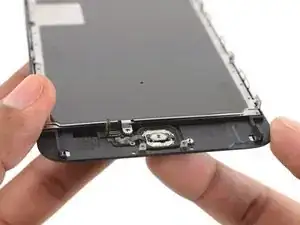
  3. 2oLQGxXQwWHE6nic
    2oLQGxXQwWHE6nic
    HT5NgEI1MSmiWRMu
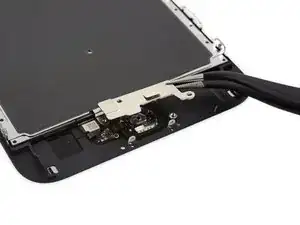
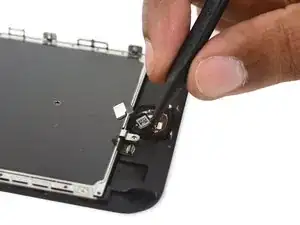
    • Use the pointed tip of a spudger to disconnect the home button cable from its connector on the display assembly.

    Gently: this piece is attached to the plastic cabling, not the surface of the phone

    Christa -

    Buongiorno,ho cambiato display però adesso non mi funziona touch sul tasto home…cosa potrebbe essere???grazie

    eduartkurani -

    ciao, hai risolto? ho sto valutando se cambiare lo schermo appunto per questo motivo, ho letto online che gli schermi non originali danno questo problema

    serena184 -

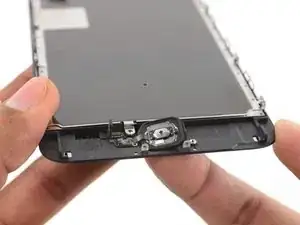
  4. SIJQtRHCnfty2BOY
    SIJQtRHCnfty2BOY
    NqOujihdwfUjexEk
    • The rubber gasket surrounding the home button is very thin and tears easily.

    • Apply mild heat (with an iOpener, heat gun, or hair dryer) to soften the adhesive securing the home button gasket.

    • Using your fingertip, gently press up on the home button from the front side of the display assembly. Use firm, constant pressure to slowly separate the home button's rubber gasket from the front panel.

    “The gasket is very thin and will tear easily. Apply steady pressure and give it time to separate. “

    The note above was very helpful. It really is thin and for one second I thought I punctured a whole through it, so be careful.

    Jeffrey Robinos -

    I did this on 2 separate phones. The first time, I did it according to directions, and it worked well. However, the adhesive pulled off in the process. On the 2nd phone I used a handwarmer to slightly warm the home button area. (I think an iOpener would work best, but I didn’t have one on hand). With the constant pressure after being heated, the home button assembly came off easily, and the adhesive stayed in place. I’ll definitely use slight heat in the future for this step as it seems to lessen the possibility of damaging the assembly.

    Jami -

    I would have liked to see the heating instructions on this page. I only saw it once I re-watched the video as I was having trouble getting the button out. iFixit would have made another sale had it been obvious that the heating pad would come in handy. I ended up using a microwave heating pad instead. Worked fine.

    Scott -

    If anyone else is totally caught off guard by the need for heat at this point, the previous mention of a heating pad gave me the idea of heating a wet paper towel in the microwave and sticking it in a plastic bag. Obviously make sure no moisture escapes into the device. Worked fine, and is absolutely necessary: that gasket is VERY delicate.

    Joshua Rodgers -

  5. E5DuKaADCQiRvqi4
    E5DuKaADCQiRvqi4
    FxWAFoZG4LrZBvwt
    HKSxgaWj2YHKKB4D
    • Use the pointed end of a spudger to pry the lightly-adhered home button flex cable off the display assembly.

  6. TpOUIMQSCFjYDWo4
    TpOUIMQSCFjYDWo4
    YxSfReaheSkGRH4I
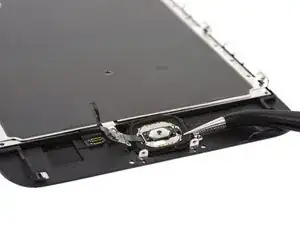
    • Remove the home button assembly.

    Make sure you remove any broken glass from around the button edges. Took me a few times to realize it had some glass on it.

    johnarchitzel -

    I could not believe how EASY this was to repair my phone! Granted, it took me awhile (2 hrs) to replace a camera and a screen, but I was probably overly meticulous about each step, especially making sure the old adhesive was fully removed and the frame was clean. I can imagine, with tolerances being as tight as they are — I could barely see some of the screws! — the slightest lump of glue might have made a smooth placement difficult. But, in the end, it was worth it! Screen looks and works awesome, and so does my camera!

    Huge props to you for this detailed guide! Very easy to follow and flawless result! Thank you!

    Patrick Lynch -

    does the home button work after you put it on the new repaired phone?

    Victoria Vojvodich -

    what about the camera? i don’t see the step moving the old camera over to the new screen

    Brian -

    Gasket guys!! How do you properly replace the gasket?? Not shown!!

    Jim Hickman -

  7. AHTspNTgs4JKuVHH
    AHTspNTgs4JKuVHH
    6XlAfIrdcIwnPfQZ
    NaQjlfnCDcTW6bxX
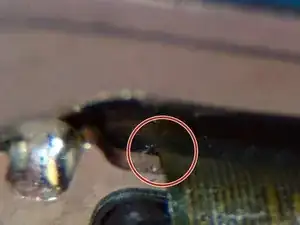
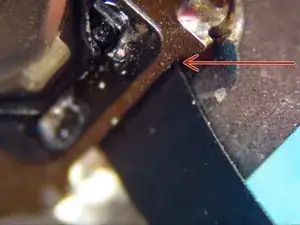
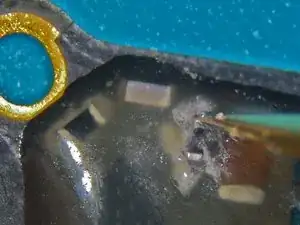
    • Though this step isn't necessary, here are some images to help you see the cause of the issue

    • Here you can see the micro-tear that happens just under the edge of the home button.

  8. yqAAfqOHdEROF5u6
    yqAAfqOHdEROF5u6
    RBAZlLnnUtHVxL2n
    KjDgIKvR5KBeTFuE
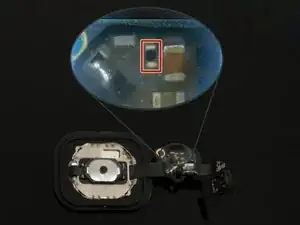
    • Find the resistor tied to the home button and remove the protective layer around that resistor.

  9. 23dLPuk14TAKTWXS
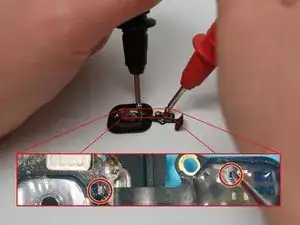
    • Test continuity between top part of the resistor and the home button.

    • If you get constant continuity between these two points, you have another issue and this process will not fix your issue.

  10. nvOFegNBpdlcZfUw
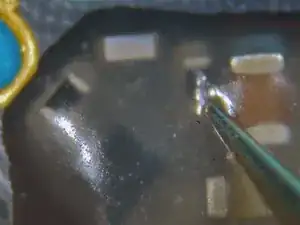
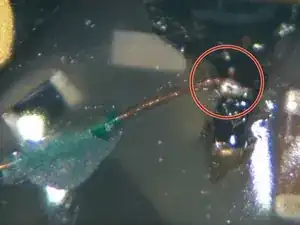
    • Now that you have confirmed the issue, you can fix it by running an external trace between the two components you just tested.

    • Solder your wire to the physical part of the home button first.

  11. UC6PUFoXAGlZQFFf
    UC6PUFoXAGlZQFFf
    yNXHNsHTC1HPlXad
    j2K3VrIMQ1ZfSXcH
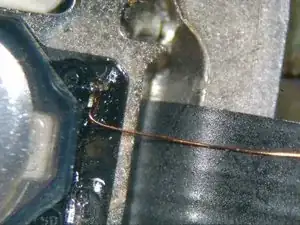
    • Guide the wire to the second component

    • It is easier to keep the wire in place if you cut part of the glue out in a line. That way you can insert the wire into the cutout to prevent it from moving

    • Add some glue or UV resin to keep the wire in place.

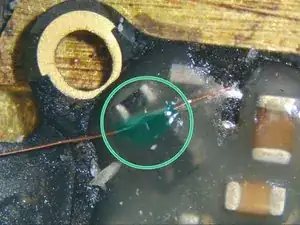
    • Solder the wire to the top end of the component.

  12. 6kjoHoOuILs1bqqU
    • Add some UV Curing Glue to the solder points.

    • To be safe, you can place some Kapton tape over the top of the new trace to keep it from moving. Be careful as this new trace is fragile where it isn't glued.

    • Follow steps 1-6 in reverse order to re-assemble the device.

Abschluss

After testing the home button and confirming that the repair worked, you can re-assemble your device.

Jon

Mitglied seit: 17/08/18

633 Reputation

4 Kommentare

Superb it worked

kumkrish36 -

Looks like have to attempt this. Have done fairly fine soldering before but maybe nothing this small. What size jumper to use? 0.1mm or 0.02mm?

Howard -

Thanks Howard. Sorry I haven’t been around for a while. The wire I used was 0.02 mm. You would probably be fine with a thicker wire, this is just what I have on hand.

Jon -

Great tutorial. There is a diagram floating around on the web that has the polarity reversed. I did that first and didn’t work before finding this guide and corrected the wiring. Works great now.

Besides a good fine tip soldering iron and at least magnifying goggles, really good flux makes all the difference on this job since everything is so small. I had some clear liquidy flux (Kester 951? don’t recall, bought long ago to help reflow GPU+SOC BGAs) That worked great as heat instantly flowed to all the right places. Necessary with tiny solder points and rework wire.

Howard -