Einleitung
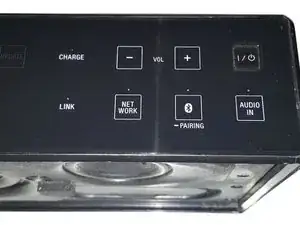
Over time, the touch buttons on the SRS-X7 may stop functioning. Double-sided tape used during manufacturing is the cause of the problem - probably as a result of degradation of the glue causing a change in capacitance.
Rather than paying a Sony service department to look at your speaker, repair it yourself economically.
Unfortunately the manufacturer chose not to issue a recall over this problem.
Werkzeuge
-
-
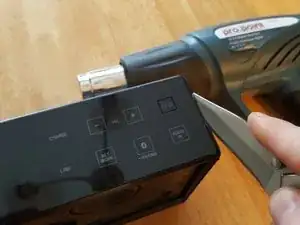
** IMPORTANT ** Wear safety glasses for this step. Whenever prying with a knife, I recommend wearing safety glasses. If the blade breaks, shrapnel could fly into your eye causing damage or blindness.
-
Use an xacto-knife or pocket knife sharpened to a 15 degree angle.
-
Twist the knife blade in order to lift up the cover.
-
Do not scratch the bezel or cover, and try to avoid scratching the painted surface under the cover.
-
-
-
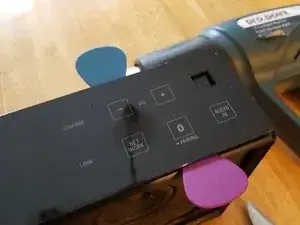
Slide guitar picks along the long edges in order to help break the bond between the cover and the housing along the edges.
-
Substitute guitar picks with playing cards if you don't have guitar picks.
-
-
-
Careful application of heat may assist.
-
Use a hair dryer or a heat gun set to low (150C or lower).
-
Move the heat source around, don't concentrate it in one spot to avoid melting or warping the plastic.
-
-
-
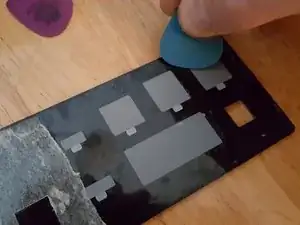
Use low-heat and a guitar pick to carefully scrape off any tape/glue.
-
Again, move the heat source around, don't concentrate it in one spot to avoid melting or warping the plastic.
-
Don't use a knife or other sharp implement, otherwise you will scratch the paint and light guides off.
-
-
-
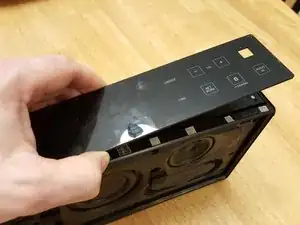
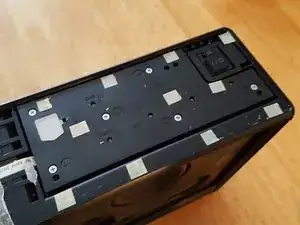
Put very small amounts of adhesive at the points identified with little squares of masking tape. Don't add the little squares of masking tape!
-
Silicone sealant works well.
-
Avoid putting adhesive over the areas directly above the touch pads or the grey light spreader on the upper-left.
-
Best to apply adhesive to the chassis, rather than the cover.
-
Keep in mind, adhesive spreads a lot, so little means VERY LITTLE.
-
-
-
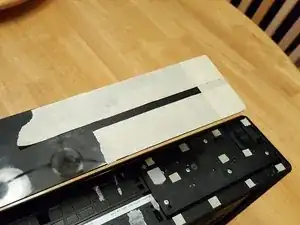
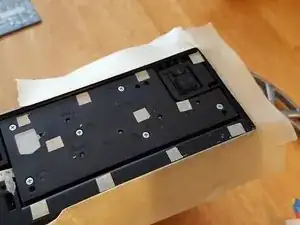
Apply masking tape to the cover.
-
Apply masking tape to the bezel.
-
This will simplify adhesive clean-up.
-
-
-
Align the cover with the bezel, and press it in place.
-
Wipe excess adhesive using a tissue, and dispose of the tissue immediately. Do not re-use the issue.
-
Carefully remove the masking tape.
-
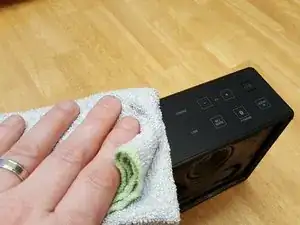
Gently wipe the cover with moderate downwards force in order to improve adherence.
-
Your speaker should now be re-assembled and ready to rock.
12 Kommentare
This was my first ifixit contribution. I hope you like it and find it useful. These speakers sound great when they work. It's a shame Sony chose to hasten the manufacturing process by use of large pads of double-sided tape. If they had gone with a liquid adhesive, or used die-cut double-sided tape that didn't cover the sensors, they could have saved a lot of headache for their customers.
I am always fixing brand-new-out-of-the-box products, and fixing products that failed far too soon. It never ceases to amaze me how manufacturers cut corners, and pass the resulting problems on to their customers. That's why I believe trust has been eroded between the consumer and the manufacturer.
thank you for sharing. Very great article. I hope it will solve my problem
Muchas Gracias ya resolvi el problema haciendo esto
