Einleitung

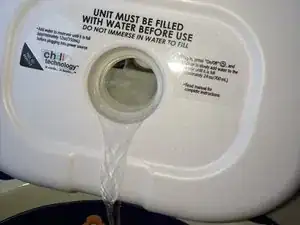
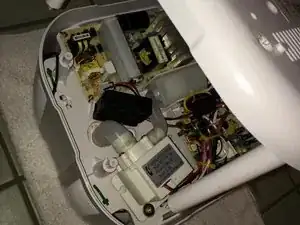
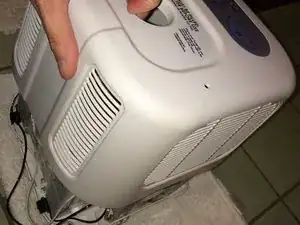
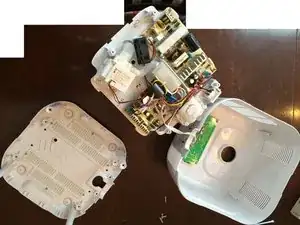
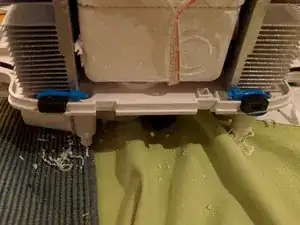
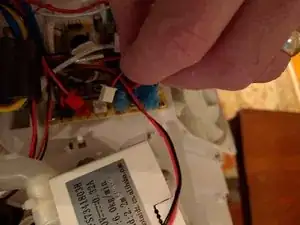
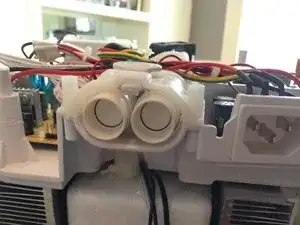
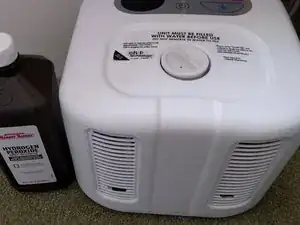
This guide will describe how to disassemble the ChiliCube cooling unit and replace the fans.

Please look through my teardown guide for the ChiliCube as well. The teardown guide has additional info about ChiliCubes which did not fit in this repair/replacement guide.

Then completely read through this guide before ordering the parts. Go out of your way to read comments by other iFixiters. The user Spectacle in particular did things differently, and may save you time and/or grief. You have to look at the bottom of each step, and expand the comments to view them.

The part count is based on repairing a single cube, double the quantity of parts if you are replacing the fans on two cubes.

This fix is much more difficult than replacing a fan on your computer.

This is not as simple a fix as one might wish.

The ChiliCube is poorly designed from the perspective of fan replacement (or any other repair), making this replacement more difficult than one would expect.

Caution:

The directions for installing the 3-way switch include steps which breach or defeat the "moat" created by the deck separating the reservoirs and filler neck on top with the electronics on the bottom. The cut in the flange, and the holes for the cable tie described in later steps might allow internal spills or leaks to flow through to the electronics area. If you want to install quieter fans, but you want to retain the same level of safety, you may want to either skip installing the 3-way switch as described (or just use another model of fan without a switch.)

Note: This describes the heating/cooling unit which is part of 2nd generation ChiliPad / ChiliCube system (introduced in 2014(?), and not the first generation unit (mostly sold pre-2015) which was more squat, and had a handle on top.

  1. urykqhePKuIudPyW
    urykqhePKuIudPyW
    EXP45kjZEgV5BxkC
    • Unplug from power.

    • Unhook the circulating tube.

    • You may want to have a small container available to put end of tube in, often it will leak a bit before the stopper valve retracts.

  2. KFpOOKVT3oexRdEW
    • Its up to you whether you empty the cube first. If you do not, put it on a low baking pan to contain any drips. The advantage to not emptying is that you can then test the fans before final assembly. (The pumps and fan will not run if the reservoir is empty.)

    • If you decide to empty it, take cube to sink and unscrew cap and empty out water from unit.

    • You may want to stick your fingers in the two circulating tube holes to open up those valves so that you can drain water from the pump side of the unit.

    I was able to complete the replacement without emptying the tank with zero issues.

    Spectacle -

  3. o3JOLgCBdO2x6kpN
    o3JOLgCBdO2x6kpN
    Wf41Q4XSJJ1RmSue
    LiASlYyow6I14WbR
    • Flip unit over.

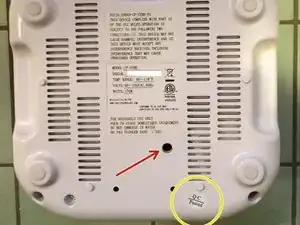
    • Slide razor blade under the QC sticker, it hides one of the screw holes. You should park it on top of one of the labels for future use. That is if you wish to pretend you have not opened a device you own.

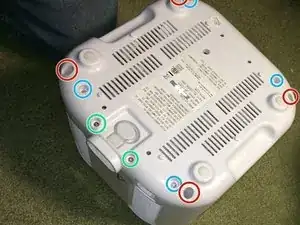
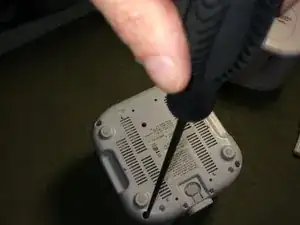
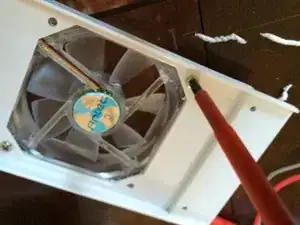
    • Remove 10 screws. Four of them are in deep narrow holes which presumably are intended to prevent casual repair like this. You will find most regular #2 philip's screwdrivers are not long and/or narrow enough.

    • The hole the red arrow is pointing to, is not a screw hole.

    • The #2 Philips screwdriver must have a shank at least 8" long. If you have an insulated electrician's driver which might be long enough, it is probably too wide for the hole.

    2019 version only has 8 screws to remove. The 2 screws next to the power socket no longer go through the case.

    Christopher Kidwell -

  4. 2yQDUWLjAficL2aJ
    • Once unscrewed, you can lift bottom part of case off cube.

  5. mTAMb5kSr3ZZhBOD
    mTAMb5kSr3ZZhBOD
    wH3DVcduwpoTXSFP
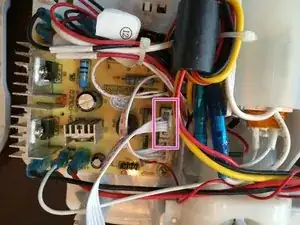
    • There is a small circuit board attached to the top part of the case for buttons and display readout. It is connected to the main circuit board on the unit by a small cable.

    • Unhook connector this small ribbon cable from the main circuit bord on the bottom of the unit (which is now facing you.)

    • The connector should pull out without needing to be released in any way.

  6. GjEZVa4Sm1bqIIyO
    GjEZVa4Sm1bqIIyO
    Da13lklZNrNdx35K
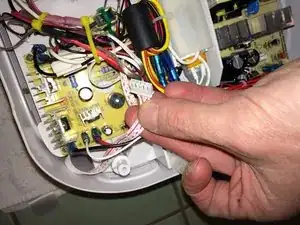
    • Flip cube over (carefully supporting the inside mechanism--its not attached to the case anymore) and then lift case off. Don't go yanking it away brusquely, that control cable may have gotten pinned underneath even though you disconnected it.

    • Flip the cube over again, so those circuit boards and pump are face-up again.

    I found it easier to remove the unit from the top of the case rather than flipping the entire thing back right side up.

    Spectacle -

  7. OiZSRlobSLctYN4w
    OiZSRlobSLctYN4w
    cG4qTymM1bYHdMMf
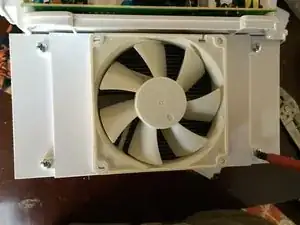
    • These instructions are written as if you were only replacing one fan, but you may want to do these steps to both fans at the same time.

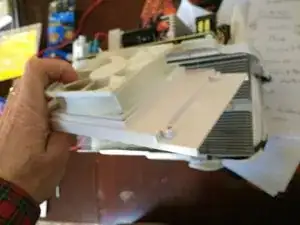
    • The 2 screws supporting the fan are on the heat sink side of the bracket/shroud, so we remove the bracket first, so we can get to those screws next.

    • Remove four screws holding the bracket/shroud to the heat sink.

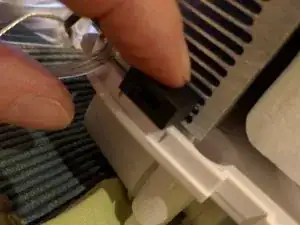
    • Tilt the bracket/shroud out. It may take a little more force than you would like. Thats OK. Try sliding it side-to-side as well.

  8. hDUStVtYUXypguTf
    • There will probably only be two of those stubby fan screws per fan.

    • Note that this is actually a photo of me installing the new fan, the old ones are white.

  9. ukKDGKPutlfh5GXQ
    • You have several choices as to how much of the original wiring to re-use. See my Teardown for more detail on the fan wiring. Unfortunately this device is designed to make it almost impossible to replace the fans neatly.

    • In every method, you will be cutting the cables leading to the fans.

    • You can either re-use the existing female 2-pin connector, or buy a new one. These instructions are written assuming you bought a new connector, and are wiring the fans with a new harness.

    • This method has the advantage that you can test the fans/harness assembly before you re-assemble the whole kazoo, fill it up with water, and then find it does not work. (...And rinse, and repeat, and rinse and repeat, in your author's case. )

    To ensure I left myself with the most wire to work with, I removed the blue sticker from the stock fans and pulled the wires off of the fan at the solder joint/point.

    Spectacle -

  10. FTWVtRTYyWNkef4A
    FTWVtRTYyWNkef4A
    kVbwGoi4rBdQaVxc
    • The new fan in this guide is an Antec TriCool 92mm computer case Fan, with 3-speed switch. If you get another 92mm fan, just skip the instructions for the 3-way switch placement.

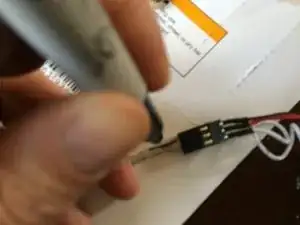
    • On this fan, I first attached the "dongle" that adapts the 3-pin connector on the fan to the 4-pin old-school molex connector. This is to help figure out which conductors are positive, negative, and speed sensor, because the new fans did not have color-coded conductors. (The speed sensor will not get used here)

    • Mark on you new fan which conductor is black (negative), and which is positive (red).

    • Once you have marked the cable, cut the 3-pin connector off.

    For anyone interested in just replacing the stock fans without using the three way switch, I recommend using the Arctic F9 92mm fans. https://www.arctic.ac/us_en/f9.html. These fans have color coded wiring which makes it easy to wire up (red to red, black to black). There is an extra wire left over (yellow), which goes unused.

    Spectacle -

  11. WsYdtRQYyHGFREOT
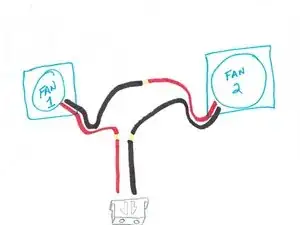
    • Crude drawing of how you need to cable the fans up. I'll leave it up to you how you do it. Splice using crimps, or solder with shrink tubing to cover. Give yourself plenty of extra length on the cabling, you'll need more than you might think.

    • As written the 3-pin to 2-pin adapter in the parts list is going to be cannibalized, you only really need need the single 2-pin connector, and you will discard the 3-pin connectors.

    • You could leave the new fan's connectors attached, and rig this up so if one of the new fans fails, you only need to replace the fan without cutting wire, but then you will need to two 3-pin to 2-pin adapters per cube.

    • Once you have the two fans and connector assembled, test them to see if they are connected correctly by testing the resistance between black and red at the connector using a voltmeter. If you have got it cabled right, it should not be an open circuit, there should be some resistance there.

    • Of course, if you have got a 24V DC supply, you could test them that way too, or even hook them up to the cube, plug it in, and turn it on (it will have to have water in it, and be turned right-side up, and have the control board plugged back in.)

    I originally tried using the 3-2 pin connector the guide calls for, but the wires came out of their pins when I tried to strip the wire ends down. Here's what I recommend: take the new fan connector and depin it using the a small jewelers tool. Un furl the pin to completely flatten it out, then place your heat shrink over and down the wire for use at the end. Wrap the stock wiring of the unit (see Step 9 of my comments) to the flattened pin, fold the pin back over itself and the wrapped stock wiring, then and solder the connection. Lastly, slide your heat shrink over all exposed wiring and heat it up. Done!

    Spectacle -

  12. eMyY3apY5JXlQlhh
    eMyY3apY5JXlQlhh
    3xARyaSWAGeiH5DL
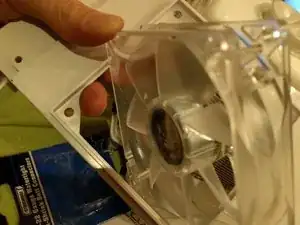
    • If you do go with the 3-speed fan used here, look ahead in instructions to see where the switch gets positioned, then attach fan appropriately to the bracket/shroud plate.

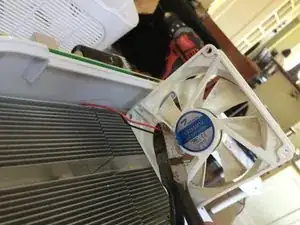
    • Note direction fan is attached. The side with cable lead-in to motor, (and usually the only label or fancier of the two hub labels), that side faces inward towards the heat sink, and the bracket/shroud plate.

    • Don't freak out if you think you can't fish the cable through the shroud the right way. You can pass the whole fan through the shroud hole on the 45º.

    This is crucial! Make sure you put the fan in facing the correct direction. I originally put my new fans in backwards and the unit ran hot. For the Arctic fans, the correct orientation is with the label facing outward and the wiring on the inside.

    Spectacle -

  13. nFIdOchhHWqQBqna
    • It seems to go on easier than it came off.

    • Note cable for 3-way switch goes around corner to right. The fan in this photo was made with slightly different cabling arrangement than described in text.

  14. NIQ641KFD3qOEDjh
    NIQ641KFD3qOEDjh
    1QwPshYKWGy4ZRRD
    wRUXrxZXQPsbXnQi
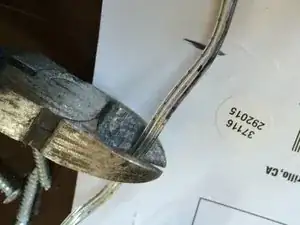
    • Caution. By cutting this flange (and drilling the holes in the next step), you will defeating a safety feature of this unit. In the case of internal leaks, or a water spill by the filler neck, water may now not be captured by the deck, and would be able to flow down onto the electronics area.

    • If you wish to retain the water retainment safety feature, install the 3-way switches differently, or use switchless fans.

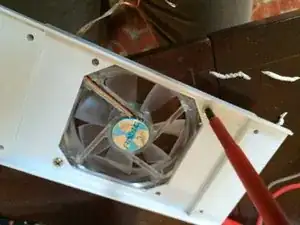
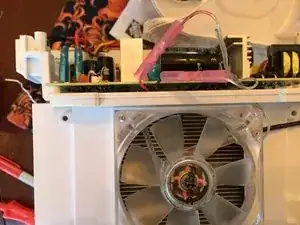
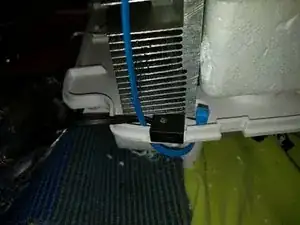
    • The 3-way switch will be positioned so that you can use a pencil point poked through the grill to change the setting after your ChiliCube is re-assembled.

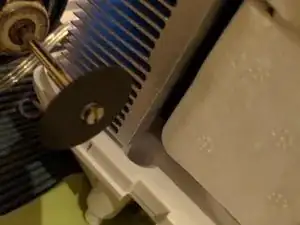
    • You can use a dremel tool to cut part of the flange surrounding the deck. Position the switch and mark, it will be just behind the grill on the front-side of the cube when it is upright.

  15. I1YXs6kVmMAHqSAV
    I1YXs6kVmMAHqSAV
    UsQU5p4LNPHKCWGb
    swx4asaAywAoKObu
    • Again, if you are going to keep the water retaining safety feature, do not drill these holes.

    • It might be possible to use silicon caulk to seal these penetrations, and around the switches. It is just very hard to verify the security of those seals.

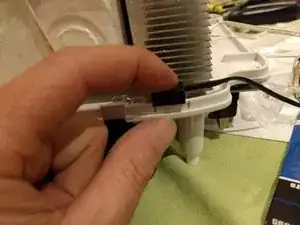
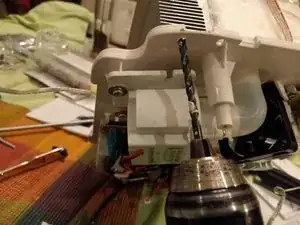
    • Drill two small holes on each end of the where the switch will go, and then loop a cable tie through to hold the switch in position.

  16. u6NNXUxYf4xGCDmC
    • If you have not tested the fans yet, it is recommended that you attach the connector to the fan header on the circuit board, put water in the tank, temporarily re-attach the connector for the ribbon cable to the control panel.

    • You will have to have to turn the cube over to be right-side up so that the float switch lets the unit sense that there is water in the reservoir. This means that the cube will be sitting on top of those open circuit boards.

    • Just be careful about putting your hand near that power supply when you have this plugged in!

    • ...And if you have been resting this on a cookie sheet, find a towel or something else non-conductive so that it is not resting on metal, before you plug it in.

    • Having done all of that, when you plug it in, and turn it on using the control panel on the top, the fans should spin.

    • Please consider clicking on the "AtaBoy" button below even if you are not going to do the fix. This article took a ridiculous amount of my time to photo and write, and its nice for me to see how many people have read it (42 so far!) If you do the fix, please comment below (plus or minus), you'll be helping the next person a lot. Pay forward!

  17. cQHPMeRGCPOPbpvq
    cQHPMeRGCPOPbpvq
    mTZSE1TbG4LEw2Li
    • Unplug the unit after testing, disconnect the ribbon again, and turn it upside down again.

    • Tie down that new cable, so it does not wander.

    • You may find that the 3-way switches seem to be getting too much pressure from the covering grill, if so, you can trim away one rib of grill on each side to protect the switches.

    • Experiment with the 3-way setting for the fans. Medium seems to work just fine, but if you really do not like noise, start with low. At this point, the pump and third fan are beginning to make more noise overall.

    • If you have your temperature setting to "LO", you may need to set the fans higher to maintain the maximum dissipation of heat.

    • If you have sudden hot flashes which need immediate cooling, you may need the fans on high, although the thermal mass of the whole system should moderate those heat swings.

    • Users who select a higher target temperature (especially one above the ambient), will probably find they do not need the higher speeds.

    Great photo of the other part that breaks on the chilipad. When the tubing connector does break from removing it incorrectly, take the screws off both sides and super glue the hook back together or add another material to replace it.

    cwcmindstormer -

    On another note, you can power the fans externally and the unit runs just fine with constantly on fans! I find it less disruptive to my sleep to have steady white noise no matter the temperature.

    nathan.corbett -

    How large was the reduction in noise? subjective/decibel etc? do you have a video/audio of the before and after?

    Tommy -

Abschluss

To reassemble your device, follow these instructions in reverse order.

Netmammal

Mitglied seit: 30/04/15

2111 Reputation

29 Kommentare

I was searching for information on the cube to try see if I could add some wifi or bluetooth control through an Ardiuno or something.. Good work on the guide.!!!

ronkloiber -

Would you share what connections you found/tried for connecting to Arduino type stuff? (Or didn't find)

Dan Bowen -

Dan Bowen, I had not done anything with the WIFI / Bluetooth interfacing, but I just tore down my Cube2 I’ve had just over 2 years. The pump is making wierd sounds. Took it apart and found the shaft end that’s burried deep inside, is worn, but not evenly all around. It worn from 1 side to the center, if that makes sense. Almost like the magnetic pull was pulling the shaft/armature to one side. What I also found is a 433mhz receiver module that I was able to find online. It uses ASK (Amplitude Shift Keying) communication that uses a 433mhz carrier sine wave. To send 1’s and 0’s they send the carrier or not. A decoder is I found this video of a guy explaining it, and using Arduino’s do transmit/recieve a signal. I figure if I can decode the info being send by the Cube remote, I might be able to build a interface using a ESP8266 with built in wifi and a 433mhz transmitter module to send the codes to the cube. Here’s the video: https://www.youtube.com/watch?v=b5C9SPVl...

ron klo -

Also to note, my “good” cube that I bought from Chili has the 433mhz module, while the cube I bought off ebay has some other type module that I could not find info on.. and that ebay cube has a communication problem. It won’t connect with a remote (I have 3 remotes, all work on my good cube). 433mhz modules I bought (99 cents !!!) https://www.banggood.com/315MHz-433MHz-L...

ron klo -

Thanks for this guide! I'm just looking to replace the O-rings, but the photo's helped!

Shawn Johnson -

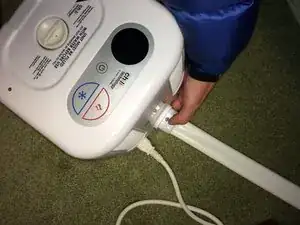
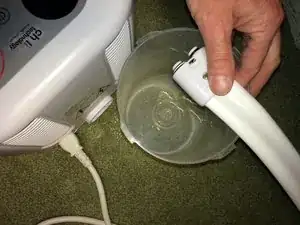
I have had two chili cubes and both developed leaks at connector. First one started leaking badly after a few years. Replaced o-rings but still leaked. Had to buy a new cube and pad. New one started leaking within a few months. ChiliPad said they would look at but since the could not fix the first one I figured they can’t fix the second one. The first system still worked fine except for leak. Decided to directly connect hose tube to pump. Inside connector, I remove internal barb which fits into hose tubes. Cut off end at first o-ring ( to create a pipe) and reinserted it into tubes on hose and silicone elbow at pump. Secured with zip ties as originally used in cube. Fixed the problem. To disconnect hose I have to pull barb out of hose.
Dave Pruner -

Dave- I have an issue at one of my connectors as well. The little “latch” that clips the hose from the mattress pad broke. It worked for a while by just pushing it in and it held anyway. Now though it pushes itself out while it is circulating. I would love to see how you bypassed the connector for a direct hookup. Can you share or create a new guide?

Stephen -

This Dave F. here (the original author), I have not had problems with my connectors, but it is clearly a problem based on the replies I’ve gotten.

That said, it would be great if Dave Pruner or CWCMindStormer or Shawn Johnson could add some guidance. (I’m willing to do the heavy lifting of writing and posting if you give me the photos.)

I recommend that anyone having trouble with the connectors call ChiliCube even if your system is out of warrantee. Secondly, for the hardware hackers, ask ChiliCube to mail you a free adapter they make to empty the pad for storage. This adapter lets you plug the tube from the pad in to and it has most of the parts in it for the cube side of the connection. With this you should be able to replace/repair the cube-side of the connection. If anyone makes photos of this repair, I would be happy to help create a fixit guide for that repair.

Netmammal -

I want to thank my readers for their feedback. When I spent such a ridiculous amount of time two years ago creating these guides, I really thought my OCDness that caused me to spend so much time on this project was bad, and would never get “repaided” by anybody actually reading the guides. I was wrong!

ifixIt sends its guide-writers a report every month telling us how many folks have looked at or used our guides, and I’ve been astonished by the numbers! I even had one reader figure out how to call me and we had a long chat about his project (which he is in the process of writing right now.) This has been a wonderful reward for me.

When I wrote this guide, I was a bit frustrated by Chilicube, but this was based on a single Amazon review. I myself have always found them helpful (if not a little bit slow and erratic.) When I have called them, I have found their support useful & upstanding. It does not hurt to tell them you will soon be writing an Amazon review yourself (not negatively, they’ll get the point.)

Netmammal -

I had the small fan for the pump reach the end of its life and I found a replacement that is very close to the OEM fan. Sunon Maglev MF50152V1-1000U-A99 is a 24V 1.08W fan that is 30.7db. The amperage for the OEM fan is a tough one to find a replacement.

cwcmindstormer -

I just purchased this pump as a replacement.. I’ll let you know how it works out. https://www.ebay.ca/i/372714292144?ul_no...

ron klo -

How did the pump replacement go?

selection989 -

Great guide! I replaced my fans with be Quiet! BL045 with 3-wire connectors:

https://www.amazon.com/gp/product/B00IOI...

No need for a 3-way switch or cutting into the bottom of the case. Just need to take care on wiring and orientation of the fans. The new fans come with 3-pin plugs: ground wire is on the side marked with a “1”, and 12V is in the middle. The other wire is for temperature monitoring and is unused. Just wire the Chili red wire to 12V and black to ground on both fans, then mount one with the label outside, and the other with the label inside.

Christopher Kidwell -

Hi, how much of a difference did that Bl045 fan make?

Zane Lawrence -

this is a complicated work, I better still need to call the mechanical man to solve this. I don’t want to buy a new one

2 player games

alecheld53 -

Hello, great write up! Have you done any videos or testing that quantifies the sound reduction?

brian burdette -

This is an excellent guide! Got the Chili pad a couple weeks ago, and it is great. Wife is not so happy with it because it is to loud. Looking at the two fans mentioned in the original article and the comments, it appears the “be quiet! Pure Wings 2 92mm, BL045, Cooling Fan” is the one to choose. My only concern is the CFM for the be quiet fan (33.15 cfm) may not be enough. Does anyone know what the CFM was for the original fan?

Samuel Eskew -

Greetings, I recently purchased an Ooler with 2 controllers (We unit). Out of the box, one control unit is splendidly quiet while the other one rattles incessantly. It’s been two weeks with repeated phone calls, emails and work tickets via the app and the mfg has been completely non responsive. I’m ready to take matters into my own hands and attempt to repair myself, but there’s nothing online about repairing Ooler units yet. Does anyone have experiences to share? Internally, does the Ooler compare to the Chili Cube? Thank you

Jen Allred -

Hi Jen -

That’s unfortunate that you got a loud unit. Before you open it up (and thus voiding the warranty), you might consider filing a dispute with your Credit Card company and see if they’ll go to bat for you. One other bit of advice: Keep in mind that Covid is causing lots of delays for many companies and their Customer Service divisions. Obviously I don’t know your specifics, but it’s been more than 2-3 weeks without any response, then consider seeking help from your Credit Card people. Good luck!

Phil Sulak -

I know this post is old, but for anyone else in the same situation with a bad fan in an Ooler system, I had an issue with my Ooler system after about 2-3 years. The fan seized up and couldn't keep the water cool. Instead of paying $130 and waiting for the manufacturer to fix it, I found the exact replacement fan on eBay for $21.50 and swapped it out myself. It works like new again. The only caveat is that the connector on the new fan wasn't the same, so I just cut the wires off the old one and soldered it to the new one. Here's a link to the fan if anyone is in the same situation. https://www.ebay.com/itm/125401606126

The fan is model FD1238SL DC 24V 0.17A

I didn't really find any other info about it anywhere, so I hope this helps you get back to a cool night's sleep again.

Jason M -

The Polar unit shares may parts with the Cube, pump is the same, many hoses and possibly the fan.

BRIAN F -

Thank you so much for this guide, Netmammal and friends!

I replaced my fans with the ones recommended by Christopher Kidwell (be Quiet! BL045). They seem to work fine, and are much quieter than the ones that came with the unit. Also, I didn’t have to install the special 3-way switch or do any drilling. I just followed Mr. Kidwell’s instructions and they worked.

So, uh, dumb question for the community: Does it matter which fan is used as the intake, and which is used for the outtake? I didn’t pay attention when I disassembled the ChiliCube... Looking down at the top of the unit, my intake fan is on the left, and my outtake fan is on the right. Is that correct, or should I swap them?

Phil Sulak -

I believe that both fans are sucking the same way (and I have forgotten which way, but I would presume they are just like fans in computers: suck air in, and force it through the heat sink.)

Netmammal -

I recently changed out the fans on my chili cube to the Noctua NF-B9 redux-1600; they are the new gray ones, and at about $10 a fan, the price can’t be beaten. They are so much quieter than the stock ones and push a little more air also. This guide helped a lot.

Side note: I did take the chili cube all the way apart and found that it uses 4 (2 on each side) Peltier coolers (Part # TEC1-12704). They each use about 12v each and, depending on manufacture, about $7 each. Keep in mind that if you remove them, reapplying a thermal paste will be needed as, for some reason, the factory-applied paste was dry on two of them. With the vast temperature change that Peltier pads can do, make sure that the paste can take the cooler temperatures. I applied Arctic Silver 5 as it is what I had on hand. I hope it works if it doesn’t will update this post.

My pump is starting to make a noise, so this weekend, I am changing it out to this 24v water pump from amazon.

I hope this post helps.

jacob shults -

In short, don’t use the pump I listed above. The voltage was correct, but the amp draw was too much, and if I did not check it before long-term running, it would have burnt out the circuit board.

After looking for a few days and figuring out what options I had, I found a 12v circulating pump from https://www.ussolarpumps.com that was able to pump the same amount of water as the original pump of 6kg aka 6 liters’s a min and also stay close to the Amps and not overload the circuit board. Overall, it is quiet and it does work barely; it does push the water through the mattress pad, but not enough flow to keep it as cool as the factory pump. It has kept me from having night sweats. I live in Phoenix, AZ, and summertime, so it’s better than nothing.

US Solar pumps have another B10A-24v-7L version, it costs about $50.00, so I am hesitant to purchase if I can’t find another pump. I am thinking of trying it out.

I will update the post with the direction I took.

jacob shults -

This guide is fantastic, thanks for taking the time.


I made a few tweaks to how I did mine and took <1hr, didn't need the 3 prong connector, and I don't have a voltmeter so didn't use that either. My changes:


- I used the F9 fans but the ones I got had a 3 prong connector (thanks, Spectacle). I just cut off the connector. I left one original fan attached and cut one off. Then trial and error for what wires were what with the unit plugged in to see what wires made the fans spin. Did the first, attached the wires then cut off the other original fan and repeat on the other side. Also used electrical tape to connect the wires.

Benjamin Pickard -

Thanks for the guide, I am running a test after cleaning now. Will probably buy a higher CFM single-speed fan as cooling is where we are having issues.

Michael Schultz -

Hello everyone. First let me thank everyone on here for your valuable information. My pump on the Ooler is very noisy and needs replacement. I bought this 24v model:

https://www.amazon.com/dp/B07KTXL42X?psc...

Mini DC 24V Food Grade Micro Brushless Water Pump 10W for Aquarium Fountain Medical Instruments

I should be installing soon.

I am also going to do the fan upgrade next.

I also have leaking at the quick disconects. Have tried o ring swap with no luck. Thinking of trying these:

https://www.amazon.com/Quick-Disconnect-...

Quick-Disconnect Hose Barb Insert,Plastic Quick Connect Male/Female Coupling Connector,Apply to 1/4" Inner Diameter hose

BRIAN F -

Thank You for your Time GREAT GUIDE!

Corey -