Einleitung

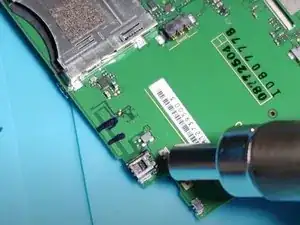
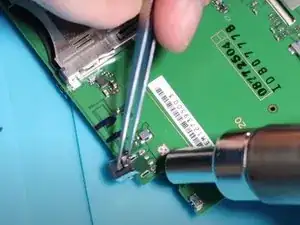
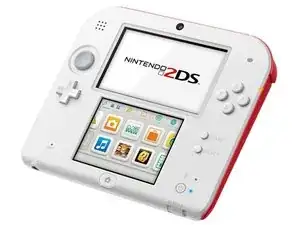
This guide will teach you how to replace a broken or damaged charging port in your Nintendo 2DS

  1. wg4RTxdhgZNOVaab
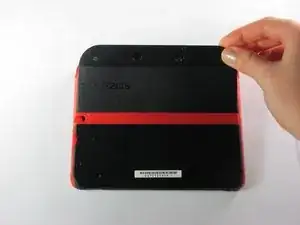
    • Remove the two Phillips captive screws securing the upper rear panel.

    • The captive screws will not completely detach from the back panel.

  2. cdb3AdyJTrNhIjrr
    cdb3AdyJTrNhIjrr
    okYxlIGDUBKBdGNP
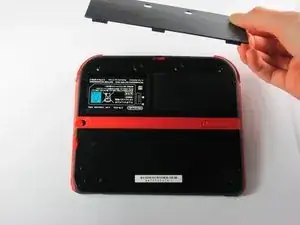
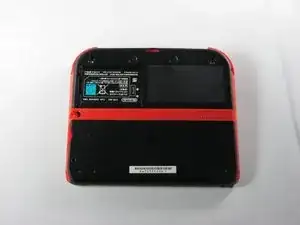
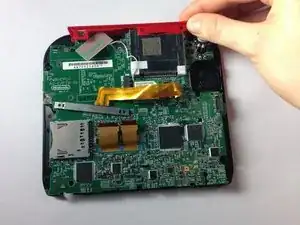
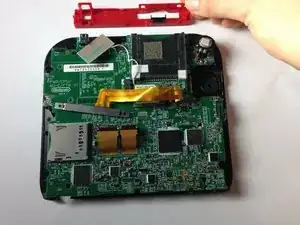
    • Hinge the upper rear panel upwards and outwards to remove it.

  3. YA2mNvc2fLpeZ4NZ
    YA2mNvc2fLpeZ4NZ
    yjKMPFAO1SC1LncE
    HRaiAoWcVXEMByll
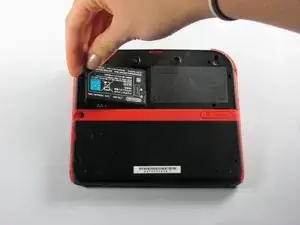
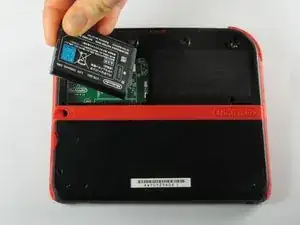
    • Remove the battery from its housing by lifting it up from the side closest to the outside edge.

  4. vkEjnCVvCfkcXpKn
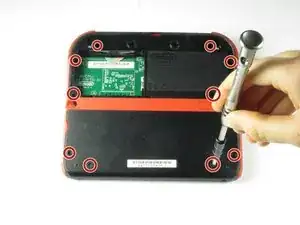
    • Remove the ten Phillips screws attaching the rear panel.

    Can't take off the screw top left next to the battery. What type of screwdriver do I use and where can I find some?

    Little Mac -

    I used a husky with changeable heads, you could probably find one on amazon

    Minecrafter Pig -

  5. ona5d6XElywnV2F6
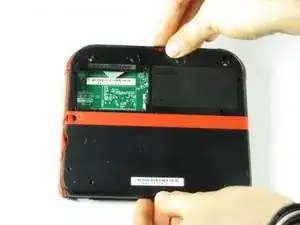
    • The rear panel is attached to the motherboard by a ribbon cable, so be careful not to lift the rear panel too far from the device.

    • Carefully pull the rear panel straight up from the device.

  6. fVKP4KxbkT6Fggne
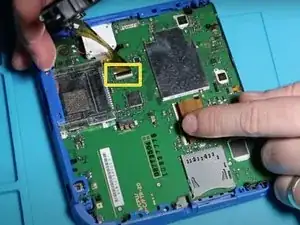
    • Use your fingernail or the flat end of a spudger to flip up the connector securing the ribbon cable to the motherboard

    • Remove the cable from the connector

    • Take the opportunity to remove the Left and Right triggers, they have hinges that may break and springs that may jump away.

    You can also detach the cable from the motherboard safely by flipping up the connector on the motherboard. Just don't forget to reattach. Some will find this tedious but may save time if you know what you're doing with said connectors.

    Blackbeard -

    I agree, this is what the guide i followed said to do and since I was disconnecting all the other ribbon cables it made perfect sense to do it that way.

    Lin -

    pay attention: my 2ds dropped it's lens covers at this step

    Jos van Reenen -

    Likewise, I used a tiny drop of glue to put the lens back in place. Take care not to dirty the lens.

    Elliot West -

    The picture you have there has the camera lens ribbon installed upside down. The ribbon needs to be pointing down when you re-attach it not up.

    Rick Parrish -

    Agreed, ribbon cable looks upside down in picture

    Elliot West -

  7. Qojp1OOvIUVTUr1u
    Qojp1OOvIUVTUr1u
    OuYdgcEvDLpnQV5M
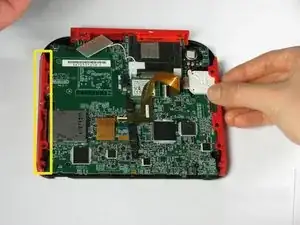
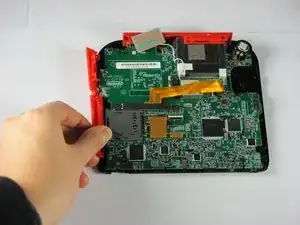
    • Hold the side panels of the device's case with your fingers and pull outward to remove them.

    • The panels should come off easily with little force required.

    When reattaching during reassembly, take great care to ensure volume slider piece is correctly aligned with potentiometer tab on motherboard, otherwise volume control cannot be changed.

    Elliot West -

    The are two small metal pins in the bottom corners of the case, take care not to misplace them.

    Elliot West -

    The (3?) small ribbon cables on the bottom of the motherboard appear to already have been unplugged in this step. unplug them while unplugging the two large screen ribbon cables in step 10

    Lin -

  8. 32gGatrJYXi2eqcW
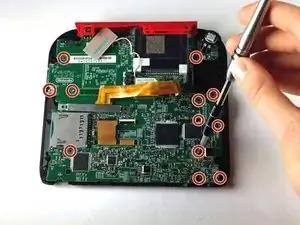
    • Remove the 12 brass-colored Phillips screws securing the main board.

    • Be very careful not to strip any of these screws. Stripping can occur very easily, and may make replacement of the motherboard impossible.

    ...also in this step, the pictures show the analog stick disappearing without a step to remove its two silver screws.

    Roger -

    I was using a brand new 000 driver, and found that I needed to dull the tip of it in order to get a better grip on these tiny screws.

    marjames -

    I dont know if its just me but my gold mother board screws i had a few that just didnt fit right with a ph000. Maybe my screw driver is just garbage?

    Mark Damien English -

  9. drj5COHLRB5bNu4x
    drj5COHLRB5bNu4x
    a5TIRFcWDcCjkH4k
    QFD1osmhxQpPJTkF
    • The top panel can only be removed when the mother board is not secured.

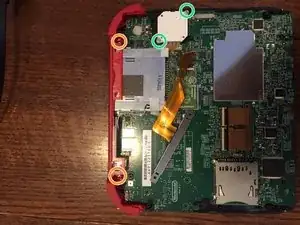
    • There are two additional screws located on the top rail. Remove these to fully remove the buttons and top rail.

    • There are two screws holding down the joystick base that must be removed. (Be careful of the ribbon cable—it stays connected!)

    • Hold the top panel with your fingers and pull away from the device to remove it.

    • The top panel should come off easily, with very little force applied.

    There are two additional brass screws holding the top panel plastic on to the frame. They are 00 Philips and shorter than the ones securing the motherboard.

    Roger -

    When reassembling, take care to ensure all buttons, and rubber button pads are located correctly BEFORE securing the motherboard.

    Elliot West -

  10. JKQgNplHbIPXEZdK
    JKQgNplHbIPXEZdK
    14GOAGZYrKXdPMfo
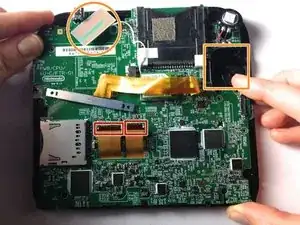
    • Detach the 2 ribbon cables by lifting the black flip connectors that hold them.

    • Lift out the rectangular board seated in the face and lift out the white square which is the joystick motor (takes a little effort). Both stay attached to the motherboard.

    • On some models, you'll need to remove three more tiny ribbon cables at the bottom of the screen. They are secured by flip up connectors. BE GENTLE!

    • Holding the motherboard on either side, lift to remove it.

    Don't forget to disconnect the two tiny ribbon cables on the bottom of the motherboard that attach to the microphone and home button.

    Roger -

    What happens if I can't get the ribbons to reattach? Is the board broke irreparably?

    Laurie Hutcherson -

    ...as well as the hidden 4-conductor ribbon cable on the upper right that connects to the analog stick.

    Roger -

    What about the top 2 wires

    briana1987be -

    Briana the 3 wires on bottom of board are covered under screen 2 step 10.

    goldenkenneth -

    y e e t y e e t m y d u d e s ! ! ! ! ! ! ! ! ! !!n ! ! ! ! ! ! ! ! ! !

    scoobert doobert -

    The replacement board that I’ve got has not got a grey plastic flip down ribbon cable retainer! How do I swap one from my old board?

    JoeStoner -

    The motherboard of my 2017(I think) 2DS is definitely laid out differently than in this guide, be careful.

    Matthew D. H. -

    Cosa succede se i connettori dei 3 piccoli cavi piatti si dovessero rompere??

    00 Jumpscare -

    How do I flip up the two ribbons ( need help desperately)

    Abbigail Brogden -

  11. MvBgZfmfBhO22gGR
    MvBgZfmfBhO22gGR
    lCVKtiImPvQl5icC
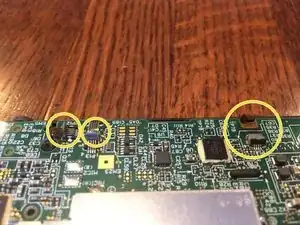
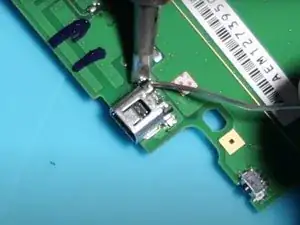
    • Desolder and remove the charging port

    • Don't try to force the port off the board. If it's not coming off, the solder isn't fully melted

  12. doEQOdBASqUb4XSA
    • Set the new port in the board, then solder it in place

Abschluss

To reassemble your device, follow these instructions in reverse order, starting at step 10
Nick Myers

Mitglied seit: 15/04/18

3083 Reputation

0 Kommentare