Einleitung

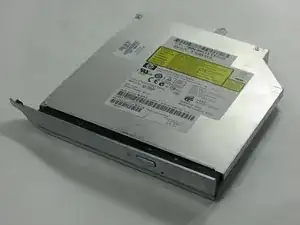
This guide will show you how to safely remove the CD/DVD optical drive in the laptop.

  1. vtV4FnA3p3etcuHR
    vtV4FnA3p3etcuHR
    RvRLWFafJEWwYgxm
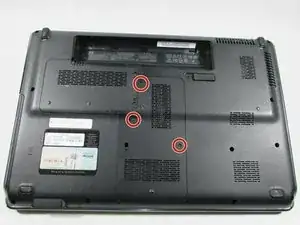
    • Flip the computer around to the back side.

    • Remove the three screws from the memory module cover.

    • Screws will not come out all the way.

    • All screws to loosen/removed in this guide will require a Phillips #01 screwdriver.

  2. vXDBSFYRFJdGFUoR
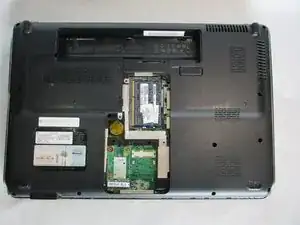
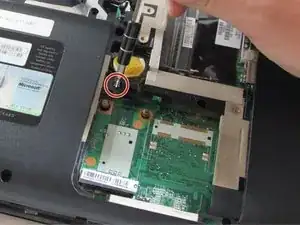
    • Remove the screw completely from the memory module panel to help release the Optical drive from the body of the computer.

    • The screw is 7mm long and head is 4mm wide.

  3. S2oKgV1fDa35PRCc
    S2oKgV1fDa35PRCc
    iRLxwXC4ljrmbwwg
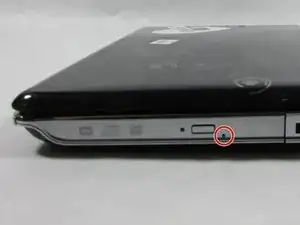
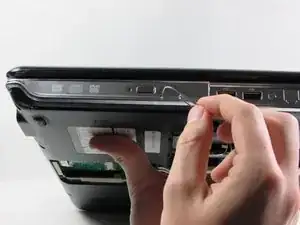
    • Locate the small hole next to the eject button.

    • Get a paper clip and insert in to the small hole until you hear a clicking sound and seeing the tray pop out.

    • Before removing the optical drive, be sure that there is nothing in the drive. Optical drives are fragile so handle with care.

  4. YMBbO1bAQEuYpkEk
    YMBbO1bAQEuYpkEk
    tt3dJp6BKvg2KrX6
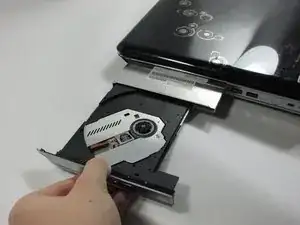
    • Gently pull the Optical drive out of the slot until the whole thing comes out.

Abschluss

To reassemble your device, follow these instructions in reverse order.
Joseph Sanda

Mitglied seit: 10/03/16

519 Reputation

0 Kommentare