Einleitung

Tausche den schwachen Akku aus, damit dein Smartphone wieder Power hat.

  1. Q2x5M4ClsCRDapWN
    Q2x5M4ClsCRDapWN
    fvObMHawhXRQoU6Z
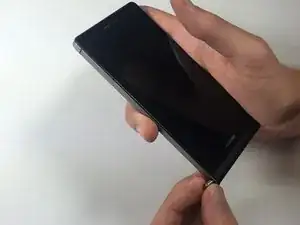
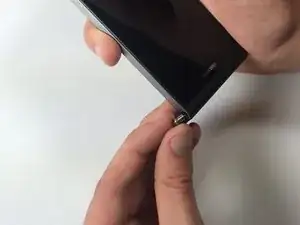
    • Ziehe und drehe den Pin links unten am Smartphone, um ihn aus der Kopfhörerbuchse zu entfernen.

    • Huawei Ascend P6

  2. LbIExr6L1V5sBuTe
    LbIExr6L1V5sBuTe
    yKSJLlbv6mgaIFdG
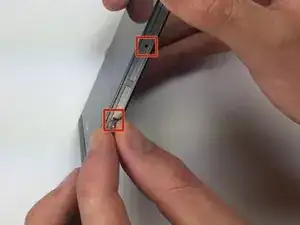
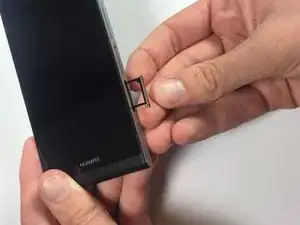
    • Führe den Pin in das Loch im SIM-Karten Fach ein.

    • Vorsichtig drücken bis die SIM-Karte klickt, dann ziehe den Pin und die SIM-Karte heraus.

    • Wiederhole den Vorgang für das zweite Fach.

  3. XFIKmrJcrls5M5nB
    XFIKmrJcrls5M5nB
    ZAXA6IZKjRNBBeyH
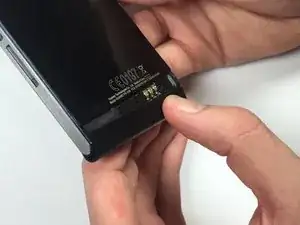
    • Drücke etwas auf die schwarze Plastikabdeckung unten am Smartphone und ziehe sie nach unten.

    • Du brauchst vermutlich ein dünnes, scharfes Hilfsmittel, um die Abdeckung zu lösen.

  4. tI4cnP5ZbJjNJBFf
    tI4cnP5ZbJjNJBFf
    pxK1sXccy1UPjAUm
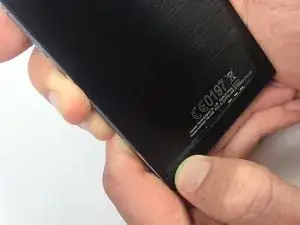
    • Drehe das Smartphone um 180°, so dass die Unterseite nach oben zeigt.

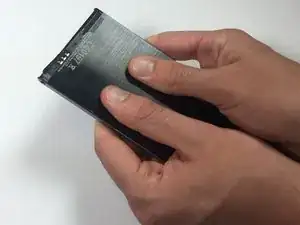
    • Drücke die Rückseite mit deinen Daumen kräftig nach oben.

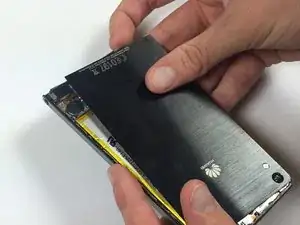
    • Hebe die Rückseite von der oberen rechten Ecke ausgehend an und ziehe sie vorsichtig vom Smartphone weg.

  5. bYUfEODU3bVYhYah
    bYUfEODU3bVYhYah
    a5h6SRSv6XVGxjSi
    VQCigwELMJHDJ2r5
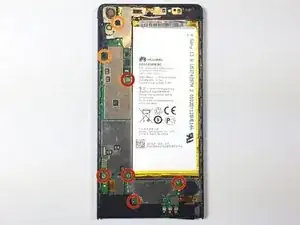
    • Entferne folgenden Schrauben, die das Logic Board am Rahmen befestigen:

    • Fünf 2 mm Kreuzschlitzschrauben #000

    • Zwei 2,5 mm Kreuzschlitzschrauben #000

    To replace the battery only the two orange 2.5mm screws need to be removed in this step.

    Jarl Friis -

  6. arI1QSHC2ADenSSD
    arI1QSHC2ADenSSD
    YnpFRUjtC1VlhMrL
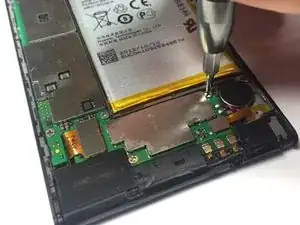
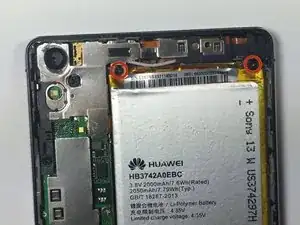
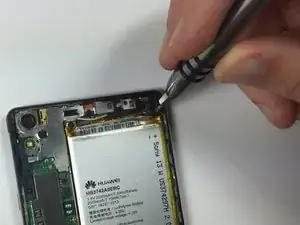
    • Drücke die gelbe Plastikauskleidung oben am Akku nach unten und entferne die beiden 2,5mm Kreuzschlitzschrauben #000.

  7. HSjBiT6qOPZm5JQW
    HSjBiT6qOPZm5JQW
    KuutUTUluVP33SAt
    oDeluOHGqovn3hkV
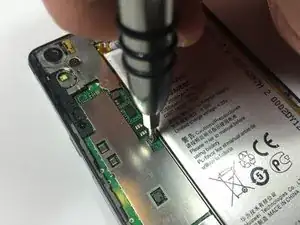
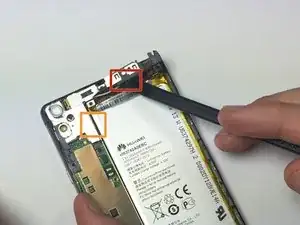
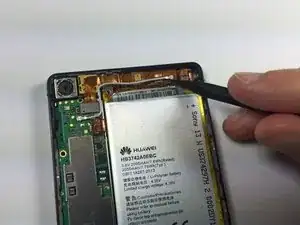
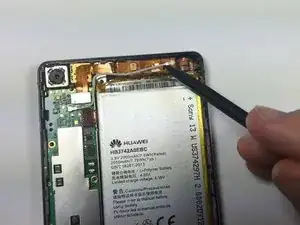
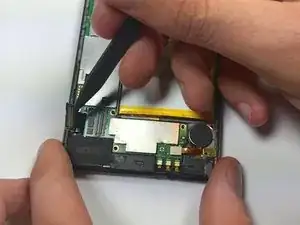
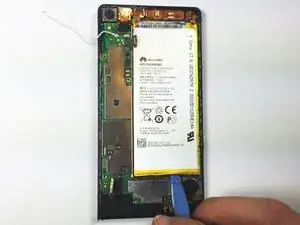
    • Benutze das flache Ende eines Spudgers, um den ersten Clip an der rechten Abzweigung der Halteplatte vorsichtig aufzudrücken.

    • Benutze das flache Ende eines Spudgers, um den zweiten Clip an der linken Abzweigung der Halteplatte aufzudrücken.

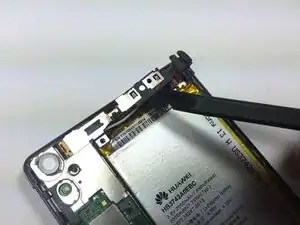
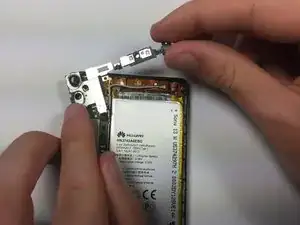
    • Benutze nun wieder das flache Ende des Spudgers, um vorsichtig die obere Halteplatte vom Smartphone zu heben.

  8. LKcVhMl1KtSxILaM
    LKcVhMl1KtSxILaM
    CIwcuSRNRZcYZiDy
    cjxpveB3CFfQ3GVu
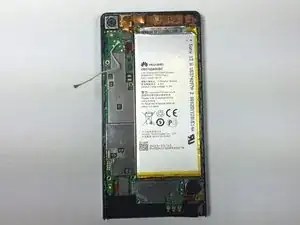
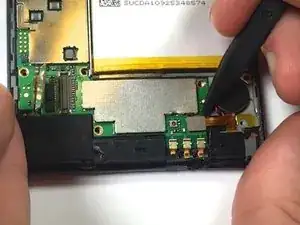
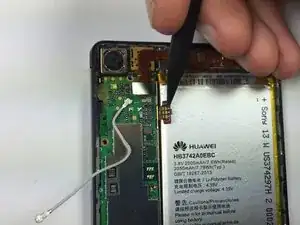
    • Benutze das spitze Ende eines Spudgers, um das Antennenstecker von seinem Anschluss zu trennen.

    • Beim Zusammenbau solltest du hier ein deutliches "Klicken" hören, was ein Zeichen für das erfolgreiche Verbinden des Steckers ist.

  9. nQoBLoDjLyEfRGOs
    nQoBLoDjLyEfRGOs
    nHcbdZgIVZBfRNGW
    VSaRJjqwrDb6yLkC
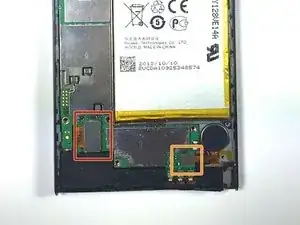
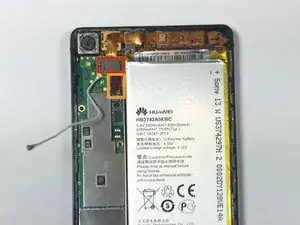
    • Benutze das spitze Ende des Spudgers, um vorsichtig folgende Stecker aus ihren Anschlüssen zu hebeln:

    • Silberner LCD Kabel stecken

    • Silberner Kopfhöreranschluss Kabelstecker

  10. 5QQhP6FCFWttJX3l
    5QQhP6FCFWttJX3l
    YGiRUKiBJUrShYlm
    dBtsLVjMLVfHTRfD
    • Benutze das spitze Ende eines Spudgers, um folgende Stecker vorsichtig aus ihren Anschlüssen zu hebeln:

    • Silberner Micro-USB Kabelstecker

    • Kupferner Akku Kabelstecker

  11. nryNKwEdSyCm3vkt
    nryNKwEdSyCm3vkt
    ManLFBStDG1ebNEs
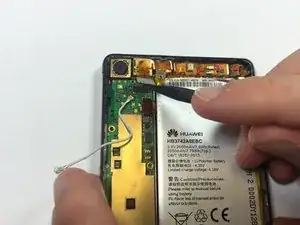
    • Achte darauf, den Akku nicht zu biegen, zu durchstechen oder zu brechen. Der Akku kann bei Beschädigung giftige und entflammbare Stoffe freisetzen.

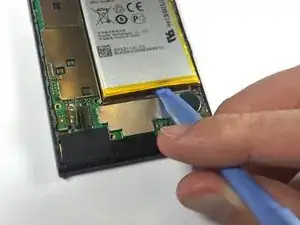
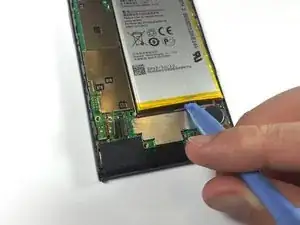
    • Benutze ein Plastiköffnungswerkzeug, um den Akku vorsichtig vom unteren Ende nach oben zu heben.

    • Du musst eventuell den Kleber unter dem Akku durch langsame Sägebewegungen lösen.

Abschluss

Um dein Gerät wieder zusammenzubauen, folge dieser Anleitung in umgekehrter Reihenfolge.

Chase Hemming

Mitglied seit: 14/10/14

2623 Reputation

10 Kommentare

Thanks! Easy to understand, I needed about 30 Minutes...

Max -

what is the purpose of step 9?

Nicolas -

Great instructions. I tried it and it worked.

A few additions: when removing the first piece, I couldn't find a purpose in squeezing the main section. On opening it, I found the small black section you first have to remove has tiny plastic clips at each of the four corners, so maybe pressing the main section of the back in the middle helps tilt the back section so that the bottom of the back section is raised up ever so slightly to help release the tiny plastic clips on the first piece.

I suggest when you have prized off a piece, (the electronic connnections, not the phone back cover) try putting it back again immediately and taking it off again. This helps you know if it is going OK when you finally put it back again.

See next post
Ricky Man -

I found there some of the screws and pieces to prize off that I couldn't see why they needed to be undone, but hey, it worked fine.

When it comes to taking the battery out, it took a lot of gentle movements to release it from the strips of glue sticking it along its back face to the rest of the phone. Yes, first run something along the bottom edge back and forth to remove glue there, but the main glue is on the back face. I used a plastic tool to go a short distance up each side of the battery too, so it was easier to lift the corners of the battery slightly. Then you have to keep moving it bit by bit trying to raise it slightly, wedging something into the bottom gap. Once you can slide something just underneath the bottom edge, its a case of gradually pressing the wedge under the battery and moving it side to side to gradually release a bit more glue and so on.

Ricky Man -

My big problem came when putting the back of the phone on again. I squished the tiny clips on one side so that instead of being L-shaped they doubled up on themselves, so they wouldn't clip back into place. I'd suggest you do what I wish I'd done, and study the clips with a magnifying glass, so you can see how they go in. There are three clips at the top edge that slide in first, then gradually work your way back equally down each side. Some of the clips are just straight, and fit into tiny slots, while the L-shaped ones make a snapping sound as they clip in. On one of the bottom corners there is a clip with a hooked end, but that fitted in OK. I fixed the problems with the L-shaped clips getting bent double by shoving a needle in one end of the mess, and then in the other end, until the mess straightened out back into an L. If you have this problem, you might also need to straighten up the L with some small pliers.

Ricky Man -

I bought the kit for opening phones that was advertised, including the spudger, plastic opening tools and things that look a bit like a guitar plectrum, and these tools worked a treat. I don't know how I'd have got it all done with conventional tools.

If you try this, good luck. It took me about an hour and a half, but lots of that was fixing the back cover at the end.

I got a very happy daughter at the end though.

Ricky Man -

Now I've seen this video and find there is another trick to opening the back. Watch and be pleased you did - you are supposed to slide the back down a little once you've released the bottom few clips, and that releases all the others. Wish this had been in the instructions above !

https://www.youtube.com/watch?v=_BNnPX_Z...

Ricky Man -

It is VERY Important, that if you insert the replacement screen, you make sure all electronic party on it are isolated with a foil or something similar (scotch tape works fine) otherwise the touchpad won't work.

geul -

thx i did it ....you are awsome..

DiVyEsH TaNdEl -

Schritt 5 / rot markierte Schrauben entfernen? Warum?

Schritt 8 / Antennenkabel lösen? Warum?

Schritt 9 / LCD- und Kopfhörer-Stecker lösen? Warum?

Schritt 10 / Micro-USB-Stecker lösen? Warum?

Um den Akku zu tauschen, sind das doch vollkommen überflüssige Arbeitsschritte. Das verwirrt nur…!

blubbs -