Einleitung

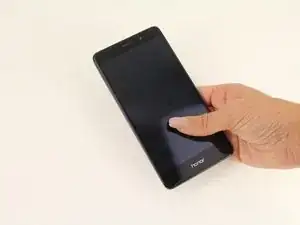
If the front camera on your device is failing or blurry you may need to replace the assembly. This guide will follow you through the steps required to open your device to get to the front camera.

  1. kuwIeijVmH4jm1VK
    • Turn off the device.

  2. KpsZEIp31MDeJdU6
    KpsZEIp31MDeJdU6
    PsmlrOAeslMMSEsg
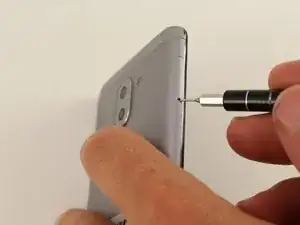
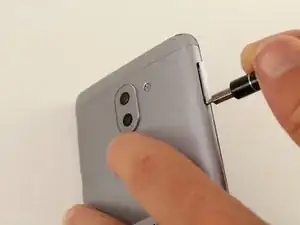
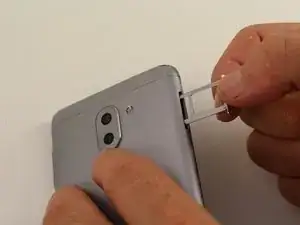
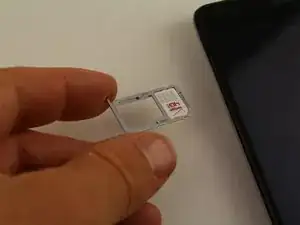
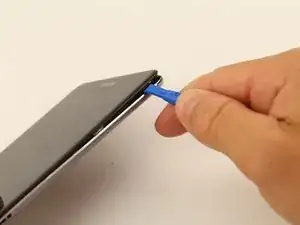
    • Insert the SIM Card Eject Tool into the SIM card tray hole.

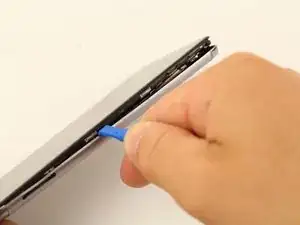
    • Press the eject tool into the hole until the tray clicks open.

  3. HWYfZebxJAGrZKNn
    • Remove the SIM tray from the device using two fingers.

    • When reinserting the SIM card, be sure it is properly aligned with the SIM tray.

  4. i26Y3dL6F1UxG6I1
    • Remove the SIM card from the compartment using two fingers.

  5. aEIcQnbdj54FsUjZ
    aEIcQnbdj54FsUjZ
    heDAAV6NC2VSgwlG
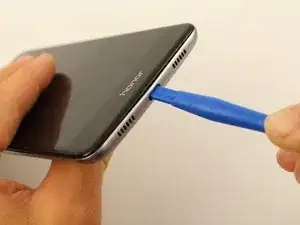
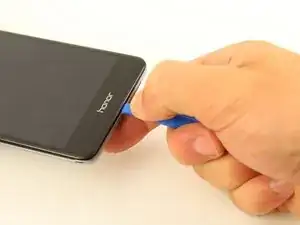
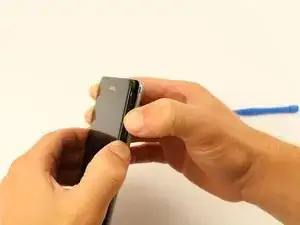
    • Insert a plastic opening tool into the Micro USB charging port with the the angled side of the tool facing the screen.

    • Pry the screen off the back of the phone by pushing down on the opening tool.

  6. pZCoWJljbHgUHOcM
    pZCoWJljbHgUHOcM
    jlooiTmCa6HJSLpA
    lDDhuWwdRwZUyyng
    • Slide the opening tool or spudger along the bottom of the phone and around the edge.

  7. EJEFrqp1Yt2Epgdp
    EJEFrqp1Yt2Epgdp
    MAcRBWU1imDEJIvP
    • Once three sides of the screen are detached, pry the phone apart using two hands.

    • When separating the back panel from the screen, do not pull them too far apart. There is an interconnect that is attached to both sides that could break, or tear, if pulled too far.

  8. T2NJB6exynOgcKgp
    T2NJB6exynOgcKgp
    AOGCLZVtYB1XUG2T
    aeex1HCutMWxW2jS
    • Remove the five 4mm Phillips #00 screws using a screwdriver.

  9. QaNYi3ysDSio4XXF
    • Remove the motherboard cover from the device using a spudger or your fingers.

    Always wear ESD Gloves before handling Motherboard.

    anti-static or electrostatic discharge (ESDgloves protect workers and the environment around them .

    Imran Khan -

  10. kFFBjROFCsAq4h5f
    kFFBjROFCsAq4h5f
    1cH2uNOtVZGADwXR
    ZGsmMq2CUH2Ok2JK
    • Pry the seven connectors off using a spudger or your finger.

  11. OHSxdkr2Nx5DDKb1
    OHSxdkr2Nx5DDKb1
    JOBZWwADPYvQl54N
    qvRjRbWyQil42ZPG
    • Remove the four 2 mm Phillips #00 screws.

  12. q3i5PR3ZxcXEqvS5
    q3i5PR3ZxcXEqvS5
    fS2BGVQAvlSZSOug
    • Lift the motherboard off of the phone using a spudger or two fingers.

    • The left side of the motherboard has a strip of rubber that may need some prodding from a spudger to remove.

  13. 2hrASexf6mX2OEIv
    2hrASexf6mX2OEIv
    Q5C3MQpQGwZCyYNa
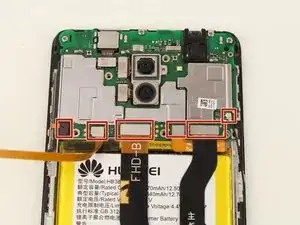
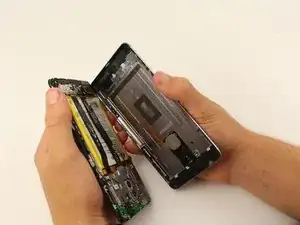
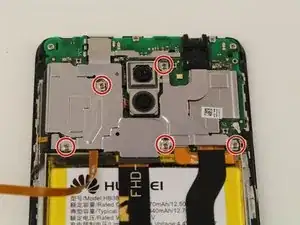
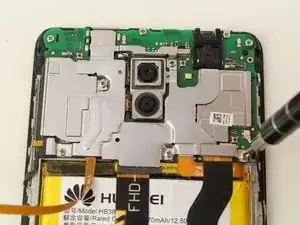
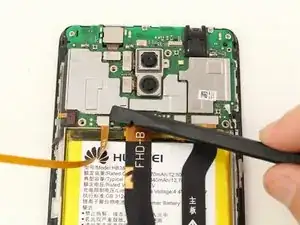
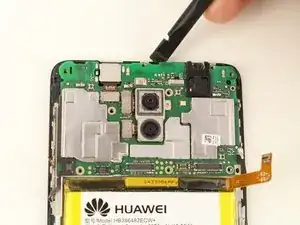
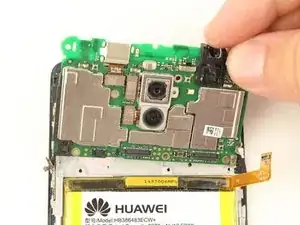
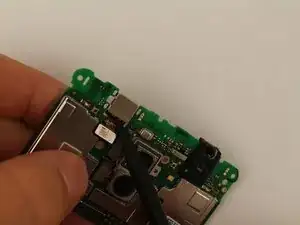
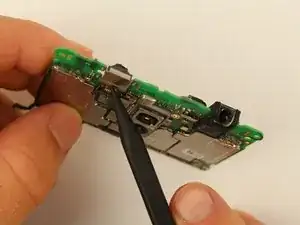
    • Remove the cable connecting the camera from the motherboard using a spudger or your finger.

  14. tqRNxTQeXVJpiDvB
    tqRNxTQeXVJpiDvB
    2RwTKufbInGXPjte
    qXmi2giCrCYSChdE
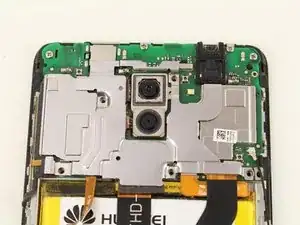
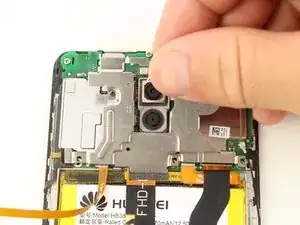
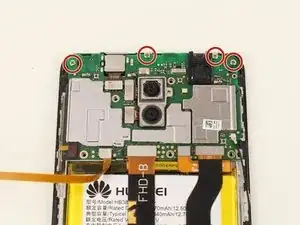
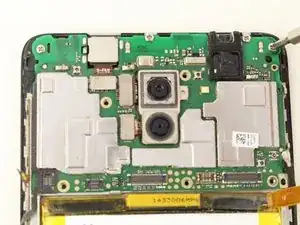
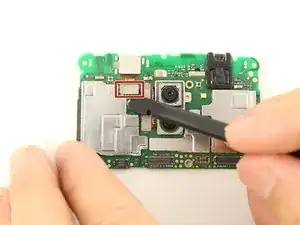
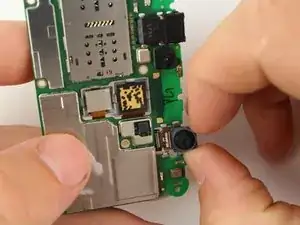
    • Remove the front camera out from the motherboard by pushing on it with the tip of a spudger.

    • This is best done from the back side of the motherboard and pushing where the cable meets the camera.

Abschluss

To reassemble your device, follow these instructions in reverse order.

Tessa Kemper

Mitglied seit: 08/10/18

591 Reputation

0 Kommentare