Einleitung

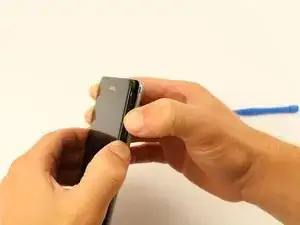
If your screen becomes cracked or is inoperable, the front display panel will need to be replaced. This process involves removing nearly every component of the phone before gaining access to the front display panel.

  1. kuwIeijVmH4jm1VK
    • Turn off the device.

  2. KpsZEIp31MDeJdU6
    KpsZEIp31MDeJdU6
    PsmlrOAeslMMSEsg
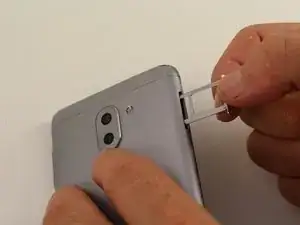
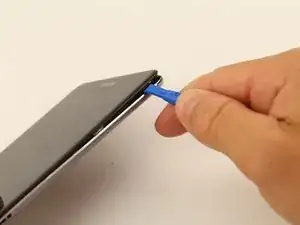
    • Insert the SIM Card Eject Tool into the SIM card tray hole.

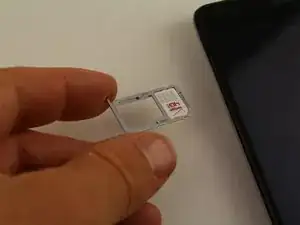
    • Press the eject tool into the hole until the tray clicks open.

  3. HWYfZebxJAGrZKNn
    • Remove the SIM tray from the device using two fingers.

    • When reinserting the SIM card, be sure it is properly aligned with the SIM tray.

  4. i26Y3dL6F1UxG6I1
    • Remove the SIM card from the compartment using two fingers.

  5. aEIcQnbdj54FsUjZ
    aEIcQnbdj54FsUjZ
    heDAAV6NC2VSgwlG
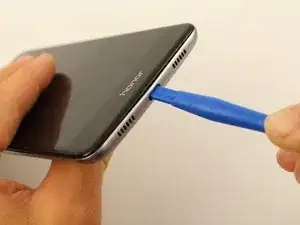
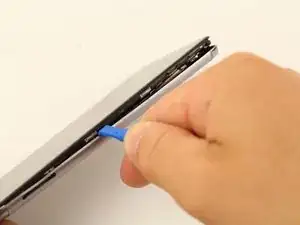
    • Insert a plastic opening tool into the Micro USB charging port with the the angled side of the tool facing the screen.

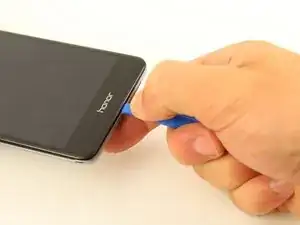
    • Pry the screen off the back of the phone by pushing down on the opening tool.

  6. pZCoWJljbHgUHOcM
    pZCoWJljbHgUHOcM
    jlooiTmCa6HJSLpA
    lDDhuWwdRwZUyyng
    • Slide the opening tool or spudger along the bottom of the phone and around the edge.

  7. EJEFrqp1Yt2Epgdp
    EJEFrqp1Yt2Epgdp
    MAcRBWU1imDEJIvP
    • Once three sides of the screen are detached, pry the phone apart using two hands.

    • When separating the back panel from the screen, do not pull them too far apart. There is an interconnect that is attached to both sides that could break, or tear, if pulled too far.

  8. T2NJB6exynOgcKgp
    T2NJB6exynOgcKgp
    AOGCLZVtYB1XUG2T
    aeex1HCutMWxW2jS
    • Remove the five 4mm Phillips #00 screws using a screwdriver.

  9. QaNYi3ysDSio4XXF
    • Remove the motherboard cover from the device using a spudger or your fingers.

    Always wear ESD Gloves before handling Motherboard.

    anti-static or electrostatic discharge (ESDgloves protect workers and the environment around them .

    Imran Khan -

  10. gY24MdlxUM4aK6Ui
    gY24MdlxUM4aK6Ui
    NRqPCvNM6COHmXWn
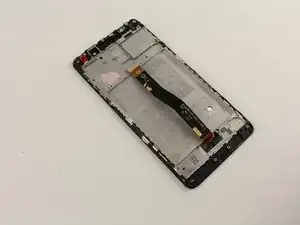
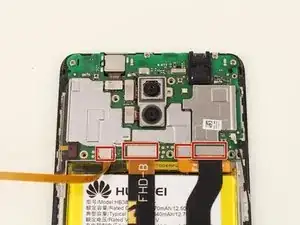
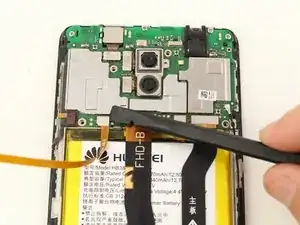
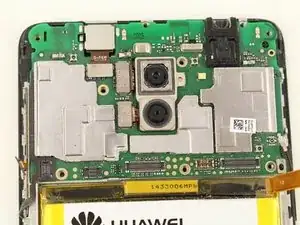
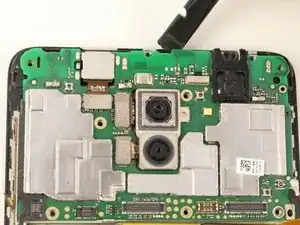
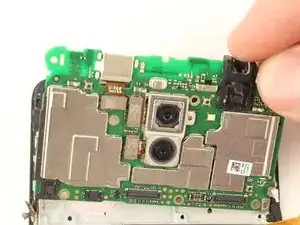
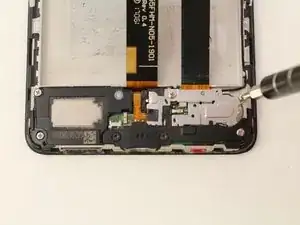
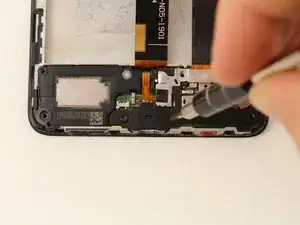
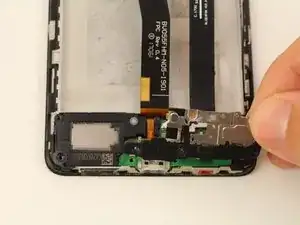
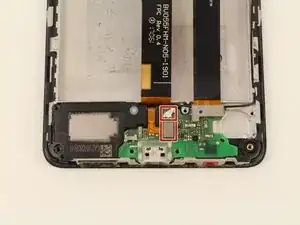
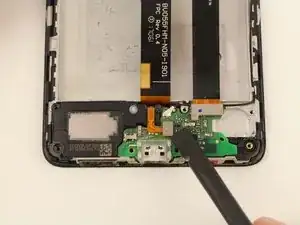
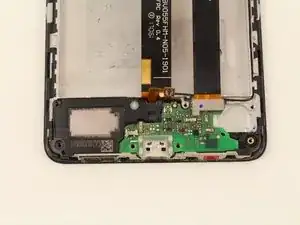
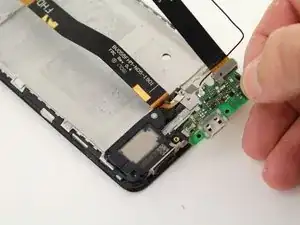
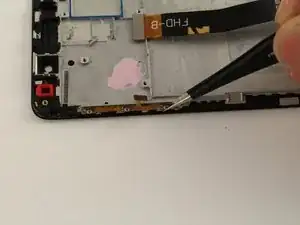
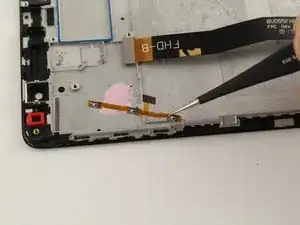
    • Remove the four connectors by placing the spudger between the motherboard and the connectors.

    • Press upwards against the connectors until they disconnect.

    • The connectors will make a "click" sound when disconnected.

  11. sWPtACeCYPjCXiBR
    sWPtACeCYPjCXiBR
    ZK5mVMEZdKwc4ipB
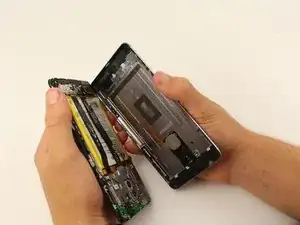
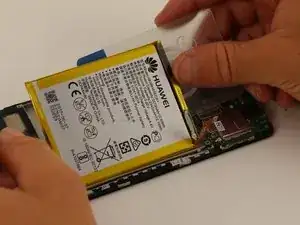
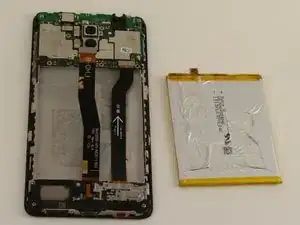
    • Remove the battery by first prying a spudger between the battery and the screen.

    • Slice through the adhesive by pushing card around and underneath the battery.

    • The adhesive is fairly strong, so make sure to press firmly against the adhesive.

    • Do not excessively bend the battery. Bending the battery too much can cause it to break and even catch fire.

  12. bErwOEd2r1MhIN1w
    bErwOEd2r1MhIN1w
    ymiancxVdxPrepFD
    • Using the plastic card, remove the battery by lifting it from the casing.

  13. vrKHYpZEkR2OXBZq
    vrKHYpZEkR2OXBZq
    OoEDIAErrNiKcMMo
    • Remove the last two connectors from the motherboard using a spudger or your fingers.

    • All cables should now be detached from the motherboard.

  14. QA5UhysLSusMZjBj
    QA5UhysLSusMZjBj
    som1ZgGmPUZCjtOm
    ChxrbO2xqmyJBHiC
    • Remove the four 2mm Phillips #00 screws.

  15. AUHXZVWtSVBIpKHn
    AUHXZVWtSVBIpKHn
    fMw6g4SNnIPIG1EP
    • Gently lift the motherboard from the phone using two fingers or a spudger.

  16. QFDNOBEhsfn311fG
    • Remove the speaker using the tip of a spudger.

    • The speaker may need to be re-glued during reassembly.

  17. JPU3y3stHRVitbcc
    JPU3y3stHRVitbcc
    ponmHtEuRSBVtrNM
    LVeXHbyfXZDY2t3y
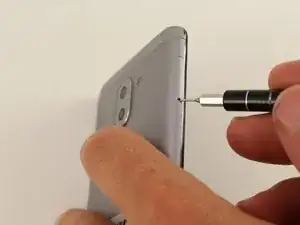
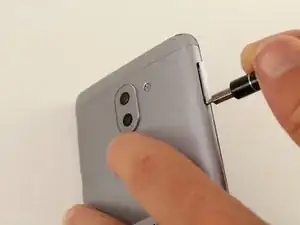
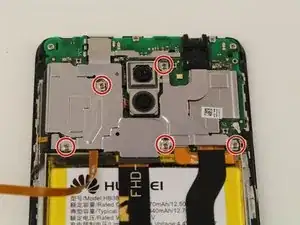
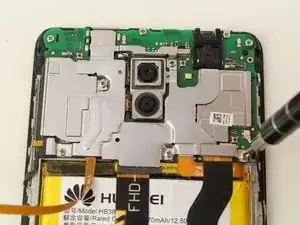
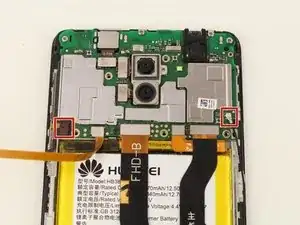
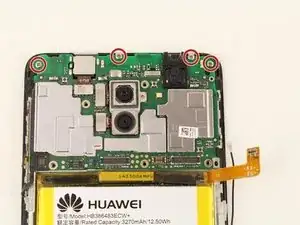
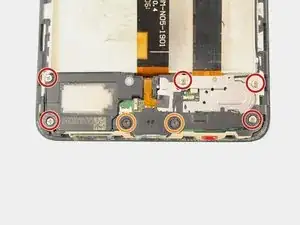
    • Remove the five 2mm Phillips #00 screws using a screwdriver.

    • Remove the two 2mm #5 Torx screws using a screwdriver.

  18. YQKhoOADOWSLxHXK
    YQKhoOADOWSLxHXK
    ZFhjQsJyVKPLPfyd
    • Remove the metal plate from the vibrator assembly using a spudger.

  19. KFGtUYyAbaFDqiRY
    KFGtUYyAbaFDqiRY
    rLoF1AqDRXqQtd4E
    EynHVRwSv6McpC4o
    • Snap the two connectors off using a spudger or your finger.

  20. yIsxq1ohnxHu2jjL
    • Pry the micro USB port off of the phone using a spudger.

  21. DSCwJ2JCvk365q52
    DSCwJ2JCvk365q52
    ycnTX25xAZKNoYYD
    uqROPIrMWfmtQSbk
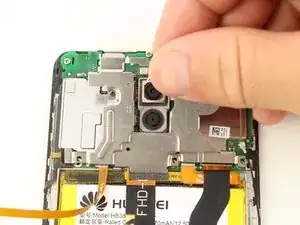
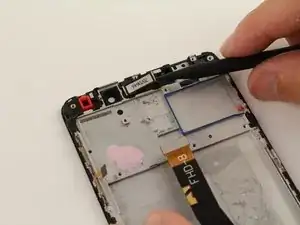
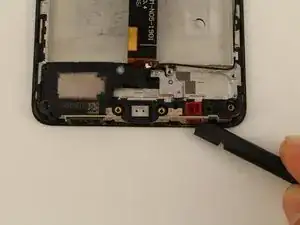
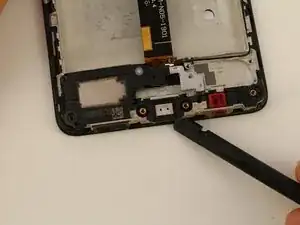
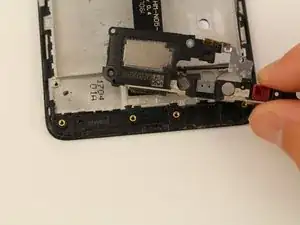
    • Pry the speaker and microphone assembly off of the phone by sliding a spudger down along the bottom.

  22. 1uSVHwYqBkBiuJBo
    1uSVHwYqBkBiuJBo
    2WQpEDRmnBZWf5Ls
    • Pull the volume buttons off using tweezers or the end of a spudger.

    • It may take a bit of wiggling and poking to get through the adhesive.

Abschluss

To reassemble your device, follow these instructions in reverse order.

Tessa Kemper

Mitglied seit: 08/10/18

591 Reputation

0 Kommentare