Einleitung

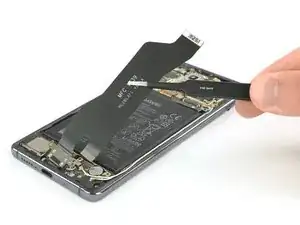
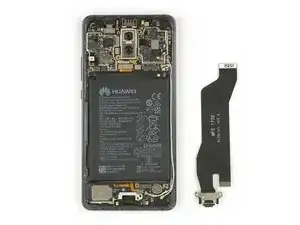
Diese Anleitung zeigt dir, wie du die Ladebuchse austauschen kannst.

  1. rg3xpGgvKOjMBPWO
    • Schalte das Smartphone aus.

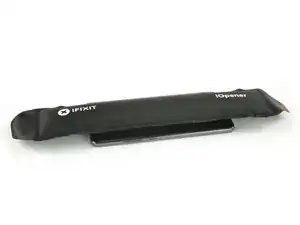
    • Erwärme einen iOpener und lege ihn etwa zwei Minuten lang auf die Rückseite des Smartphones, um den Kleber unter der Rückabdeckung zu lösen.

    Erm… Simply impossible to open the phone this way…

    I used the iOpener for 2 mins as instructed, I’ve used even an hair drier for 30 secs on max power (could barely touch the phone after) and still with the suction tool I was not able to open the phone.

    It simply doesn’t budge!!!

    Miguel Oliveira -

  2. vJVBYc2fWjWoTSNG
    vJVBYc2fWjWoTSNG
    wgXxR6VJO4alrBKR
    illPhNTBeVFxigjt
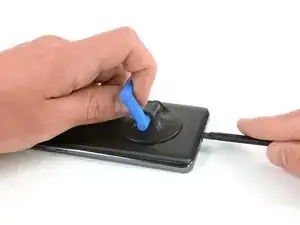
    • Hebe die Rückabdeckung mit einem Saugheber hoch, bis du die Hellebardenklinge eines Halberd-Spudgers einsetzen kannst.

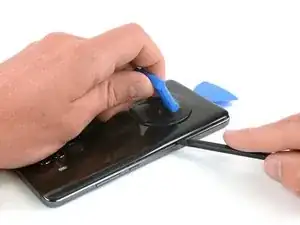
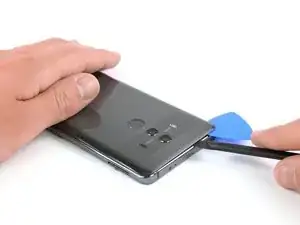
    • Trenne den Kleber unter der Rückabdeckung rundum mit dem Halberd-Spudger auf.

    • Setze Plektren ein, so dass sich der Kleber nicht wieder verbinden kann, während du an anderer Stelle arbeitest.

    Faire attention à ne pas enfoncer trop le cutter/spatule hallebarde. Surtout à l’approche des boutons ON/OFF et volume, la nappe ne passe pas loin et se branche à coté de l’empreinte digitale.

    Bilan, j’ai coupé cette nappe et n’ai plus de bouton volume et on/off.

    Plus qu’à chercher la piece de rechange pendant que le telephone est ouvert ;)

    NeoX -

  3. C5QkPmrDkMAECFTO
    C5QkPmrDkMAECFTO
    lV1jdUdq1oorWMA2
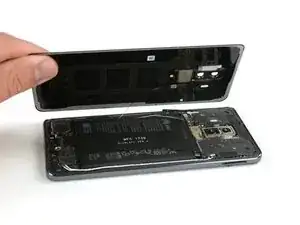
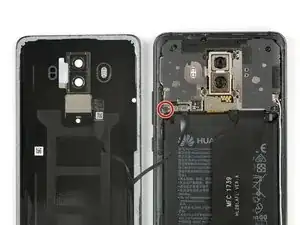
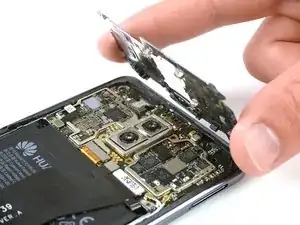
    • Entferne die Rückabdeckung noch nicht ganz. Das Kabel des Fingerabdrucksensors ist immer noch an der Hauptplatine angeschlossen.

    • Klappe die Rückabdeckung zur Seite.

    • Entferne die Kreuzschlitzschraube #00, mit der die Metallabschirmung befestigt ist, die sich auf dem Verbinder des Fingerabdrucksensorkabels befindet.

  4. VcxMNTBJfNQCqTLN
    VcxMNTBJfNQCqTLN
    Mx42vEmk5nW5QvKv
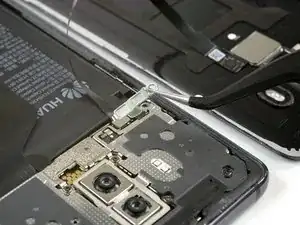
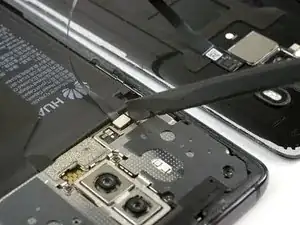
    • Entferne mit einer Pinzette die Metallabschirmung, die den Stecker des Fingerabdrucksensors bedeckt.

    • Trenne das Fingerabdrucksensorkabel mit einem Spudger ab.

    • Verwende beim Zusammenbau wo nötig neue Klebestreifen.

  5. tAqccddL4PorxOAC
    tAqccddL4PorxOAC
    SF3upv2yvfqMQaPC
    CNBw4EBW6koEH2Ex
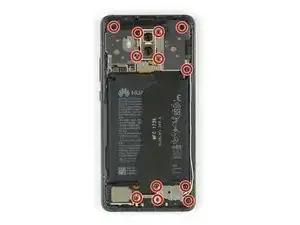
    • Entferne die zwölf Kreuzschlitzschrauben #00.

    • Entferne vorsichtig die Abschirmung über der Hauptplatine und der Ladeplatine.

    • Wenn die Abschirmungen nach dem Ausdrehen der Schrauben nicht leicht von selbst herauskommen, dann kannst du sie mit einer Spudgerspitze heraushebeln.

  6. AJKvpcjmmVncyGQ2
    AJKvpcjmmVncyGQ2
    GwxgGLrKtEWpWCmO
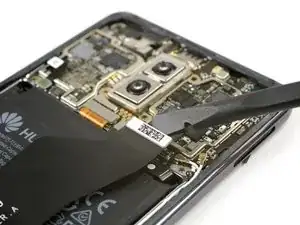
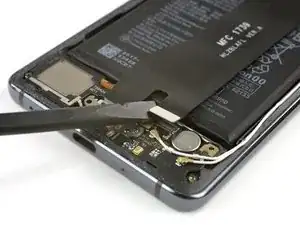
    • Löse das Flachbandkabel der Ladebuchse mit einem Spudger von der Hauptplatine und der Tochterplatine ab.

  7. O6QARa6cJ26AKtOX
    O6QARa6cJ26AKtOX
    pv3hObwLtKYKUyhH
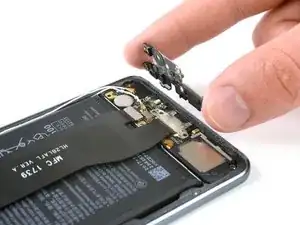
    • Entferne die Ladebuchse und das Flachbandkabel behutsam mit einer Pinzette.

    • Die Ladebuchse sitzt sehr eng in ihrer Vertiefung. Wenn sie schwer herauskommt, dann heble sie mit dem flachen Ende eines Halberd-Spudgers heraus.

    Do I need to apply a new sealer / adhesive tape in order to assemble the phone back together? If yes, where can this be purchased for Huawei Mate 10 Pro?

    Megan -

    If the adhesive on the back cover is damaged too much and/or doesn’t stick any more it is recommended to remove the old adhesive from the back cover and clean off any residue with isopropyl alcohol (>90%). Then use thin double sided adhesive tape and apply new strips of adhesive.

    Tobias Isakeit -

    hi, after this install it will still will water proof ?

    David Tay -

    Hi David,

    opening the Mate 10 Pro will damage the waterproof sealing on the device. If you do not replace the adhesive seals, your phone will function normally, but will loose its water-protection.

    Dominik Schnabelrauch -

    Hi there, I completed the battery replacement nicely with all your steps, the phone could turn on and function normally, the only issue after the battery replacement is the phone has no sound and vibration. I have ensure all connectors are back to place securely. Does anyone have any clue of the cause of no sound and no vibration?

    Shawn W -

    You do not have to remove the charging port for battery replacement, it does not interfere anywhere. I couldn't get the charging socket out at all. Where is the trick?

    Christian -

Abschluss

Um dein Gerät wieder zusammenbauen, folge den Schritten in umgekehrter Reihenfolge.

Dominik Schnabelrauch

Mitglied seit: 23/11/16

167812 Reputation

2 Kommentare

Great tutorial! It has been a month without being able to charge my phone, and now it charges 2x as fast with my repair.

Bruce Panagopoulos -

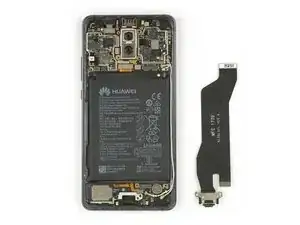
I recommend testing the USB C flex cable assembly before you reassemble the phone. As soon as it’s connected to the upper connector and the battery is plugged in the phone should be charging. Mine was broken from the factory but I went to a great local repair shop and got a new one, the guy said 1 out of 15 is broken from the factory. Great tutorial, successful repair.
Martin Olsson -