Einleitung

Verwende diese Anleitung, um die Kopfhörerbuchse in deinem Huawei P9 Lite zu ersetzen.

  1. TEq5nM4U4sDEDHNx
    TEq5nM4U4sDEDHNx
    l2sFSkJVVUauFbPP
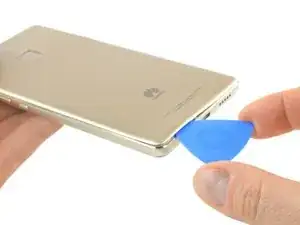
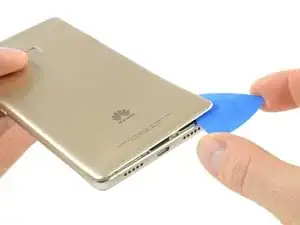
    • Benutze ein Plektrum um die Rückabdeckung abzulösen, beginne damit an der unteren Kante.

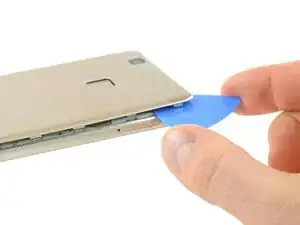
    • Arbeite dich entgegen dem Uhrzeigersinn um die Rückabdeckung herum und löse vorsichtig nach und nach die Klickverbindungen.

    What could you use instead of an opening pick??

    Alfredo -

    Like, could a guitar pick wor? Or anything else?

    Alfredo -

    A guitar pick will also do.

    Tobias Isakeit -

    what can still be used besides guitar pick

    Tarshia Thompson -

    I had a hard time to open the back cover by opening pick. Then I used little, really little knife at first, and I continue to opening back cover using opening pick.

    Andy B -

    Heating up aroud the finger sensor to loosen the square adhesive tape ..

    Hishamchohan -

    If you do not have any picks, You can also adapt an old credit or utility card by cutting it in to thirds. Then with some fine emery or sand paper, rub a sharp point on the one edge of the card. This will help you get access to the clips that hold the rear cover on. The one i did yesterday had quite a lot of adhesive around the edge & around the finger print sensor. Another tip with an old credit card is to cut it in to narrow strips to insert in to where you have separated the cover from the frame to stop it getting stuck to the adhesive again.

    gazza667 -

  2. HHkVVuLiGxGZQ3JZ
    • Unter der Rückabdeckung befindet sich etwas Klebstoff, mit dem sie am Akku und an der Metallplatte im oberen Bereich befestigt ist.

    • Sei vorsichtig mit dem Flachbandkabel auf der rechten Seite.

    • Verwende das Opening Pick, um die Rückabdeckung nach oben zu hebeln und vom Klebstoff zu lösen.

    Most of the adhesive is around the fingerprint cell and on the battery itself. You can slowly pull the back cover from its side but make sure not to break it. Push the mediator or a longer piece of plastic under the back cover to slowly destroy the adhesive.

    Nicolas Combaret -

    Slowly, slowly wins the day. Nicolas is right and comes off a charm. The most nerve wracking part of this longish repair.

    John Nordstrom -

  3. IWjHQtQ5StgPJEIy
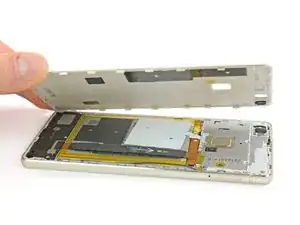
    • Wenn die Rückabdeckung vom Kleber befreit, kannst du sie vollständig abnehmen.

    Hi! Im so sad! At the begginig of the operation i ve broken the white seal/connector that in one side is connected to the board and the other side is "glued" to the battery. Can someone help me? how can i solve this?? There is no image displayed on the screen. but there is vibration, sound, notifications... can someone help me please???

    Diogo -

    What you broke is handling the NFC, and doesn’t have anything to do with the display. You probably damaged the ribbon right below the battery, since that’s what links the display to the motherboard.

    Polaris -

    Oups ! L’antenne NFC était solidement collée à l’intérieur de la coque et j’ai donc déchiré sa nappe en ouvrant la coque. Heureusement, je n’utilise pas les fonctions NFC et, à part cela, tout a l’air de fonctionner normalement.

    Michel Orban -

  4. cEIdkjnxJ2ABeg1m
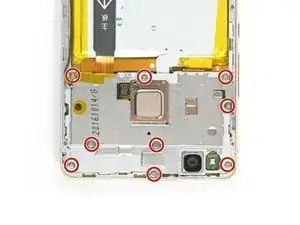
    • Entferne die neun Kreuzschlitzschrauben #00, mit denen die Metallabschirmung befestigt ist.

    • Auf einigen der Schrauben sind Aufkleber zur Manipulationssicherung. Nimm sie ab, damit du den Schraubendreher korrekt einsetzen kannst.

    Qu’est ce qu’un “indicateur d’eau”?

    chevaliernoir -

    Une petite pastille qui change de couleur au contact de l’eau. Les fabricants s’en servent pour nullifier la garantie : si ta pastille indique que de l’eau s’est infiltré, tu devra payer ta réparation.

    Polaris -

    Are all the screws the same size ?

    Hishamchohan -

    yes they are

    Adam M -

  5. MterKwicy2L12yfj
    MterKwicy2L12yfj
    tZRxJIr3qNvXpXLj
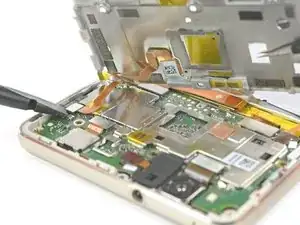
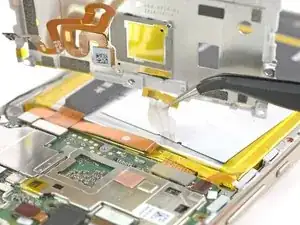
    • Entferne die Abschirmplatte noch nicht, sie ist noch durch einen Stecker und ein angeklebtes Kabel verbunden.

    • Löse den Fingerabdrucksensor mit einem Spudger vom Motherboard ab.

    • Löse das NFC-Antennenkabel von der Metallplatte ab.

    can we just remove NFC antenna and dont want to install int back?

    Mohd Danial Bin Harun -

    Note there are two plastic tabs at the top of the shield plate. Unlock them with a mediator, the plate will come easily after that.

    Nicolas Combaret -

    Buongiorno,

    va sostituita l'intera piastra metallica contenente il sensore impronte e la fotocamera, oppure il sensore é estraibile dalla piastra?

    Grazie

    LUIGI

    GI GI -

    Yes, it is possible to remove just the fingerprint sensor from the motherboard shield. Remove the small metal plate on the inside of the shield covering the sensor and push the fingerprint sensor through from the other side.

    Tobias Isakeit -

    Grazie mille.

    GI GI -

  6. MpWDwNXEyQhhaRIC
    MpWDwNXEyQhhaRIC
    uYevqWHZNCoZdRCg
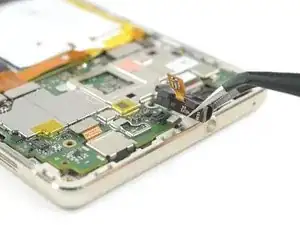
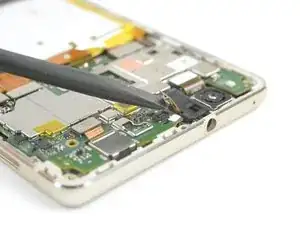
    • Trenne die Verbindung der Kopfhörerbuchse zum Mainboard.

    • Nimm die Kopfhörerbuchse nun vorsichtig aus ihrer Vertiefung.

Abschluss

Arbeite die Schritte in umgekehrter Reihenfolge ab, um dein Gerät wieder zusammenzubauen.
Dominik Schnabelrauch

Mitglied seit: 23/11/16

167773 Reputation

0 Kommentare