Einleitung
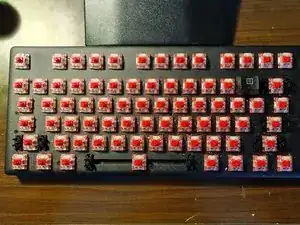
This was a non-functioning keyboard, that was opened in order to expose the PCB.
Werkzeuge
Ersatzteile
-
-
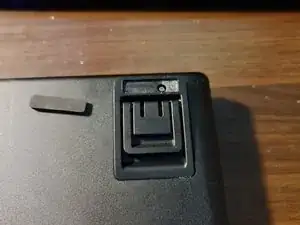
Remove the rubber foot from the upper right keyboard stand to expose the machine screw. Then remove the screw.
-

To reassemble your device, follow these instructions in reverse order.

2 Kommentare
Do you happen to know the pinout for the RGB light? Also, the copper trace for the space bard RGB? My RGB pad on the space bar was lifted during de-soldering to fix the stabilizer. The copper trace seems to be the most different in the space bar LED. I need to find the trace to create a new connection to the RGB for the space bar
I could probably work it out for you. It would help if you shared pictures of the lifted trace. In order to effect a repair you will need a soldering iron, solder and flux. You will also need some aircraft or kynar wire (really thin wire). Do you have a multimeter with continuity tester?