Einleitung
The original Chromebook Pixel, a high-powered Chromebook released in 2013, stopped receiving updates from Google in August 2018. While the laptop still functions (and pretty well), it no longer receives Chrome OS updates, including security fixes. Plus, Google will keep reminding you with a little red notification that it has abandoned it.
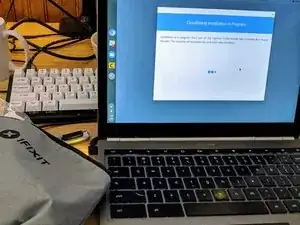
This guide will get your Pixel modernized once more, with security updates and OS improvements. Best of all, hardly anything will change about the interface or system. We will install CloudReady Home Edition. CloudReady, from Neverware, is meant to give older laptops and desktops a new life with a lightly modified version of Chromium OS, the open-source root of the Chrome OS companies put on Chromebooks.
The Chromebook Pixel isn’t listed on CloudReady’s list of officially supported devices, but given that it’s a Chromebook, it works entirely fine. I’ve used for four months as of this guide writing, and 98% is functioning: Wi-Fi, Bluetooth, touchpad, touchscreen and display, even the Linux system built into newer Chromebooks. There’s a strange sound occasionally when you boot up, but that’s about it. You won’t get Android apps, but then Google never tried to put them on the Pixel, either.
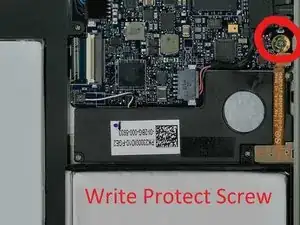
Important: You will have to remove the Pixel’s write-protect screw and change the laptop’s BIOS as a prerequisite to installing CloudReady with a minimum or problems. Without doing these two things, CloudReady may not install properly; at the least, it will require you to enter a Control+L command every time you boot up your Pixel, or else hear a very loud, un-mute-able beep. The initial hassle is worth it.
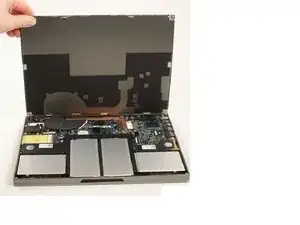
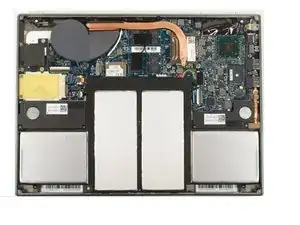
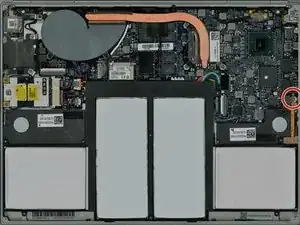
Luckily, the Pixel is an easy laptop to open up and get inside. Since you’re already opening it up, consider a battery replacement if your Pixel can barely live off the charger after 6 years.
Werkzeuge
-
-
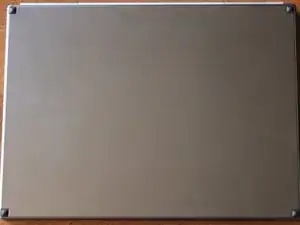
Flip your Chromebook Pixel over onto its back
-
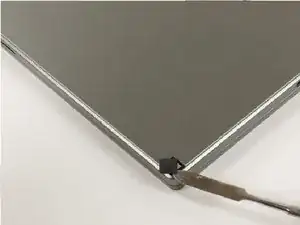
Using a flat edge screwdriver, gently pull up to remove the rubber pads from the laptop to reveal the screws
-
-
-
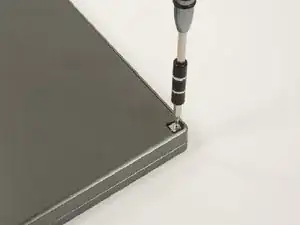
Using a small Philips screwdriver, remove the four screws under the pads
-
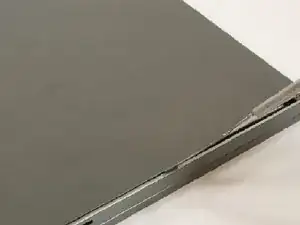
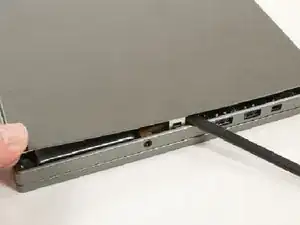
Using a spudger (or another flat but slightly blunt object), gently pry the laptop open
-
You may find it helpful to start with a smaller (skinnier) head and work your way up to a larger size
-
-
-
Close your Chromebook Pixel back up, working backwards from Step 3 to Step 1. The feet should not need any adhesive to re-attach, and fit snugly. Boot up your Chromebook.
-
The next step will wipe the Chromebook. If you have any files in your Downloads folder that you might want to hold onto, now is the time to upload them to Google Drive, or offload them onto a USB stick.
-
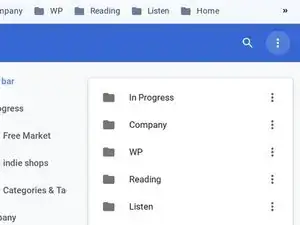
If you haven't enabled bookmark syncing in your Google account, you can back up your toolbar bookmarks by heading to the Bookmark Manager (Ctrl+Shift+O, or from the browser's three-dot menu, or right-clicking on the bookmark toolbar). Once in the bookmark manager, click that three-dot button in the upper-right, then choose Export Bookmarks.
-
-
-
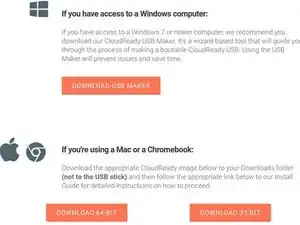
Head to CloudReady's page for the Home Edition and follow the instructions to turn a USB drive (8 GB or more) into a CloudReady installer.
-
It's easiest to make the USB installer on a Windows device, but you can also use a Mac, or this pre-wiped Chromebook, to make the installer.
-
If something goes wrong trying to use one USB drive, try another. They're more finicky than you'd expect for being "universal."
-
-
-
We need to enable Developer Mode to install another BIOS and operating system. To enable Developer Mode, we must first invoke Recovery Mode.
-
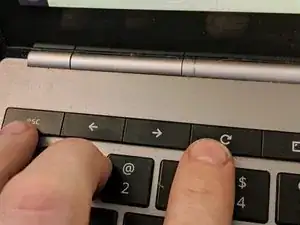
To start Recovery Mode, power up the Pixel. At the login screen, hold down the Esc (top-left-most key) and Refresh keys (three keys to the right of Esc on this model), then press the Power button (top-right-most key) for a moment, until the keyboard's backlight turns on, and you see the display blank and restart.
-
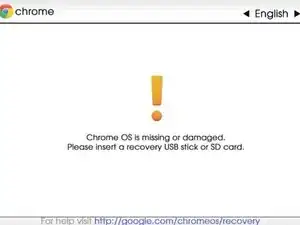
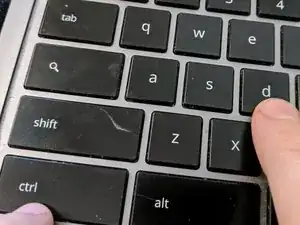
Once you see the exclamation mark and the message "Chrome OS is missing or damaged," press Control+D
-
You'll see one last check that you really want this (you do!): "To turn OS verification off, press Enter." Press Enter. As it says, your laptop will reboot, and your data will be wiped.
-
-
-
When your Chromebook reboots, you'll get yet another warning screen: "OS verification is off." Press Ctrl+D one more time to get past this warning.
-
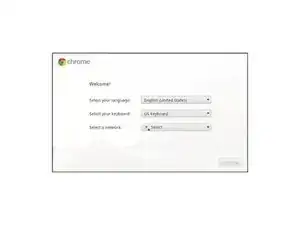
When you land inside Chrome OS, it will be as if you're setting it up for the first time. You might have to click a "Let's go" button to get to the screen where you can choose a Wi-Fi network. Select your Wi-Fi, but don't continue on!
-
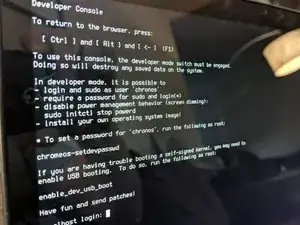
Once you've selected a Wi-Fi network and successfully connected, hold the Ctrl and Alt keys and press the -> button (the second button from the esc key). You should see a stark-looking terminal screen and text prompt.
-
At the stark-looking prompt with a "localhost login," enter "chronos" as your login. That should change the prompt to "chronos@localhost," give you the permissions you need to run the next step.
-
If you're having trouble logging in at the localhost prompt, you can get back to the ChromeOS setup (Ctrl and Alt and <- button). Once you're inside ChromeOS, hold Ctrl and Alt and hit 'T', then type "shell" at the command prompt. This also makes it easier to copy/paste the command in the next step.
-
-
-
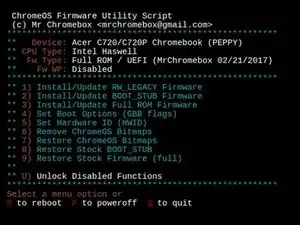
Mr. Chromebox is a developer who is saving us all a lot of time typing in commands with an all-in-one script. Go to the page for his Chrome OS firmware script and type out the command on that page (starting with cd; curl ...
-
You should see prompt similar to the one at left (but maybe not exactly; this is from a different device and time). You're going to choose "Install/Update Full ROM Firmware," which is usually the third option, by typing in "3" and hitting Enter.
-
When asked if you want to back up your firmware by the script, you should say (Y)es! Plug in a second USB drive (different than the one you're using for the CloudReady installer), select it when prompted, and continue along. Back up the firmware file to Drive or another safe location, as well.
-
Once the script is done installing the new firmware, enter "P" to power off.
-
-
-
With the Chromebook powered off, insert the CloudReady installer USB stick you made in step 6 (or go make it now on another computer if you haven't done so).
-
With the USB stick in one of the USB ports, power on the Chromebook. You should see a new thing; a speedy rabbit at the top of your boot screen, and a message at bottom, "Press ESC for Boot Options/Settings."
-
Do it! Press Escape before the bunny disappears. You'll be given a simple prompt to choose a device. Choose the option that looks like the USB stick you've inserted. It might show the name of the maker, like "Lexar" or "Sandisk" or just "Generic USB."
-
If you miss it, just wait a moment; you should end up inside the BIOS options anyways, because there's no operating system installed. Choose the "Boot device" menu (or something similar) and look for where you can choose your USB stick for booting.
-
-
-
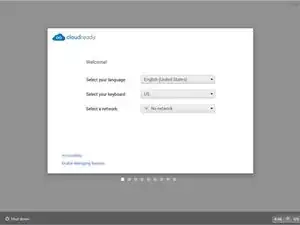
You'll get a CloudReady setup prompt that looks quite similar to the traditional Chromebook setup. Hooray!
-
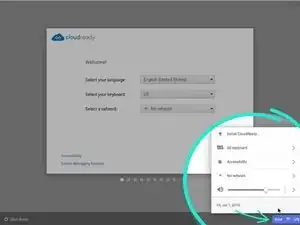
But! You don't want to go through this setup—it's just for setting up a "live" session. To actually install CloudReady, click the icons in the lower-right corner, and choose Install CloudReady.
-
-
You’re done! Enjoy your new open-source, up-to-date Chromebook. If you ever want to switch back to the standard BIOS/Chrome OS, you can use the same Mr. Chromebox script detailed in Steps 8 & 9 to restore your stock BIOS, and use a Recovery USB stick to flash a new Pixel system.
53 Kommentare
I have followed your tutorial but cannot get the Mr. Chromebox script to run. I am trying to install on Pixel 2013.
Where are you in the process? Are you seeing any error messages? Are you using the terminal that appears when you press Ctrl+Alt+”forward arrow”, or trying to use the Ctrl+Alt+T shell?
Johan! I have now updated the tutorial with details on getting past the “localhost” login thing (entering “chronos” when prompted for a localhost login). My apologies for not noticing this missed step in the original tutorial.
Me too - same issue - enter terminal mode, run command and just returns to localhost login prompt
@pavlovic @funski A few ideas/thoughts:
+ Are you using the shell that you get to by pressing Ctrl+Alt+(forward arrow)? If not, are you using the Ctrl+Alt+T terminal, then typing in the “shell” command?
+ You’ve followed the previous instructions, and you’re sure that your chromebook is in a Developer Mode state? i.e. when it boots up, you hit Ctrl+D to get into the setup, not Space to start recovery?
+ Is the terminal seeming to ask you for a password?
Yes, Ctrl-> with Dev mode set. Keeps going to a regular terminal mode login/password prompt. However, slightly punctured the battery in getting the case off so it's better to just replace it with a new Pixelbook due soon.
