Einleitung
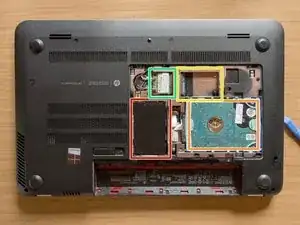
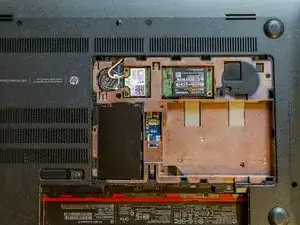
Usually, when we install an SSD, the latter one takes the place of the HDD but in some laptops of the HP ENVY 15 series there is also a further possibility. These PC are indeed provided with an mSATA slot intended to host - as cache drive only - an SSD of max 64 GB. Users have nonetheless found out that in this slot it’s possible to use an mSATA SSD of larger capacity as main boot drive. In other words, in the j100el model this mSATA slot is empty and it’s possible to install both drives inside this laptop, an SSD with the OS and an HDD as storage.
Before the beginning:
- update the BIOS to the latest version
- create a backup of your personal files in an external drive
- create a bootable USB stick with the OS installer. You can find step-by-step guides in internet if you don’t know how to create it. I am going to install Windows. A stick of 8GB or more is enough to host the installer. It is important that, when it will be written, the USB stick will be formatted with FAT32 file system because the BIOS does not recognise NTFS bootable drives.
- get an mSATA SSD. No other restrictions here besides the mSATA interface. Mine was 1TB large. If you are going to install a used SSD, format it completely before you start.
- get a Phillips PM2.0×2.5 screw
Basically we are going to remove the HDD, to install an SSD and the OS, and to eventually reinsert the HDD.
Before reinserting the HDD in the laptop we need to be sure that all the boot information of the old OS are gone from it. When we turn the pc on indeed, the HDD is always going to be booted before the SSD and if there is an OS installed in the former, that OS is the one which is always going to be loaded as first, i.e. the new OS won’t never show up. We could easily solve this issue if we could change the boot order of the drives before the start of the OS but the BIOS by HP is not that customisable.
For these reasons,
ifixers#1: if you want to keep the original HDD,
before you insert it again you have to wipe all the data off the HDD, or, if you keep only your personal files in a single partition, you could format all but this partition.
In order to format the HDD after the installation of the SSD you can externally connect it to the laptop using a data transfer cable (that’s ok: being connected through USB, the old OS won’t mess up with the new one) or you can install your HDD in its internal slot, and, using another bootable USB stick in which you installed Rescatux before the beginning of this guide, format the HDD before the start of the new OS, using the Gparted software integrated in Rescatux.
ifixers#2: if you want to install a new HDD,
you’re all set and ready to go, the new hard disk is obviously already empty. Once that everything is done, you could use a data transfer cable as well to transfer the files between the HDDs or you could transform the original HDD in an external drive.
Werkzeuge
Ersatzteile
-
-
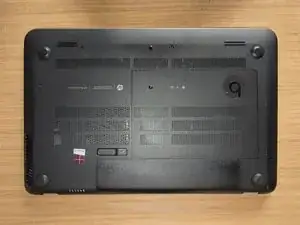
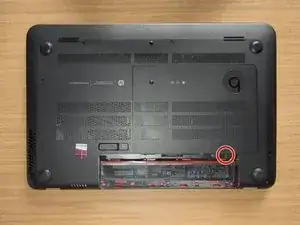
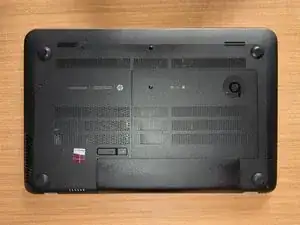
Turn the laptop upside down and gently lay it down on a flat surface.
-
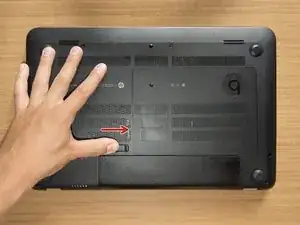
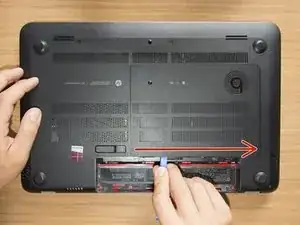
Slide the battery release latch to the right and the battery will pop up slightly.
-
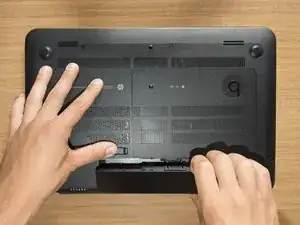
While keeping the latch slid with one hand, grab the battery with the other hand and remove it by pivoting it upward.
-
-
-
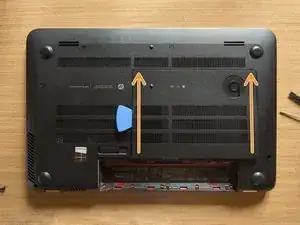
With an opening tool pry off the tabs that secure the service door to the base enclosure. Start with the long edge.
-
Continue along the short edges.
-
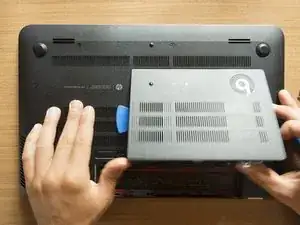
Once you have pried the service door off as it is in pic#3, it will come out of the rear edge very easily.
-
-
-
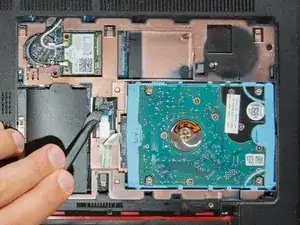
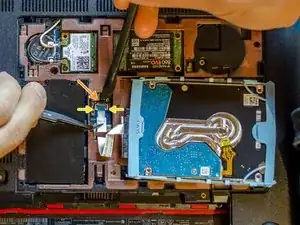
Are you grounded? If yes, using a spudger, flip up the small black locking flap of the hard disk's ZIF connector.
-
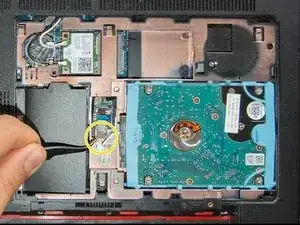
Afterwards, using a pair of tweezers, grab the HDD's SATA cable at the transparent tab and simply lift its end up, out of the connector.
-
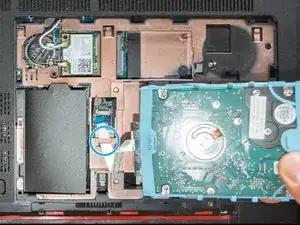
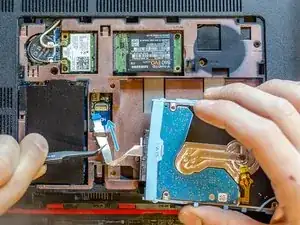
By levering with an opening tool, pry the HDD out of its bay. Once it is on your hand, release its cable from its retaining hole obtained on the base enclosure and finally leave the HDD aside.
-
-
-
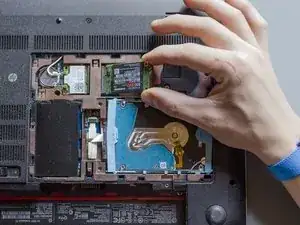
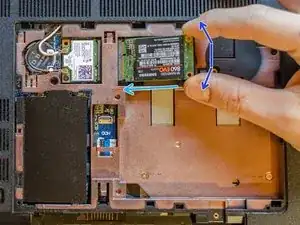
Are you grounded? If yes, grab the SSD as it is shown in pic#1 and align it to its connector holding it at an angle of +/- 40°.
-
Now start to gently push the SSD inside, maintaining its inclination. Follow the light blue arrow's direction and go slowly.
-
On top of the previous movement - and always maintaining the SSD tilted - you have to lightly move the module back and forward as the blue arrows show: think of a pendulum.
-
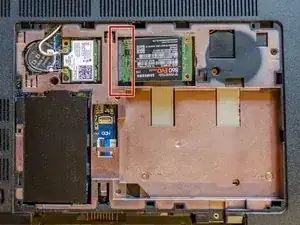
STOP when you feel you can not go any further and you can see that most of the yellow part of the connector is inside.
-
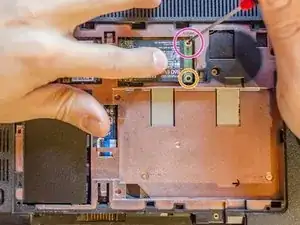
Now, pushing in the middle of it with a finger, slowly press the SSD down. The small black plastic wedge depicted has to pass through the bottom hole of the SSD in order to centre its position.
-
STOP when you feel you can't push the module any further. You should notice that the SSD is not perfectly horizontally laid, that is good. Now, using a PH#00 screwdriver and the Phillips PM 2.0x2.5 screw you got before starting this guide, secure the SSD to the base enclosure of the laptop, don't overtighten this screw.
-
-
-
Now, starting from step 3 and going backward, follow the instructions in order to reassemble the service door and the battery (ignore the HDD for the moment, it has to be reassembled later).
-
Then turn the laptop to its upright position and connect it to the electricity.
-
-
-
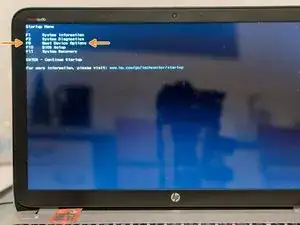
Plug in the bootable USB stick you prepared with the OS installer and turn the laptop on. As soon as you have pressed the power button, start to repeatedly press esc. STOP when the BIOS startup menu appears.
-
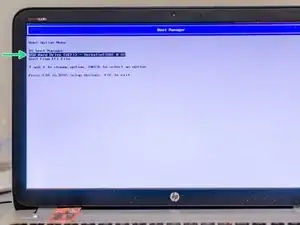
Now press F9 in order to access Boot Device Options and open the Boot Manager.
-
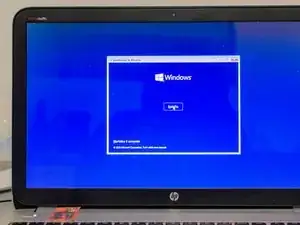
Using the up and down buttons, select the entry USB Hard Drive - name of your drive and press enter: the OS installer should automatically show up after some seconds.
-
-
-
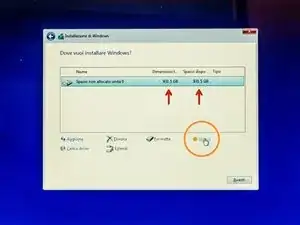
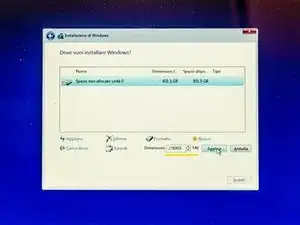
After some clicks you should reach this page and see the whole capacity of the SSD as a single unallocated space - the entries Total dimensions and Available space should match each other - if not, e.g. some previously hidden partitions appear, click on Format and wipe them away until you obtain a single unallocated volume.
-
Now we are about to create the partition to host Windows, namely the (C:) drive. Click on New
-
Choose the size of your forthcoming (C:) drive, type it in MB and then click on Apply (according to your needs, you can think of leaving an amount of unallocated space in the SSD for another partition that you will create later, for personal files for example)
-
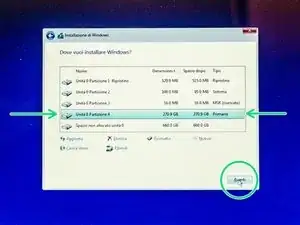
If it doesn't remain selected, select the partition you chose the size of, which has just been created (it should be labelled as primary or main), and then click on Next: the installation of Windows begins.
-
-
-
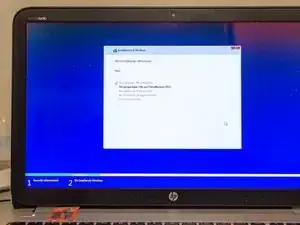
Once the installer has finished its job, Windows should power on automatically ...
-
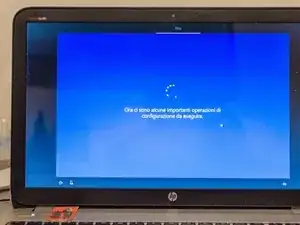
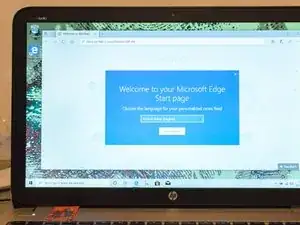
You are then asked to configure Windows (services, Cortana, privacy, exc). Once you have finished that and you managed to see explorer for the first time, eject the USB stick and power off the laptop. We are going to reinsert the HDD in its slot.
-
-
-
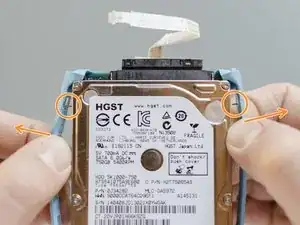
... take the original HDD and pry the light blue rubber case off of it using your hands and following the arrows' direction. Starting from the top, make the two small metal plates which centre and secure the case to the HDD come off. Repeat the operation for the two metal plates which are in the bottom and release the HDD from its rubber case.
-
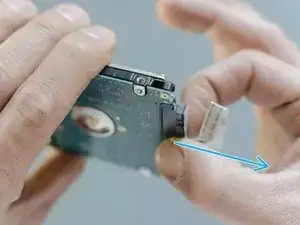
Now hold firmly the HDD with one hand and, with the other one, grab the SATA connector in the middle - leaving freedom of movement to its cable - and pull it out straightly and forcefully!
-
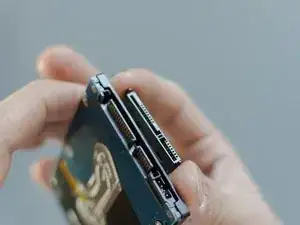
Following backwards the previous two paragraphs of this step, take now your new HDD and assemble it with the case and with the SATA connector you just disconnected.
-
-
-
Quoting the introduction: In order to format the HDD after the installation of the SSD you can externally connect it to the laptop using a SATA --> USB data transfer cable (that’s ok: being connected through USB, the old OS won’t mess up with the new one) and then you could use the windows' partition tool Disk Management
-
or you can go ahead to the next step of this guide, install the original HDD in its internal slot (as it is, with all of the partitions) and, using another bootable USB stick in which you installed Rescatux before the beginning of this guide, format the HDD before the start of the new OS, using the Gparted software integrated in Rescatux.
-
-
-
Are you grounded? If yes, make the SATA cable pass through its retaining hole on the base enclosure.
-
Lay down the HDD. Grabbing the plastic tab of the SATA cable with a pair of tweezers, move it in order to properly lay its blue final part in the ZIF connector: its two blue bottom corners should match the white squares of the connector.
-
Now keep the final part of the cable correctly positioned with the tweezers and using a spudger with the other hand, flip down the small black locking flap of the hard disk's ZIF connector.
-
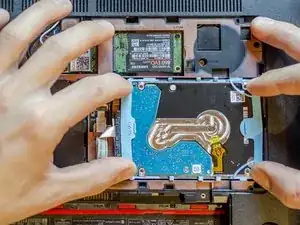
Finally, using your hands, gently push the HDD down in its bay.
-
It’s over, you made it! Good job. By this time you know how to remount the service door and the battery, so, it’s done, enjoy the upgrade!
P.S. It could be possible that afterward you installed the HDD, when you power on the system for the first time, Windows won’t launch. It happened, don’t panic :) reboot once and it will work.
All the credits for this method go to the user bwillet who managed to make this hardware upgrade already seven years ago, thanks!
6 Kommentare
I did those in 2017.. The very same thing… But if i only put ssd and install windows.. Then it boots up normal.. Again i put the hdd and tried to boot.. It didn't boot… Then later i put both ssd and hdd… And installed Windows again on ssd it worked and i can now see both drives… But again if i take out hdd and try to boot only from ssd .. Then again i can't boot… Once i put the hdd back.. Then i can again Boot..
Don't know what's the problem!?
Raj -
Hi Raj
we can not change the boot order in the BIOS of this HP laptop series. That is the problem I think, but I am a beginner and not an IT expert. If we could set the mSATA drive to be loaded before the hard disk drive, the problem would be solved, once and for all, and you could remove the HDD as many times as you wish, without boot problems.
If I understood well, you wrote Then later i put both ssd and hdd… And installed Windows again on ssd it worked and i can now see both drives… But again if i take out hdd and try to boot only from ssd .. Then again i can’t boot so you managed to install Windows on the SSD, to launch Windows from it, and to see both drives in Windows ... I do not understand why at that point, if it works, you take the HDD out again.
In my case, the workaround I described in this guide works perfectly since last January. It has only this drawback: every time I have to reassemble the laptop - after cleaning / thermal paste or whatever - I have always to boot once with the SSD only, before being able to insert the HDD again and get my whole system back.
So, every time I have to reassemble the laptop, I follow this procedure:
- I insert the mSATA drive (in which Windows is installed).
- I switch on the laptop. (Windows launches as normal)
- I switch off the laptop, I disassemble it, I insert the HDD and I reassemble it.
- I switch on the laptop, I get a black screen with this message or something similar: OS not detected, please install an OS on your Hard Disk Drive and I switch off the laptop.
- I simply switch on the laptop once again, and I get my whole system back with both drives working as desired. Since this time, in which it made it, every time I switch on the laptop the system launches perfectly with both drives and no conflicts.
In my case, the black screen disappears when I boot for the second time. If I reassemble the laptop and put both drives at the same time, and I try to boot, it never boots and that black screen with that message always appears, no matters how many times I reboot. I have to boot once with the SSD only and then I can reinsert the HDD and finally boot the whole system.
Following this reassembling procedure is ok to me, I do not need to disassemble the drives often and the fact of launching the system once, with the SSD only before being able to reinsert the HDD, looks only like a small drawback in reassembling the laptop to me. But I understand that if you need to disassemble the HDD often, it becomes annoying.
If you try this workaround again, be sure that the BIOS is updated and that the HDD you reinsert has no trace of operating system. In any case I do not know if there is a solution to this fact that we always have to boot once with the SSD only before reinserting the HDD at each laptop’s reassembly.
If this thread is still alive:
I have hp-envy 15 j048tx laptop. I have 500GB samsung 860 msata.
i simply plugged in. I want the msata to be additional space. When i did that, i get non disk raid menu and then OS boots, but comes to a blue screen and says pc ran out of problem
Any suggestion?
Hello Ashwin. Once you plugged in the SSD, and before booting the OS, you could try to create a partition in it using a bootable USB stick and GParted or similar softwares. That mSATA door is intended to be a 32GB cache drive only. That should be why the OS cannot recognise such a big drive there. If you create a partition in the SSD, before booting the OS, the latter should manage to see it as a normal drive as you want it to and as it did in my case (I never tried to plug in the SSD and to boot straight away, without creating a partiton there first).
I am not that expert and I can think only of this. Eventough I did another thing from what you’re trying to do, the steps above worked easily for me so that is probably due to something simple you only need to figure out. It should work on your hp envy as well.
This thread could help or you can try to create a thread directly in the iFixit forum.
