Einleitung
There are many benefits to adding a second hard drive to your laptop such as improved speeds, greater storage space, and less heartache when installing new software. Use this guide to install one using our optical bay hard drive enclosure.
Ersatzteile
-
-
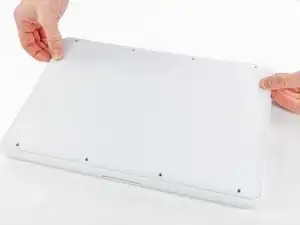
Slightly lift the lower case near the vent opening.
-
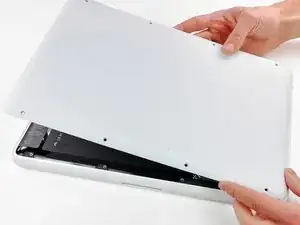
Continue running your fingers between the lower and upper cases until the upper case pops off its retaining clips.
-
-
-
Use the flat end of a spudger to lift the battery connector up out of its socket on the logic board.
-
-
-
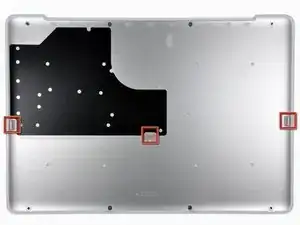
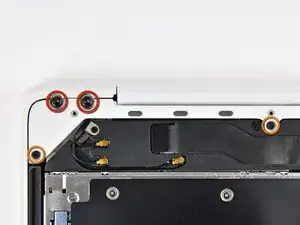
Remove the following screws from the optical drive side of the rear vent:
-
Two 10 mm T8 Torx
-
Two 5.2 mm Phillips
-
-
-
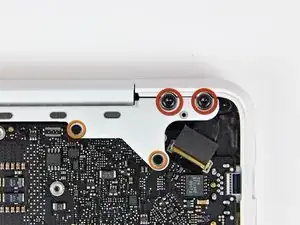
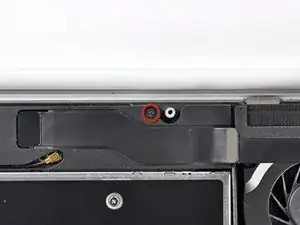
Remove the following screws from the port side of rear vent:
-
Two 10 mm T8 Torx
-
Two 5.2 mm Phillips
-
-
-
Remove the single 12 mm Phillips screw securing the top of the rear speaker housing to the upper case.
-
-
-
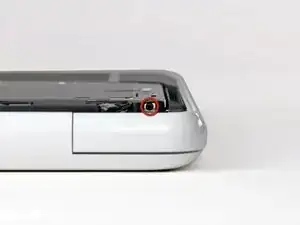
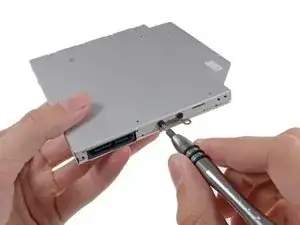
Remove the single 2.2 mm Phillips screw inserted horizontally into the side of the optical drive.
-
-
-
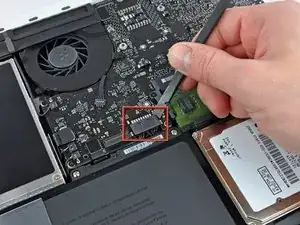
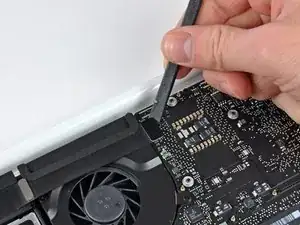
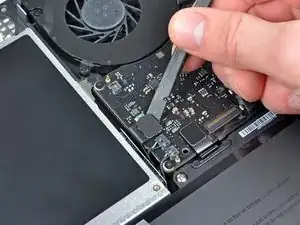
Use the flat end of a spudger to pry the AirPort/Bluetooth ribbon cable connector up off the logic board.
-
-
-
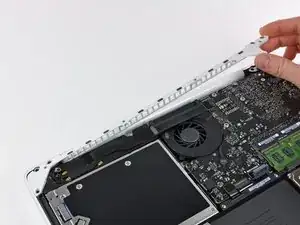
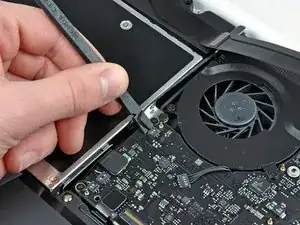
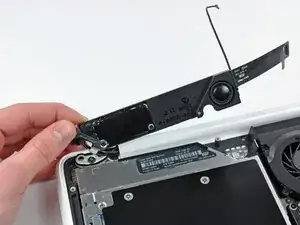
Carefully rotate the rear speaker assembly (with AirPort/Antenna cables still attached) out of the lower case.
-
-
-
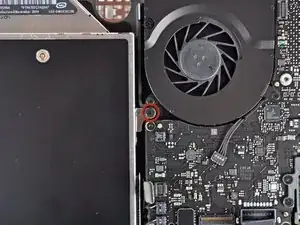
Remove the single 4.5 mm Phillips screw securing the optical drive bracket to the upper case near the fan.
-
-
-
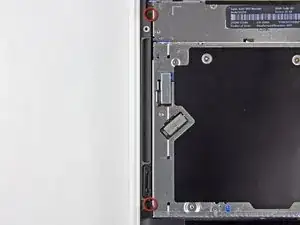
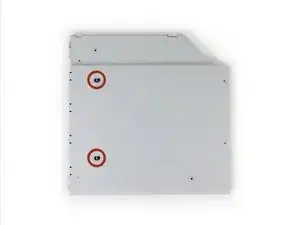
Remove the two 2.5 mm Phillips screws securing the optical drive to the upper case near the optical drive opening.
-
-
-
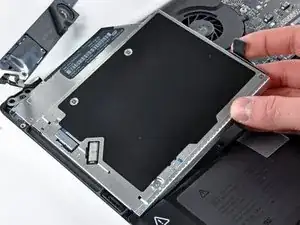
Lift the optical drive near its connector and pull it away from the upper case to remove it from the computer.
-
-
-
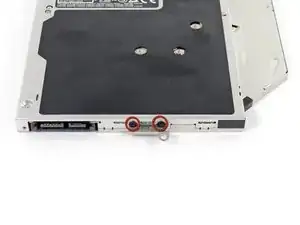
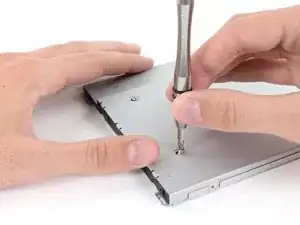
Remove the two black Phillips #0 screws securing the small metal mounting bracket. Transfer this bracket to your new optical drive or hard drive enclosure.
-
-
-
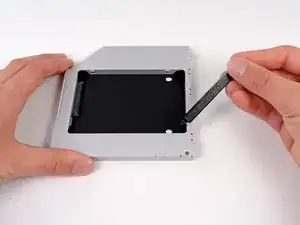
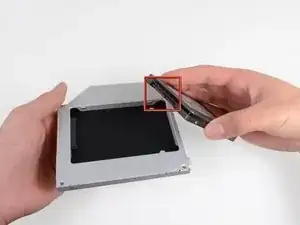
Remove the plastic spacer from the optical bay hard drive enclosure by pressing in on one of the clips on either side and lifting it up and out of the enclosure.
-
-
-
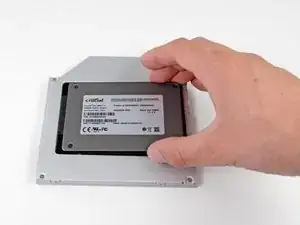
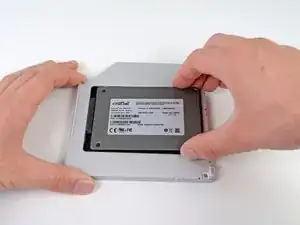
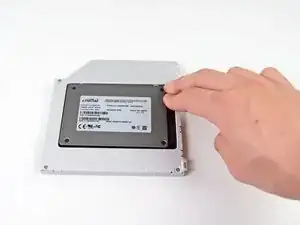
Make sure that the hard drive connectors are facing down before placing it into the enclosure.
-
Gently place the hard drive into the enclosure's hard drive slot.
-
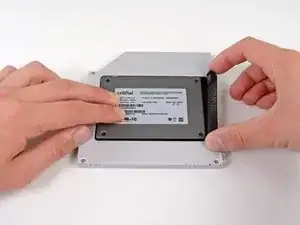
While firmly holding the enclosure in place with one hand, use your other hand to press the hard drive into the enclosure connectors.
-
-
-
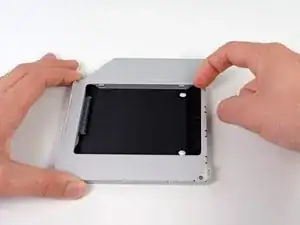
Once the hard drive is snug, reinsert the plastic spacer while holding the hard drive against the bottom of the enclosure.
-
-
-
Attach the optical drive bracket to the new enclosure with two Phillips #0 screws.
-
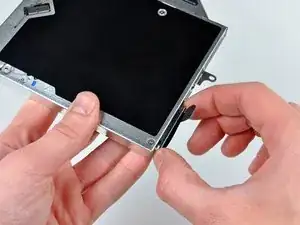
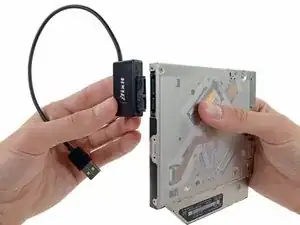
Reconnect any cables you have removed from the original optical drive onto the optical bay enclosure.
-
-
-
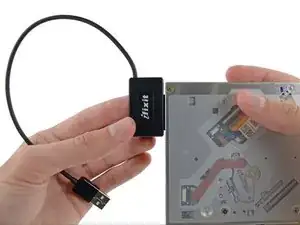
Align the cable's SATA connector with the drive's port and plug in securely.
-
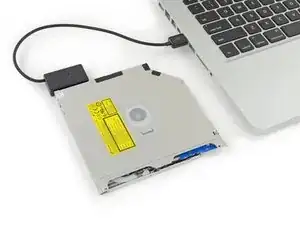
Plug the USB connector into your laptop and your optical drive is ready for use.
-


To reassemble your device, follow these instructions in reverse order.

10 Kommentare
when i did i have a gray screen and in the middle i have a question mark in a file and it flashing
You haven't installed and software on the new hardrive. Install some using a boot disk or USB
Hi! I have a big problem... I have MB unibody 09. After install the hdd the MB doesn't switch on, so I reinstall the dvd unit and after try sometimes the laptop starts and at the status bar appears there has no a battery and the fan works very hard.
I find an area near the switch battery ( in the mainboard), that I unplugged to install the hdd, where there is an small chip that takes a very high temperature when I plug the batery connector... So what could be the problem, and what can I do?
I followed step by step so I Don't know where can be the problem... Some help please!
Is it possible to remove the optical drive and connect a sata extension cable where it was connected to the motherboard? The sata extension cable would stick out thru the cd entry. this way one could had a sata port to connect external hard drives faster than by the usb 2.0 ports! I don't understand much about electronics so I'm sorry if it's a stupid question.
According to this page http://support.apple.com/kb/HT1651?viewl..., the 8 screws are not identical.
Can anybody tell me where each kind of screw is supposed to go?
Gregoire -
They are all 100% Identical. You were probably looking at a different model, or Apple has entered the wrong information... Hey, It happens...
weeowey weeowey -
The screws on the Late 2009 are identical. The blue lock compound might make tightening some require a little more effort.
svenaustx -
Can I replace it with a SATA 3 cable?
nm -
A1342 macbook does not have the right controller to support sata III
weeowey weeowey -
hi, i just got back from the apple store and they are really keen for me to upgrade to a new laptop since my battery is old and the screen is cracked, so glad i found ifixit i would love to upgrade this puppy! gonna make it a real sleeper! styler hall wrote about sticking 16 gb of ram in his a 1342 ? is this a simply mather of ordering 3 4gb sticks ?aslo i currently have 4 gb and would like to upgrade to 8 ( or indeed 16) does that mean i need to buy all new sticks or can i continue to use the old one and stick a new one next to it ?
thanks again mick van aar, perth western aus.
michelvanaar -
The A1342 will take up to 16 GB of RAM, however, there are only two RAM slots, so use two 8-GB RAM modules. Other World Computing (OWC) is a great reference source for info on exactly which RAM to use with which model; prices are usually much better on EBay though. Add an SSD from OWC and your machine will really scream!
I hope that helps!
gdesbrisay -
Gregoire is right. The 8 screws are absolutely NOT identical, I’m looking at them right now, weeowey weeowey.
John Guzman -
I just wanted to say that, in 2020, i used these instructions to replace the magsafe socket on my A1286, mid-2012, pre-Retina MacBook Pro. The internal layout is not quite the same but close enough for me to do the job. I skipped the steps of fully disconnecting the fans and speakers because of what others had said about breaking the sockets. it just meant I had to be extremely careful when lifting up the main board so that I did not tear and break the connections. I was able to disconnect the old magsafe socket with the board flat and in situ, but there was no where near enough room to be able to aline and press home the new par home. Reluctantly i had to lever up the board. This was difficult as there is a tapped post that holds a screw in the way close to where the USB sockets are, that prevented the board lifting up and out. I had to be quite forceful to manouevre the sockets out from the edge of the case.
Paul Burridge -