Einleitung

Wenn einer der drei Anschlüsse (AUX, USB, Ladeanschluss) nicht mehr funktioniert, müssen sie vielleicht ausgetauscht werden. Wenn du nur einen der Anschlüsse austauschen willst, musst du löten können. Unsere Lötanleitung zeigt dir, wie das geht.

  1. iM4oEbSJvrCv1M42
    iM4oEbSJvrCv1M42
    hVTHnK2ZHk6WYCZD
    UQOa1JkUcJXahQCK
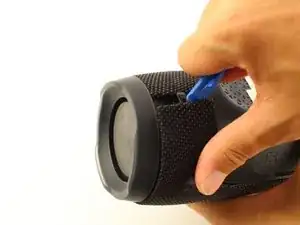
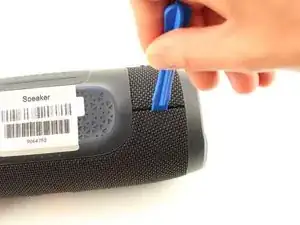
    • Lege dein Gerät mit der Unterseite nach oben und setze ein Plastiköffnungswerkzeug vertikal in den Schlitz in der Frontabdeckung ein.

    • Ziehe das Werkzeug langsam nach außen und löse die Rasten, mit denen die Abdeckung befestigt ist.

    • Wiederhole dieses Verfahren an allen vier Kanten der Frontabdeckung.

    Sometimes disassemblers forget that the first time they disassembled the item it didn’t want to give up easily: I didn’t like the forces I was having to apply at all, so I switched to two plastic prying tools per “corner” and one in-between them (total 5, you could use plectrums…) before I was happy the the forces were low enough not to break anything.

    Frank Puranik -

    the front grill is supposed to be first not the back the back has longer while the front has shorter clip

    Water Bass Tester (Water BT) -

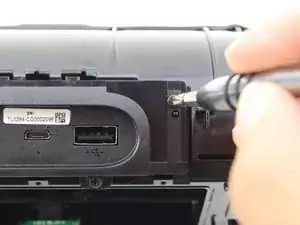
    There are two Phillips head screws to remove before prying the cover off

    jason -

    Where in south Africa can I buy jbl charge3 port bay replacement

    Donovan Fransman -

    There appears to be different versions of the Charge 3. If you find it difficult to pry open a second side the two small screws mentioned by Jason will need to be removed but it also indicates that there will be some additional changes to this tear down that I will try to convey in the comments as well.

    john Ramirez -

    Sadly I damaged the latches on my charge 3. There was more to it than just prying the front cover up. First, there is a small latch on both sides that you need to push down before pulling the front cover towards you that release the clips holding the front cover in place. Pull only slightly forward because… Second, in the front cover there are 6 circular notches connected to the front cover in tue four corners including the middle corners, you need to squeeze the front cover a little bit gently removing the notches so they dont break (like mine did).

    ralphkeneth_gomz -

    Definitely had to watch about 10 videos and still couldn’t get it to pop out easily.. Took a look at the first picture in the next step and really took note of where the little hole that lets you through to push down the tab is. Once I took a look at that and combined the techniques I’d seen in some of the videos it finally popped off easily. https://www.youtube.com/watch?v=u7i0_nD9... I only watched the first minute of this video but it helped a good bit if anyone else is having trouble.

    Rowan Darko -

  2. dVS6cpIOfmgGM33C
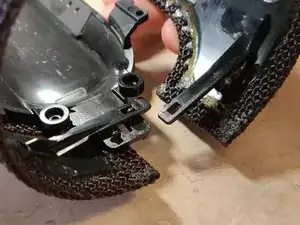
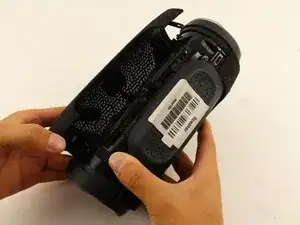
    • Ziehe die Abdeckung auf beiden Seiten vorsichtig auseinander und entferne sie vom Gehäuse.

    • Im Inneren der Frontabdeckung befinden sich Löcher, die beim Zusammenbau in die entsprechenden Stifte des Lautsprechergehäuses passen müssen

    • Das Entfernen der Frontabdeckung beeinflusst nicht die Abdichtung gegen Feuchtigkeit. Allerdings werden beim weiteren Zerlegen des Lautsprechers wasserdichte Verklebungen und Dichtungen beschädigt. Dein Gerät wird danach wahrscheinlich nicht mehr länger wasserfest sein.

    Include dissembling the plastic cover? cover?

    KanGoon -

    @KanGoon Yes, on mine it took the removal of 6 (reasonably obvious) screws to remove that. I’ll try to insert a photo when I reassemble…

    Frank Puranik -

    Very good guide! Pics and descriptions make this easy!

    John G Petko -

    There is a step missing here. How do you remove the rubber cover that covers the port?

    Phillip Luebke -

    Gibt es eine Möglichkeit diese wieder wasserdicht zu bekommen?

    Furkan Karakelle -

  3. wusO1PuuOogrjt3X
    wusO1PuuOogrjt3X
    TobBWvWoHu4qFYiC
    x1VSMkNa3dCyFK5Z
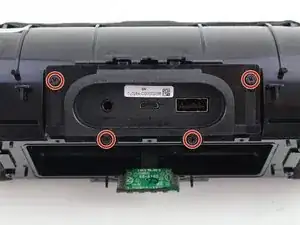
    • Entferne vier 8 mm Kreuzschlitzschrauben #1 von der Abdeckung der Anschlüsse.

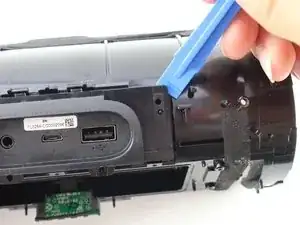
    • Zwänge ein Plastiköffnungswerkzeug um die Abdeckung und entferne sie.

    and then wiggle it directly (almost radially from the cylinder) out until you see the cables shown in the next step.

    Be careful not to damage the plastic gasket as you pull it out,

    Frank Puranik -

  4. CGYMHIAKZxCJDICZ
    CGYMHIAKZxCJDICZ
    OOrnJBnK3BpatD6K
    PNZL2vjCvVvkuQOL
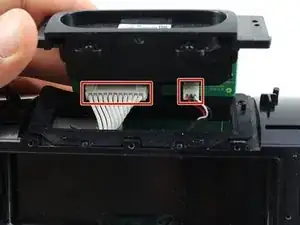
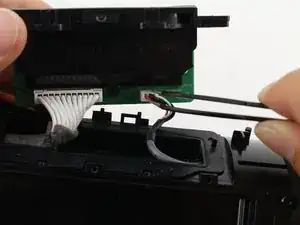
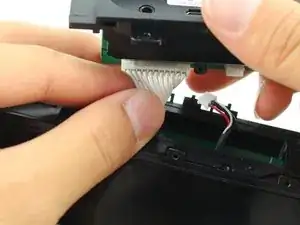
    • Entferne die beiden Stecker an den Kabelbündeln der Anschlüsse.

    there’s not much room to get you fingers in. Again I used prying tools to help me get the two connectors off the PCB

    Frank Puranik -

    How do i get another port bay

    pjimenez98 -

  5. Y4aERMIWdxvpXAah
    Y4aERMIWdxvpXAah
    itZMSLHAuiynRFqD
    GIRNg5eVMZeLdJPb
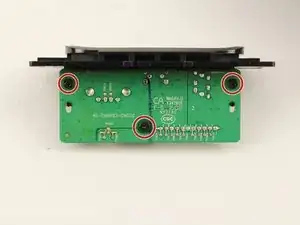
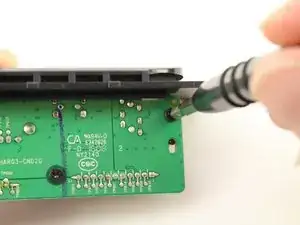
    • Entferne die drei 8 mm Kreuzschlitzschrauben #1 von der Anschlussplatine

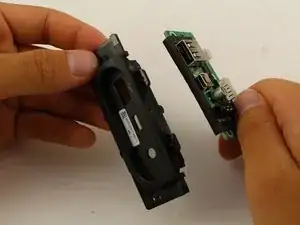
    • Ziehe die Abdeckung der Anschlüsse von der Anschlussplatine ab

    Be careful not to break the 2 plastic lugs you can see just below (on the photo) the 2 screws at the edges

    Frank Puranik -

  6. JD3aoPhrXTnqcfq2
    JD3aoPhrXTnqcfq2
    yBMWTY2FVEmKUZSv
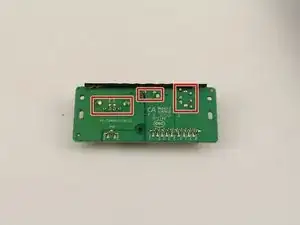
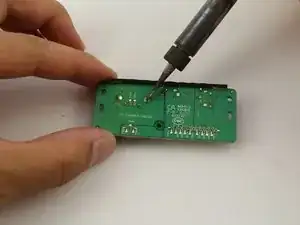
    • Entlöte den USB-, Micro USB- und AUX Anschluss von der Platine.

Abschluss

Um dein Gerät wieder zusammenzusetzen, folge den Schritten in umgekehrter Reihenfolge.

Jack Ng

Mitglied seit: 08/10/18

1764 Reputation

15 Kommentare

Is there a place to buy an entire replacement port bay?

indecisive_decision -

Found the whole assembly on line for 30 bucks. Or a usb port for five from jbl

bonnie.1964 -

Can u share a link? Need a new port bay!

Max de Groot -

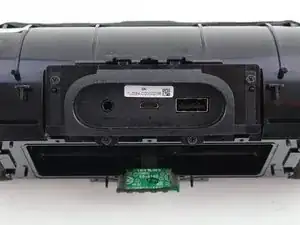
Hello! My jbl charge 3 has a problem in bluetooth, I can't detect the bluetooth in any gadget. Is there anybody have an idea how to fix this?
ebataluna -

anyone have the charging ways of this board i have 2 pads missing and would like to run the lines

Juju B -

yeah i need that too. the micro usb broke off the mb

Benjamin Goerke -

Hi,

the pinout for the micro-usb socket, looking from the top side (3.5mm audio socket is on my left and USB port is on my right):

1. Most left line, line #1 on the micro-usb connector is GND. Goes to the pin #5 (also connected to #6 and #7) of the large 11pin connector labeled J602.

2. Line #2 on the micro-usb connector is ID which is connected to the GND - pin #5 (also connected to #6 and #7) of the large 11pin connector labeled J602.

3. Line #3 on the micro-usb connector is DATA +, which goes to pin #4 of the large 11pin connector labeled J602.

4. Line #4 on the micro-usb connector is DATA -, which goes to pin #3 of the large 11pin connector labeled J602.

5. Line #5 (most right) on the micro-usb connector is VCC/+5V, which goes to pin #1 (also connected to #2) of the large 11pin connector labeled J602.

Simon -

Welche Maße haben die Ladebuchsen?

Jan Philipp -

Hi,

for anyone interested - we are offering the micro-usb socket replacement service for JBL Charge 3.

You can google “getgui charge 3 micro-usb” since its probably against the policy to post links here.

Simon

Simon -

Where can I buy the port bay

martinezjajlj -

Wo kann man bauteile bestellen ? Bitte Antwort.

Danke :)

manuel.hill -

does anyone know where i can buy a new charging port board

neohunter -

Habe heute die SMD Micro USB Ladebuchse ausgetauscht. Wie man diese Reparatur in 15min erledigen will ist mir ein Rätzel. Und einfach eine THT und SMD Buchse umlöten, benötigt wirklich Fachwissen und die nötigen Lötskills. Eher 30 bis 45 minuten mit dem richtigen Werkzeug und Microskop!

Yoshioiram -

Ersatzteil:

✅ JBL Charge 3 Bluetooth Lautsprecher Micro USB DC Buchse Ladebuchse Connector

https://www.ebay.de/itm/163349223128

Falls Sie beim Austausch der Buchse Hilfe benötigen:

✅ REPARATUR Austausch Micro USB Ladebuchse JBL Charge 3 Bluetooth Lautsprecher

https://www.ebay.de/itm/163349231063

PC-Solutions -

This is incomplete repair directions. Putting the new connector on the board poses some issues. what about the pins on the back/bottom of the connector? how did you attach those to the board? Complete the repair!

adam724 -