Einleitung

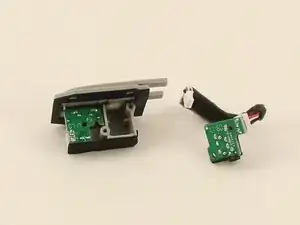
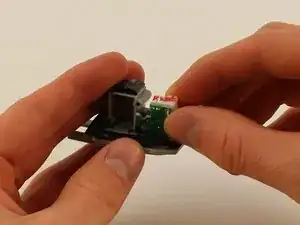
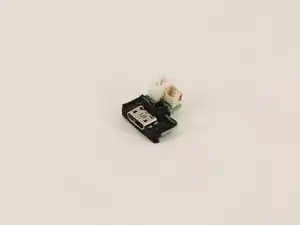
Wenn bei deiner Box Probleme beim Laden auftreten oder der USB-Anschluss locker erscheint, sind möglicherweise die elektrischen Anschlüsse für die Stromversorgung beschädigt. Möglicherweise ist ein Austausch des USB-Anschlusses erforderlich. In dieser Anleitung erfährst du, wie du den USB-Anschluss auswechseln kannst.

  1. TPdTjBXgaNNyAUQE
    TPdTjBXgaNNyAUQE
    uyxjyBvlQ5EvE4JM
    SXsnMdYGMSiQt6TY
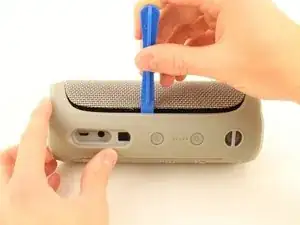
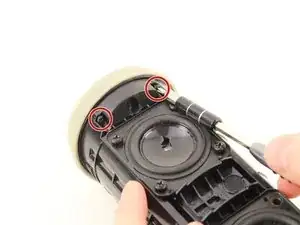
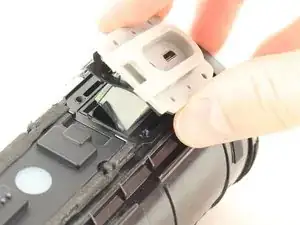
    • Führe das Öffnungswerkzeug in den Spalt zwischen der Abdeckung und dem Gummiboden ein. Achte darauf das die Box so steht, das die Akku-LED's links neben dem An/Aus Knopf sind (wie auf dem Bild).

    • Heble die Abdeckung ab. Beginne an der Seite, wo nicht die Lautstärkeregler sind.

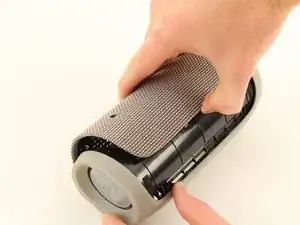
    • Beim Abnehmen der Abdeckung erzeugen die sechs Clips (drei entlang jeder Seite des Gummirückens), mit denen die Abdeckung am Lautsprecher befestigt ist, Schnappgeräusche.

    • Heble sehr vorsichtig, damit die Clips nicht beschädigt werden.

    • Ziehe die Abdeckung mit den Daumen ab.

    Important suggested edit to these instructions - make sure to pry off clips/ridges from BOTH sides before attempting removal of the cover.

    I interpreted these instructions as saying you only needed to pry clips from one side - then peel off cover. Doing this broke a clip from the other side. Bummer. I'd like others to avoid that.

    kevmuldoon13 -

    If you do break a clip - save it. They are relatively easy to glue back into the cover.

    kevmuldoon13 -

    My Flip4 had a single long clip on the non-button side that ran the entire length of the rubber spine. The other side (with play/ vol buttons) had three seperate clips (middle and both sides) as mentioned above.

    takentrashout -

    What if my speaker battery dies very fast and makes weird crackling noise, is it counted as faulty battery?

    Jayden Koh -

    Yes. I first thought one of the drivers was defective.

    Paul Sommer -

    What was the fix in the end ?

    Jack Mulcahy -

    I used the flared edge of a metal measuring spoon handle since I didn’t have an opening tool. Worked great! Replacement battery from iFixit is on order. Thanks for the guide!

    Greg -

    My battery was glued. Tried it anyway to remove. Battery exploded!!!!

    Don't go on if the battery is glued.

    darthvader007 -

  2. MqSuoCcPNBeHtZpb
    MqSuoCcPNBeHtZpb
    bRHK1IRZthrIHwUj
    YFp1hjI2RBYUSP5B
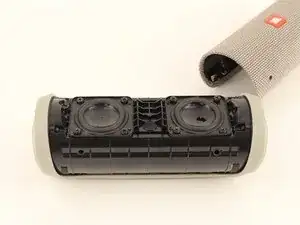
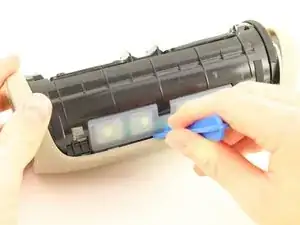
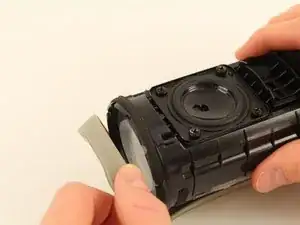
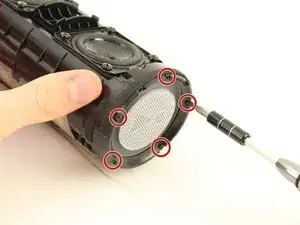
    • Entferne die vier 13mm JIS #0 Schrauben, mit denen die Gummiränder an den beiden Seiten befestigt sind.

    • Löse mit dem Öffnungswerkzeug die Clips, die den mittleren Teil des Gummirückens halten.

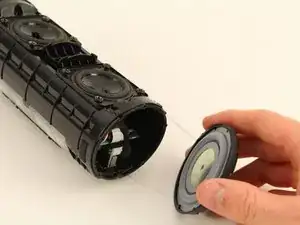
    • Heble einen Gummirand mit den Daumen weg, bis er sich löst. (Wie auf dem Bild).

    • Das Abnehmen der Rückseite kann etwas Fingerspitzengefühl erfordern.

    • Die Lautsprecher sind starke Magnete. Halte sie von anderen empfindlichen Elektronikgeräten fern.

    Suggested Edit : Be careful when removing the screws that they don't get attracted to the speaker (magnet). They can scratch the speaker.

    kevmuldoon13 -

    Note : screws don't need to be removed from their “channel” (it’s quite difficult). Just unscrew fully and leave in channel.

    kevmuldoon13 -

    Note or precaution: Place a piece of cardboard over the speaker or use a plastic/rubber/nonmetalic handled screwdriver when loosening/removing the 13 mm screws. The speaker magnets are so powerful that the end of my metal jewelers phillips screwdriver was pulled into the speaker, tearing the plastic/rubber cone. I destroyed two speakers in the process of replacing the battery. Had to buy the speakers from JBL ($16 each).

    Clark Brown -

    The rubber spine was fixed with glue strips.

    Jaider -

    I have 2 Flip 4's bought approx. a year apart. The older speaker was exactly as described here. The newer speaker does not have the 5 end screws, instead it has a twist to lock end plate. Make sure the top screws that secured the rubber end are removed, as these will prevent end cap twisting. I used rubber gloves to get a grip and twist end cap counter-clockwise to unlock. I found that if you grip end cap too tight it makes it even harder to twist off. Someone may find a better solution, like prising the tags around circumference, but be warned these look flimsy.

    Phil -

    Great guide. Only problem is that the battery on mine was in a neoprene sheath and had swollen. It was a bit of a problem to get out. There didn’t seem to be room to fit something to push it out without damaging wires or the motherboard. At the risk of a fire, I worked it back and forth and pulled with a pair of needle nose pliers. Yes there were sparks and some smoke. I did it outside and knew I was risking the whole thing catching on fire. Luckily it went ok.

    Q Switch -

    Great guide! I have a model with the twist-off caps (not 5 screws) with helpful, though subtle, lock/unlock icons on the plastic. Only other problem was replacing the white neoprene battery retainer cover (2 screws). One screw slipped off my screwdriver and fell into the unit - probably stuck to a speaker magnet now. But it doesn't seem to be affecting the sound. iFixit is the best!!

    Jen Morris -

  3. pG2pjcBNnP6P2ZfZ
    pG2pjcBNnP6P2ZfZ
    urdHPnDVFVKxSQaE
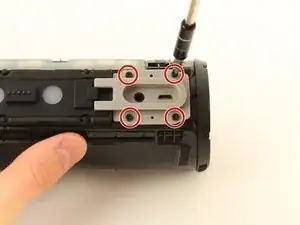
    • Entferne die vier 9mm Kreuzschlitzschrauben #1 die den grauen USB-Anschluss befestigen.

    • Löse das graue Gehäuse der USB-Abdeckung mit der Hand ab.

    Minor point: the colour of the USB port and casing is whatever colour the speaker is. Mine was red so never had a gray USB port or casing.

    Yuri Silkin -

  4. mOf1PZsTlV4InLL1
    mOf1PZsTlV4InLL1
    Sxm3rSbnmVaGjo16
    • Entferne die fünf 9mm Kreuzschlitzschrauben #1 um die Endkappe mit dem JBL-Ausrufezeichen zu entfernen.

  5. flkWSqhZepyd2LPR
    flkWSqhZepyd2LPR
    yqsrrgaAk1RRhSwC
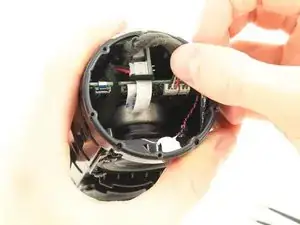
    • Ziehe den mit dunkelgrauem Schaum beschichteten Draht aus dem Bereich, in dem er verstaut ist, und schiebe ihn aus dem Weg (Wie auf dem Bild).

  6. AcWg4YrSmwgQdVhM
    AcWg4YrSmwgQdVhM
    iWSWpPZjO5wKC6KH
    EoBrDIQnucXLEnwp
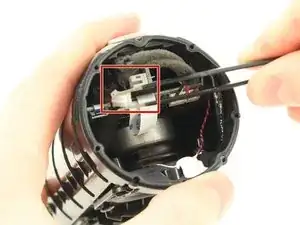
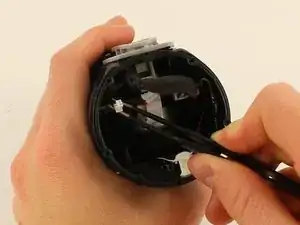
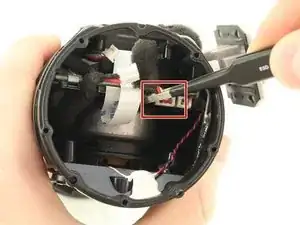
    • Löse den weißen Stecker, der an der kleinen Platine des grauen Micro-USB-Gehäuses befestigt ist (Wie auf dem Bild), mit der ESD sicheren stumpfen Pinzette.

    • Ziehe den Stecker durch den Spalt in der großen Leiterplatte, damit du an den nächsten Stecker hinter ihm gelangen kannst.

    JBL has upped their “security” I see. On mine, this plug is glued in place and the ribbon cable nearby is completely covered in tape so I can’t unhook it.

    Melinda Rabenstein -

  7. lthIEglBEQQSyLJ2
    lthIEglBEQQSyLJ2
    RM6uGfCLg2KhfU4t
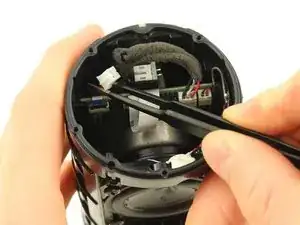
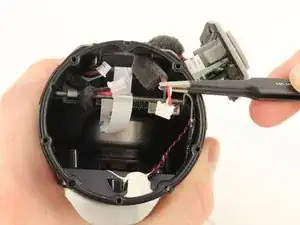
    • Hake den anderen kleineren weißen Stecker hinter dem vorherigen Stecker von der gleichen Leiterplatte mit der Pinzette aus.

  8. EnRQ3iS2BL6TmayO
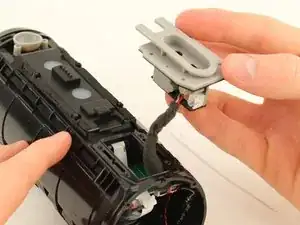
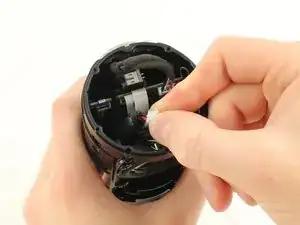
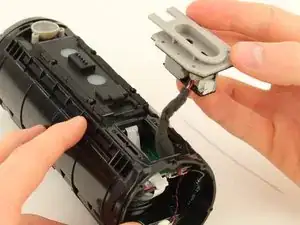
    • Ziehe den grauen USB-Anschluss aus dem Lautsprecher.

    • Ziehe nicht zu fest am USB-Anschluss, da er noch mit Kabeln angeschlossen ist.

  9. eVFG6FMjQCxyWNZP
    eVFG6FMjQCxyWNZP
    RmHoCwWXXYRtGXt2
    4GEusiHTGhgkbWjt
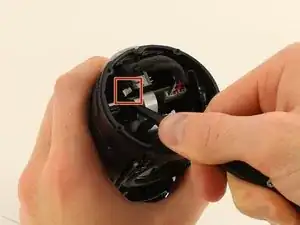
    • Löse den kleinen weißen Stecker, der an der Hauptplatine angebracht ist, die den USB-Anschluss am Lautsprecher hält (Wie auf dem Bild).

    • Entferne die USB-Anschlusskomponente aus dem Lautsprecher.

  10. UDETSTqpCPQULho3
    UDETSTqpCPQULho3
    WXASE3ieHwcgJWmf
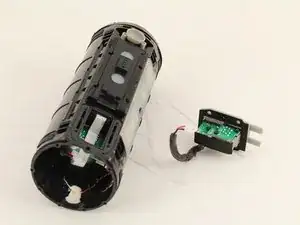
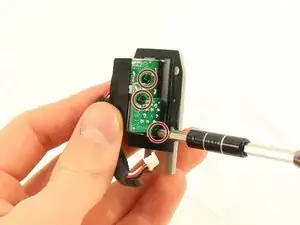
    • Entferne die drei 9mm Kreuzschlitzschrauben #1, mit denen die beiden kleinen Leiterplatten an der USB-Anschlusskomponente befestigt sind.

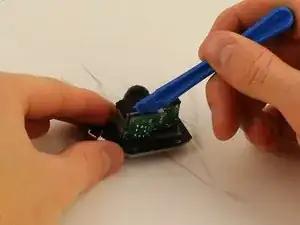
    • Heble die obere kleine Platine mit dem Öffnungswerkzeug ab (Wie auf dem Bild).

    • Du musst etwas Kraft aufwenden, um diese Platte zu entfernen, weil sie festgeklebt ist.

  11. VTYI4CScAKLbMuXk
    VTYI4CScAKLbMuXk
    OkVyFPwQy4KTGGN2
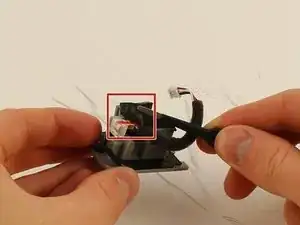
    • Ziehe den schwarzen Klebestreifen auf der Unterseite des Bauteils mit der Pinzette ab und entferne die Kabel darunter.

    • Entferne die erste kleine Platine und die angeschlossenen Drähte.

  12. BpODGuMVHSbW2255
    BpODGuMVHSbW2255
    pgpqfYmLTvbvNkJn
    • Ziehe die zweite Platine mit den Händen heraus und entferne sie.

    • Du musst möglicherweise fest an dieser kleinen Leiterplatte ziehen, da sie auch an einigen Stellen festgeklebt ist.

    Well presented. Needed. Wire pin descriptions. Thanks

    Nard Curedlard -

Abschluss

Folge den Anweisungen in umgekehrter Reihenfolge, um die Box wieder zusammenzubauen.

Philip Pang

Mitglied seit: 08/10/18

1164 Reputation

9 Kommentare

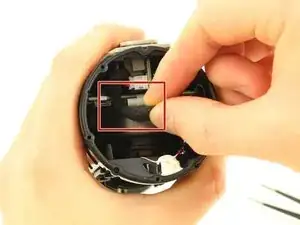
Hi, I need to replace this circuit board where the charging port mounts.

While trying to remove damaged micro usb port, I damaged the tiny wires from the circuit board.

I tried to find this online but no luck so far.

Do you know the code for this PCB?

Thank you,

alex garcia -

hi, where can i buy new circuit board for micro usb charging port?

joseph celerio -

please i need 1… thank you.
joseph celerio -

I have a question on the small circuit board (charge port), one of the female port on it is for power (+5v), but what is another one? Is it D+, D- ?

P.S. I’ve measure that port with micro usb connected to power source, turns out there has no voltage measured, but the bigger one does has 5v measured.

Thanks!

馮會鈞 -

https://www.ebay.com/itm/184156589848

Just ordered one of these. Told it’ll be delivered by August 1st.

Ryan Crammer -

Would be so great if you could tell us where we could obtain a replacement USB port that INCLUDES the little circuit board. All replacement parts I have found are the port itself and not the port including the little circuit board and plugs.

Brett Strydom -

Hi I discovered water on the inside of the on button rubber layer how do I access it?

Benedict Fong -

Thanks. Brought this speaker back to life. Reconnecting the wires was a little bit of a challenge but got it done in the end.

Dave Swindells -