Einleitung

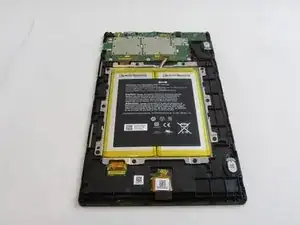
This guide shows how to replace your Kindle Fire HD 10 (7th Generation) Battery.

The batteries wear out over time due to repeated charging cycles. If you notice a decrease in performance from your battery, you may need to replace your battery. For further information look at this link below:

Amazon Fire HD 10 (7th Gen) Repair


Warning: before you start working on replacing your battery, make sure your Kindle Fire HD 10 device is turned off and the charger is disconnected.

  1. teCykDVKq1NBO4gj
    teCykDVKq1NBO4gj
    Et1QS4XdbwAIhDHE
    NbQfcTsq1nm6QXO1
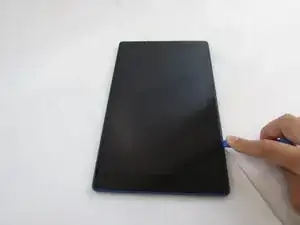
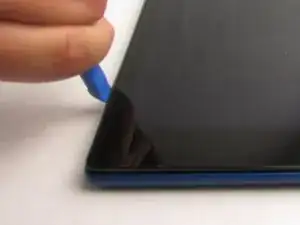
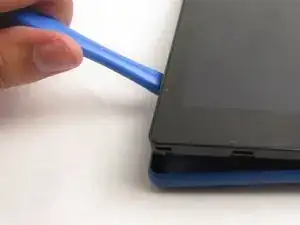
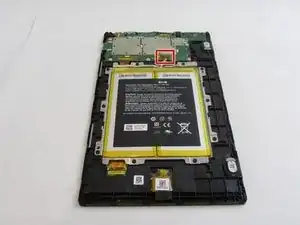
    • Pry open the case using the iFixit opening tool. Make sure to go around the whole case before removing the whole case.

    • Some force is required to remove the back cover. In order to remove the casing successfully, keep the clips holding the cover from "popping" back in.

    I think you could combine these two bullets to be more concise. Can you be clearer about how to separate the two pieces?

    Alex Watkins -

    There are an additional 4 clips on the back of the 10 inch Fire that engage with catches, 2 on each side near the battery. Open case as described but to more easily separate slide a long spunger inside the case to disengage these inner clips from their catches.

    George Monk -

  2. v1ePZ3tLqIyExuEu
    v1ePZ3tLqIyExuEu
    vwHEfKSE2NmaVgan
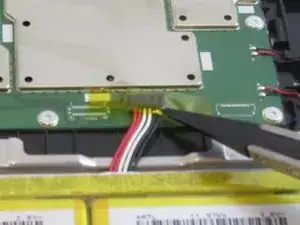
    • Remove the plastic yellow taping from the wire circuits using a pair of tweezers.

    Where is this? Consider adding a top-down markup shot to show the user where this is. Do you have a less blurry image? Do you have images where you’re doing this, like a before and after?

    Alex Watkins -

  3. xojiuJHhiGRAnZWk
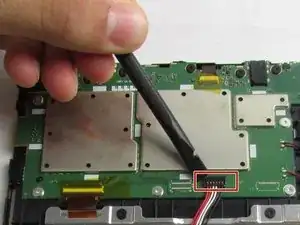
    • With slight force pry off the cable connecter using a spudger.

    Which tool? Does it require force? Also, note that iFixit uses circles for screws, only.

    Alex Watkins -

    These are great questions! I can definitely imagine myself being a bit confused without some of the details you requested/suggested.

    Kudos, too, to the author(s) who incorporated the additional information into this VERY helpful tutorial. Your efforts are greatly appreciated!

    Hamartia MacGuffin -

    May want to let people know in which direction you need to go to "pry off" the cable end that attaches. Especially as the spudger in the image looks to be applying force toward the battery. For those that come later, you need to "pry up" from the cable side as there are two extrusions that lock the cable end from moving toward the battery.

    Morden Kain -

  4. IqjeapFLvcSNsAwu
    IqjeapFLvcSNsAwu
    bMIaIyAK1COweqeT
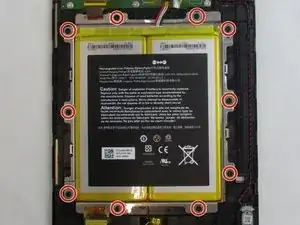
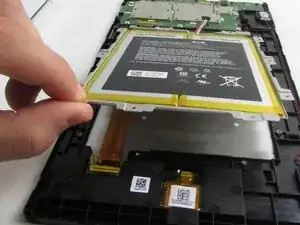
    • Remove the ten 4mm screws from the outsides of the battery with a Phillips #0 screwdriver.

    • Lift out the battery from its resting position using your fingers.

    Make sure to mark up all screws. You also don’t need the image with the screw measurement.

    Alex Watkins -

Abschluss

To reassemble your device, follow these instructions in reverse order.

Jonathan Stewart

Mitglied seit: 20/09/19

294 Reputation

Ein Kommentar

I cannot open a SL056ZE.

I mean I opened it up to all around it, it lifts but there seems to be part of ‘blue’ plastic cover - internally - that is kind of locked into right side of PCB [looking at it with battery below !

Any ideas?

JoeBlog -