Einleitung

If your Kindle Fire 8.9'' has cracked front glass or a damaged screen, use this guide to replace the entire display assembly, including the LCD display, touch digitizer, front panel, and frame.

  1. bkbEhyiXZ1HjKZ4C
    bkbEhyiXZ1HjKZ4C
    gPtwNbXUYPDcx3LA
    BTCfm1oDvMG3DyM3
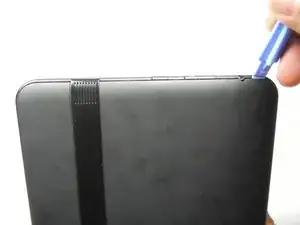
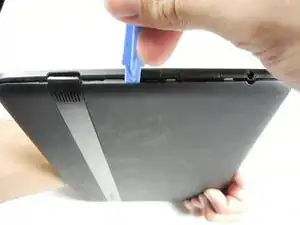
    • Insert a large plastic opening tool next to the Kindle's headphone jack.

    • Make sure the notch on the plastic opening tool is facing the back of the Kindle.

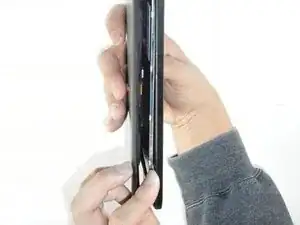
    • Move the plastic opening tool evenly around the Kindle, separating the two halves.

    • Be careful not to completely separate the rear cover. There are two delicate flex cables that connect the display assembly to the motherboard.

    Getting the SIM card dummy plug out a real challenge. Broke off one end. Seems this part was never intended to be removed.

    Bob Steger -

  2. En1T3mMhf3MtTQOA
    • Set the Kindle down on the rear case.

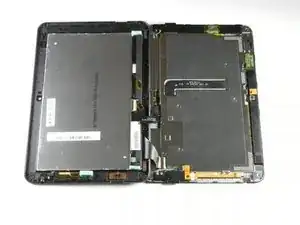
    • Holding the display assembly near the camera, carefully open the display assembly up to about 90 degrees from the rear case.

    • These images show the Kindle laying flat. In order to prevent damage to the flex cables, keep the Kindle open at 90 degrees while disconnecting the display assembly.

  3. IyOjwXpAigmDHn1s
    IyOjwXpAigmDHn1s
    Ai1asMaRQKIdSJLM
    EfBUsZv31oTnkMwG
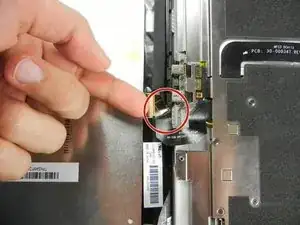
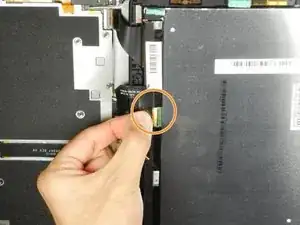
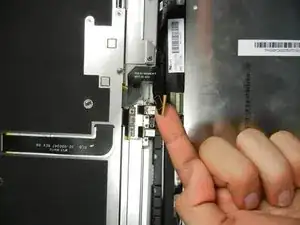
    • Lift the retaining flap on the ZIF connector of the upper flex cable.

    • Gently pull the cable out of its socket.

    • This flex cable is delicate. Be careful not to crease or bend it while working.

    This is very delicate. The flap is very easy to break off. Remove the yellow tape on both these connectors and replace with ordinary plastic tape upon reassembly. If you don't tape them you'll pull them apart working on the other. A helper to hold the assy is a good idea.

    Bob Steger -

  4. RTnuHjAGGrSRL6cX
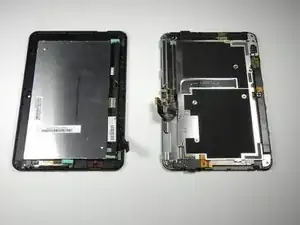
    • Separate the display assembly from the rest of the device.

    • When reassembling the device, align the two halves of the case before connecting the flex cables.

Abschluss

To reassemble your device, follow these steps in reverse order.

Jesus Perez

Mitglied seit: 11/01/13

992 Reputation

21 Kommentare

Where are the rest of the instructions???? I now have a disassembled Kindle and no idea how to install the new screen!

Lisa Comer -

At the end of every iFixit guide, next to the "I did it! Success!" button, there is a message that says "To reassemble your kindle, follow these steps in reverse order." However in some cases, there will be a slightly different message. In the case of this guide, the message says "To reassemble your kindle, follow these steps in reverse order. Just make sure that you successfully connect the two flex cables to each half of your kindle and that you then align the two halves on the side opposite the camera before reassembling it."

Ian Meeder -

I think Lisa is asking for instructions concerning LCD display unmount. I got the same issue

Marlon -

How do you put the screen on??????

Ally -
while you are at it, try replacing the battery for a better experience.

I did, checkout this battery for kindle here :

http://bestbattery.biz/Amazon/219010-Kin...

Kermit45 -

Why does the title say for screen replacement when all it shows you is how to open and separate the kindle ? I still don't know how to replace the screen digitizer . Anyone figure it out ???

Christian -

So lame post

Douglas -

the lcd and digitizer are glued so both are replaced together

chughes60 -

I was wondering how to reattach the flex cables, do they slide in or do they rest on top? Mine came with 2 little pieces of yellow tape.

librarylady7 -

The connectors for the display assembly flex cables each have a delicate lever tab that flips up to release the flex cable and the cable slides out of a slot under the lever tab. To reinstall, the black lever tab should be up and the flex cable can then slide under the tab. When the flex cable feels like it is inserted as far as it will go fold the lever tab down flat over the cable. The yellow tape is typically installed after the cable is in place and the lever is closed. The tape provides some insurance that the lever will stay down and the flex cable stays in place.

Jeff Stephens -

What, and where is the "Lock Key" ? I was unable to find such on my grandson's Kindle Fire HD 8.9" tablet when I disassembled it.

I am an experienced fixer, so I don't believe that I missed anything.

Thanks!

Michael Driver -

This was useless. I now have the kindle in half with no way to figure out how to put the new screen in. Really? Can anyone help me?

svsmith24 -

I've replaced the battery but the Kindle still doesn't work. It charges and the start up screen say Kindle Fire but the swipe screen doesn't come up. The screen doesn't show any visible cracks. Hate to purchase a new screen to find out there something else wrong with the device any help would be appreciated.

treehousecq -

I purchaed a lcd and digitizer to do this repair. It did not come with the frame around it. How do i replace without breaking anything. Seems like things are glued together. This guide only really shows how to replace with a full frame and already has the lcd and digitizer glued in

Chris Porter -

The lock key the author is referring to is the SIM card tray. I had to remove it before the two halves would separate.

Julie -

If you are replacing the digitizer glass only, you will need to use a heat gun to soften the adhesive so you can separate the glass from the lcd. You can then use a thin pry tool like a guitar pick or iSesamo to slowly pry the glass away.

Julie -

Okay I replaced the screen but when I turn it on the screen is split. It repeats itself. What do I do?

Karen Utsey -

As stated in prior comment, I purchased a Display Assemby(LCD and Touch Screen). There is no front frame included. Do you have instructions to remove old Display assembly from front cover? Any information is appreciated.

Steve Taylor -

Is this screen adaptable to the Kindle Fire HD 8 (7th Generation)?

Catalina Kim -

After replacing the battery, the ZIF cable retaining flap on the largest of the two sockets broke off while re-connecting. I tried using tape and it seems to hold. Images appear on the screen, but the touch-screen doesn’t work. Is there any solution other than replacing the socket (which would not be worthwhile due to the unit’s age)? And I suppose it’s possible I may also have damaged the cable itself—not sure. 3HT7G, 8.9”. Thanks! sdelahoyde@netscape.net

Stan Delahoyde -

Does anyone know which of the two boards contains the flash memory?

Leo -