Einleitung
Diese Anleitung zeigt dir wie, du eine defekte Hauptplatine austauschen kannst.
Werkzeuge
Ersatzteile
-
-
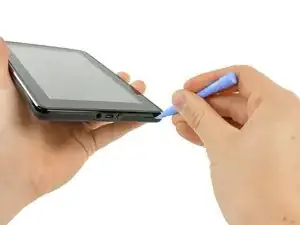
Zwänge ein Plastiköffnungswerkzeug in den Spalt an der unteren rechten Ecke des Kindle Fire.
-
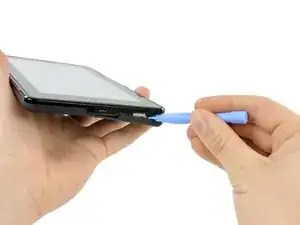
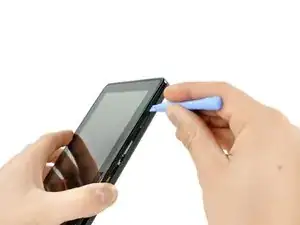
Heble die Teile auseinander und lasse das Werkzeug rings um das Kindle Fire laufen. Löse so die Rasten, welche die beiden Gehäuseteile zusammenhalten.
-
Es kann helfen, wenn du die Unterseite des Kindle weg vom oberen Teil ziehst (und heraus aus der Seite). Wenn du zuviel Kraft zum Trennen aufbringst, ohne zu ziehen, können die Rasten brechen.
-
-
-
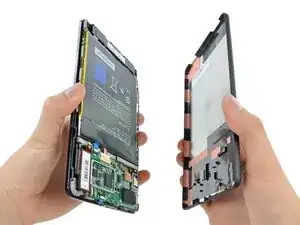
Wenn alle Kunststoffrasten gelöst sind, kannst du das Gehäuserückteil weg vom Kindle Fire ziehen.
-
-
-
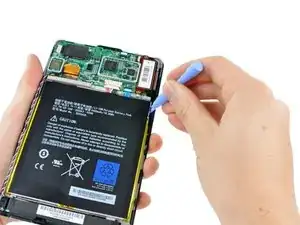
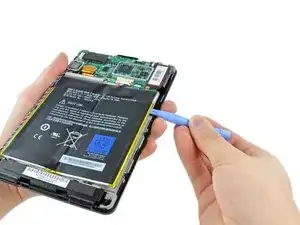
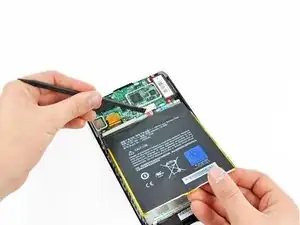
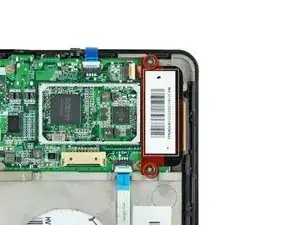
Setze die Spitze eines Plastiköffnungswerkzeugs zwischen die rechte Akkuzelle und dem Rahmen des Kindle Fire.
-
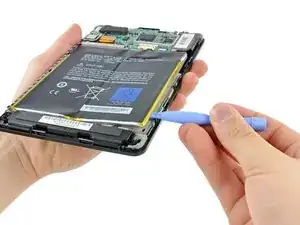
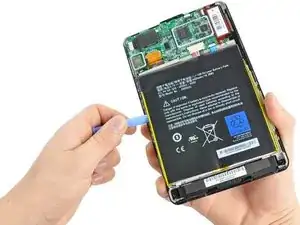
Heble den Akku hoch und arbeite dich mit dem Werkzeug die Kante entlang, um die Klebeverbindung zum Rahmen zu trennen.
-
-
-
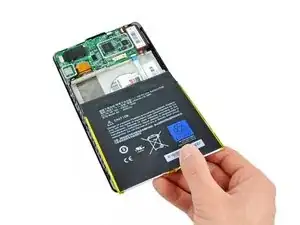
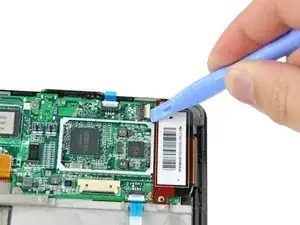
Hebe die Rückseite des Akkus hoch, um jegliche Spannung vom Akkuanschluss zu nehmen, und benutze gleichzeitig einen Spudger, um den Akkuanschluss aus seinem Verbinder zu schieben.
-
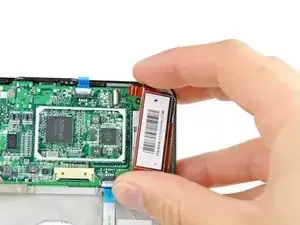
Ziehe den Akku aus dem Kindle Fire heraus.
-
-
-
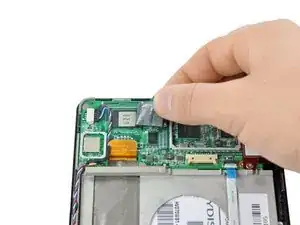
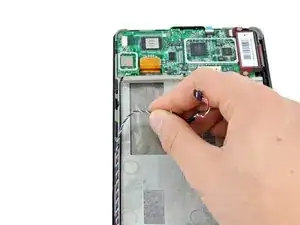
Ziehe das Stück Klebeband vom linken oberen IC ab, welches das Lautsprecherkabel festhält.
-
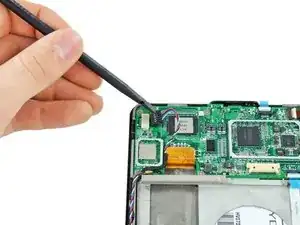
Schiebe mit dem flachen Ende des Spudgers den Stecker des Lautsprecherkabels aus seinem Sockel.
-
Fädle das Lautsprecherkabel aus, so dass es nicht mit der Hauptplatine ins Gehege kommt.
-
-
-
Entferne die beiden 2,3 mm Kreuzschlitzschrauben #00 vom Kontroller des Touchscreens.
-
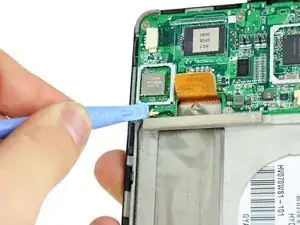
Löse den Stecker am Kontroller des Touchscreens mit einem Plastiköffnungswerkzeug.
-
Hebe den Touchscreen Kontroller hoch und nach rechts. Entferne ihn vorsichtig.
-
-
-
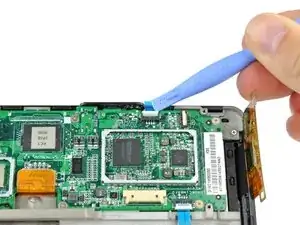
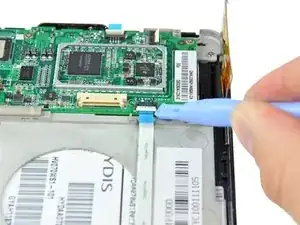
Klappe den Sicherungsbügel am ZIF Verbinder der Einschalttaste mit einem Plastiköffnungswerkzeug hoch.
-
Klappe den Sicherungsbügel am ZIF Verbinder des Helligkeitssensors mit einem Plastiköffnungswerkzeug hoch.
-
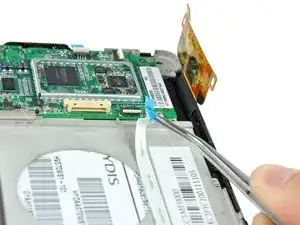
Ziehe mit einer Pinzette an der blauen Lasche am Kabel des Helligkeitssensors, um es aus seinem Sockel zu entfernen.
-
-
-
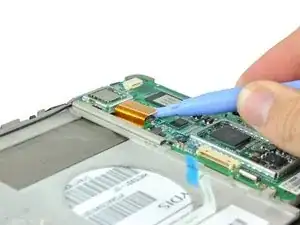
Benutze ein Plastiköffnungswerkzeug um das Displaydatenkabel hochzuheben und abzulösen.
-
Hebe den Antennenstecker mit einem Plastiköffnungswerkzeug hoch und löse ihn.
-
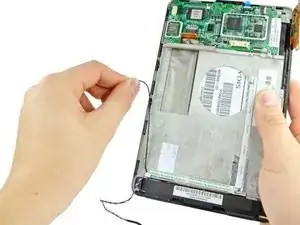
Fädle das Antennenkabel aus.
-
-
-
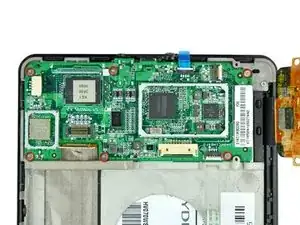
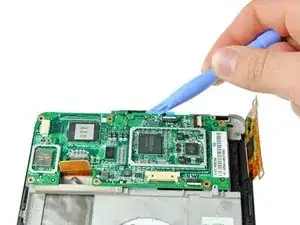
Entferne die sechs 2,6 mm Kreuzschlitzschrauben #00, welche die Hauptplatine am Rahmen befestigen.
-
-
-
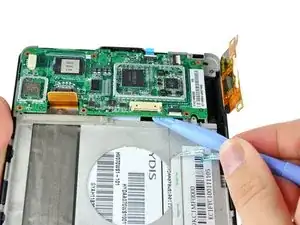
Hebele vorsichtig mit einem Plastiköffnungswerkzeug an der Unterseite der Hauptplatine, um sie von der Klebeverbindung darunter zu lösen.
-
Hebele die Hauptplatine oben mit einem Plastiköffnungswerkzeug hoch, bis sie frei kommt.
-
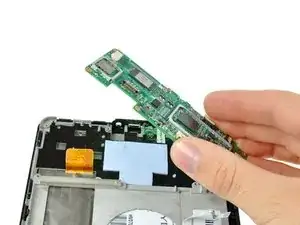
Hebe die Hauptplatine aus dem Kindle Fire. Achte dabei darauf, dass das Kabel zur Einschalttaste aus Schritt 8 aus seinem Anschluss herauskommt.
-
Um dein Gerät wieder zusammenzusetzen, folge den Schritten in umgekehrter Reihenfolge.
5 Kommentare
These are excellent instructions. Unfortunately, it's impossible to find a motherboard for a first generation Kindle KINDLE FIRE 31KC1MB0090 for the D01400. I just spent an hour searching the Internet including, eBay, powerbookmedic.com and Pronto.com. PowerBookmedic advertises the motherboard but they are out of stock. If anyone has any sources, I would greatly appreciated it.
I did it! I removed the Kindle Fire 7" motherboard, replaced the USB connector with one bought from a vendor on eBay, and then reassembled the Kindle with a fully functional USB connector. Your guide made it an easy project for a couple hours on a Sunday afternoon.
Soldering the fine-pitched connector is probably not for the faint of heart, but I have a good temperature controlled soldering station and a lighted magnifier that made the task eminently do-able.
I would not have tackled this project without your step-by-step guide and Plastic Opening Tools.
Thanks!
/john
jkeefe1 -
Where did you get the connector. If you can send me a link for the connector. I have the same issue.
Kevin
Mon kindle fire ne s'allume pas car lorsqu'il affiche le logo directement un écran rouge affiche et puis rien
NICEFORT -


Where can I buy a battery for my kindle fire
nannyto2 -
Try EBay or Amazon. make sure you get the right battery for your Kindle , one is for a Kindle HD and the older version........both are 7 ".
vvenona1954 -
Remember to remove any sd card first!!! Snapped mine in half.
lucy_lady_bug -
I have the first kindle that came out and it doesn't have the same setup how can I open the back of my kindle?
Kris Sanders -