Einleitung
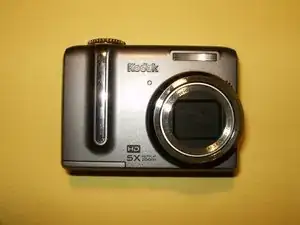
This replacement is a straight forward job. It only requires a few tools, a bit of dexterity, and patience, particularly during the removal of the rear case.
Werkzeuge
Ersatzteile
-
-
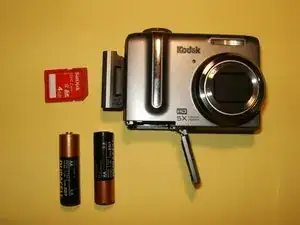
Remove the batteries and the memory card from the camera, if so equipped. The batteries can be located on the bottom of the camera, and the memory card can be located on the left side of the camera.
-
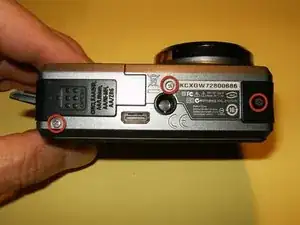
Remove the three screws on the bottom of the camera, where the battery hatch is located.
-
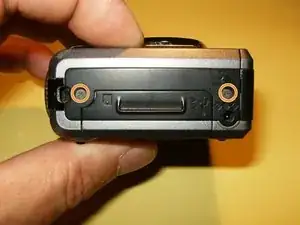
Remove the two screws on the left side; this is one of two short sides and is the same side of the memory card storage.
-
-
-
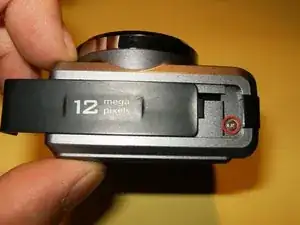
Remove the screw on the right side, underneath the side cover. The side cover is attached to the camera by one of the screws on the bottom, and the cover should easily slide down to reveal the screw.
-
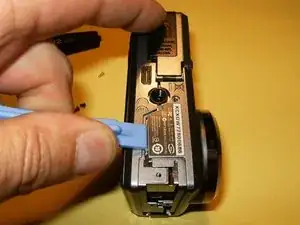
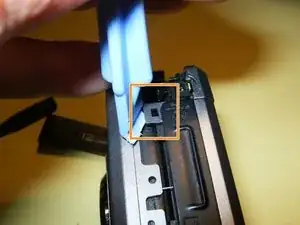
Separate the outer case from the catches on the bottom of the camera with an opening tool. The case clicks into place with a few catches on the bottom and the sides of the camera.
-
Separate the case from the catches on the sides of the camera with an opening tool.
-
-
-
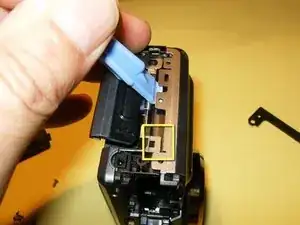
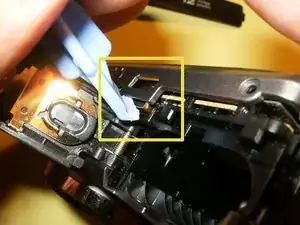
Undo the catch on the top left side of the camera.
-
Undo the catch on the bottom left side of the camera.
-
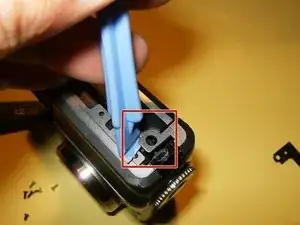
Undo the catch on the battery compartment of the camera.
-
-
-
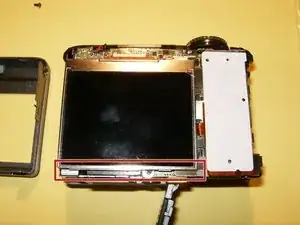
Separate the rear case from the camera by wiggling the opening tool. You should have a clear view of the LCD in its frame.
-
Lift the LCD out of its frame, but do not fully detach it yet. It is still attached to the camera by two ribbon cables.
-
-
-
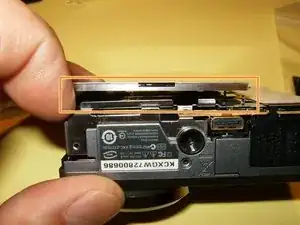
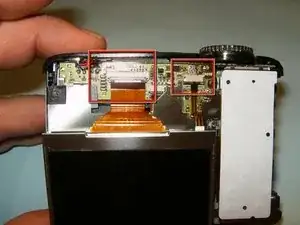
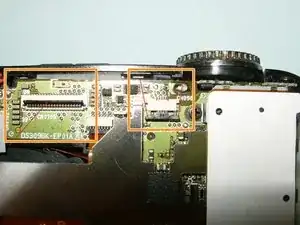
Slide the LCD screen down and out of the frame, so that the two ribbon cables underneath are now visible.
-
Push the compression clip away from the connector with your fingernail or a small tool. Moving the clip a few millimeters will fully detach the LCD from the camera.
-
Install the new LCD screen.
-
To reassemble your device, follow these instructions in reverse order.
4 Kommentare
to lift lcd there are four clips two on top two on right side.
ps under the lcd are two screws to take off the lcd mount but first u need to remove buttons ribbon cable. be careful since the ribbon cables are cheap injust watched the gold connecter flake off mine so my repair is foiled litterly. plus i noticed corrosion on the usb/kodak connector and more corrosion at the top at cn0901 and cn0902 maybe thats why the camera was taking bad photos with lines and pinkish colors. i am going to snip some ribbon cable off to try and fix it. The white cable is what give me problems.
fixed the white cable on the left under lcd by snipping off a bit. thankfully the contacts arent stacked like the other cables. by taping the sensor i am taking better photos.
