Einleitung

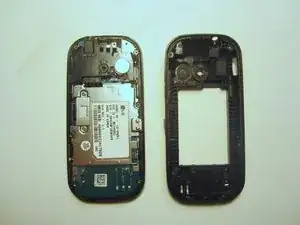
The steps to this process straightforward and mostly involve removing screws.

  1. sQDRDYEZwH5tiJWB
    sQDRDYEZwH5tiJWB
    I5OXtoYRUjAtf5rN
    OxtLVD2iVJxkJbVL
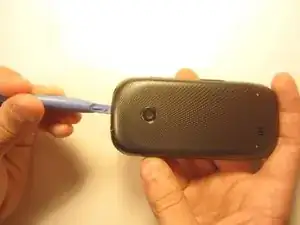
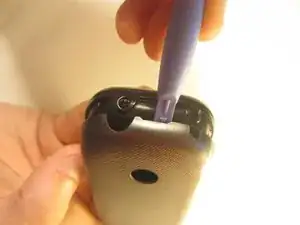
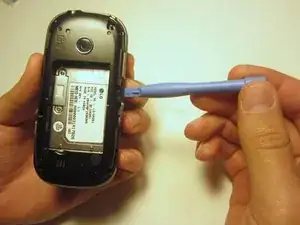
    • Insert the plastic opener into the slot at the top of the device.

    • Apply gentle pressure with the plastic tool to pop the back case off.

  2. dfjnRTFJmJogJ5NN
    dfjnRTFJmJogJ5NN
    4GwDNQGTMhAYoHHQ
    bFEMh1R5SqaaEwgV
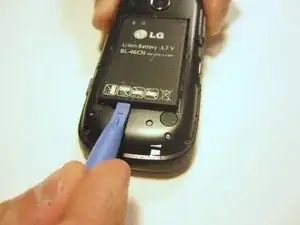
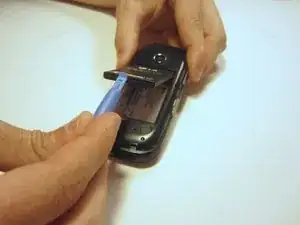
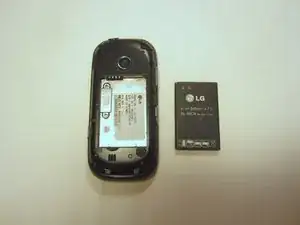
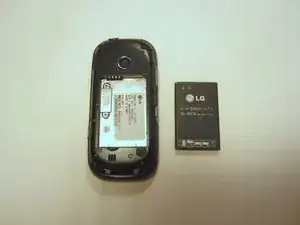
    • Use the plastic opener to lift, and remove, the device battery.

  3. Gdi1iSUJGZpvUvh5
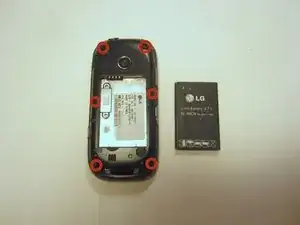
    • Use a screwdriver and corresponding bit to remove the six 2mm screws that are located along the edge of the rear case. Set the screws aside.

  4. TEocVeK5t2ErTBZl
    TEocVeK5t2ErTBZl
    haBq1rWUiEYfRvsw
    CNQpBR1tUCgwr1VO
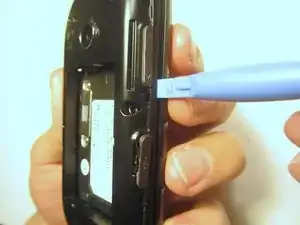
    • Use the plastic opener to pry the rear case loose.

    • This can be difficult. You will need to pry around the entire edge of the rear case, not just in one place.

  5. V5WtHHODkAX6k3uU
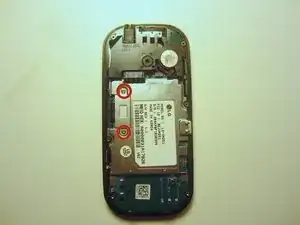
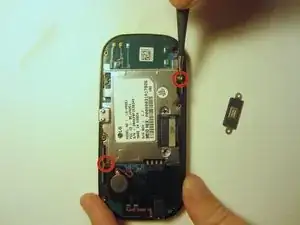
    • Use a screwdriver and corresponding bit to remove the two 3mm screws that attach the motherboard to the front case. Set the screws aside

  6. IhKKyEy4tK6LdKIB
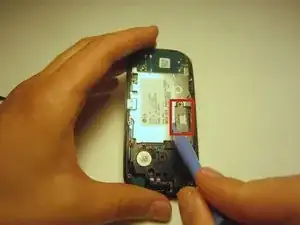
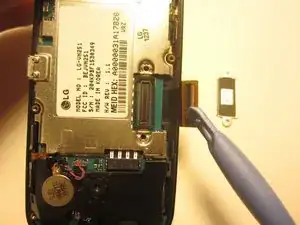
    • Rotate the phone 180 degrees and use the plastic opener to lift the metal piece that covers the ribbon cable.

  7. pRepVD5l6YPrA3aF
    pRepVD5l6YPrA3aF
    gUP1S2FTmHogwjAC
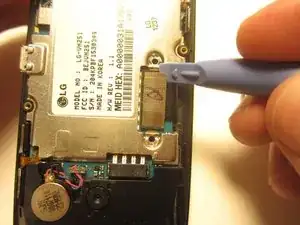
    • Use the plastic opener to disconnect the ribbon cable.

  8. eyBLfBiHQ2Q4INTG
    eyBLfBiHQ2Q4INTG
    RBVEyiIiNfTWGrtU
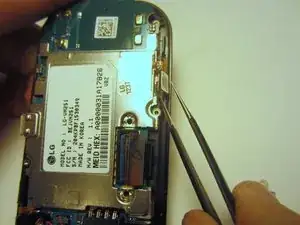
    • Use tweezers to disconnect the two cables that attach the motherboard to the case.

    • Note: Pull on the cables gently to prevent damage for future use.

  9. LQm1WBjx4MsVrA1Y
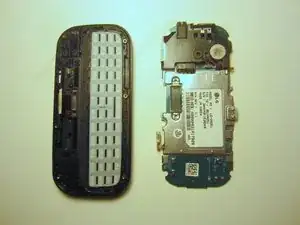
    • Remove the motherboard from the front case.

Abschluss

To reassemble your device, follow these instructions in reverse order.
Nick White

Mitglied seit: 18/10/13

851 Reputation

0 Kommentare