Einleitung

  1. sQDRDYEZwH5tiJWB
    sQDRDYEZwH5tiJWB
    I5OXtoYRUjAtf5rN
    OxtLVD2iVJxkJbVL
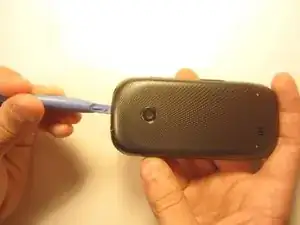
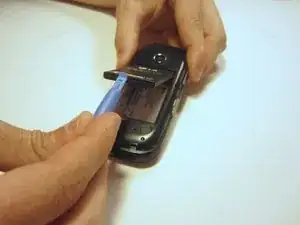
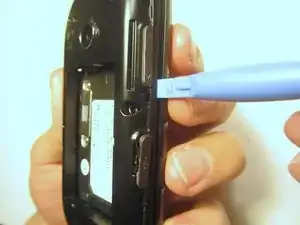
    • Insert the plastic opener into the slot at the top of the device.

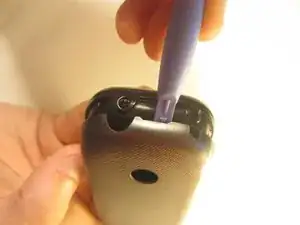
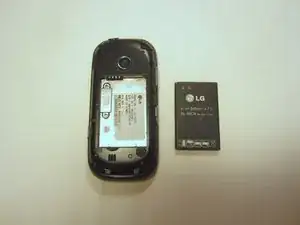
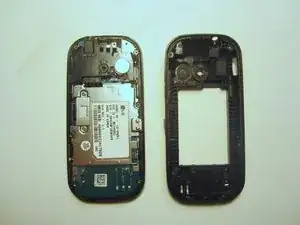
    • Apply gentle pressure with the plastic tool to pop the back case off.

  2. dfjnRTFJmJogJ5NN
    dfjnRTFJmJogJ5NN
    4GwDNQGTMhAYoHHQ
    bFEMh1R5SqaaEwgV
    • Use the plastic opener to lift, and remove, the device battery.

  3. Gdi1iSUJGZpvUvh5
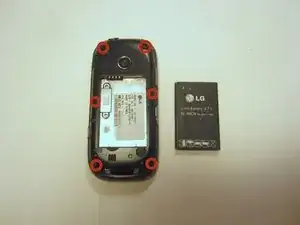
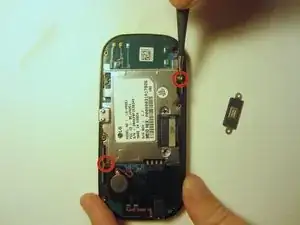
    • Use a screwdriver and corresponding bit to remove the six 2mm screws that are located along the edge of the rear case. Set the screws aside.

  4. TEocVeK5t2ErTBZl
    TEocVeK5t2ErTBZl
    haBq1rWUiEYfRvsw
    CNQpBR1tUCgwr1VO
    • Use the plastic opener to pry the rear case loose.

    • This can be difficult. You will need to pry around the entire edge of the rear case, not just in one place.

  5. V5WtHHODkAX6k3uU
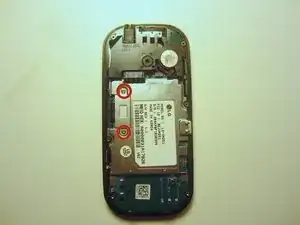
    • Use a screwdriver and corresponding bit to remove the two 3mm screws that attach the motherboard to the front case. Set the screws aside

  6. IhKKyEy4tK6LdKIB
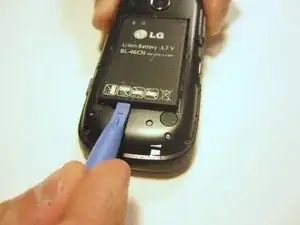
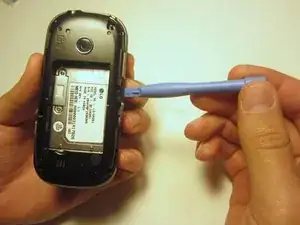
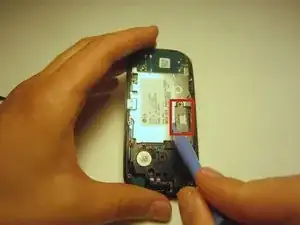
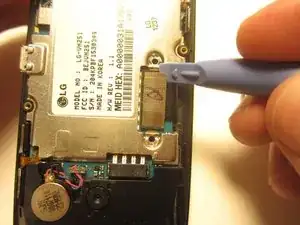
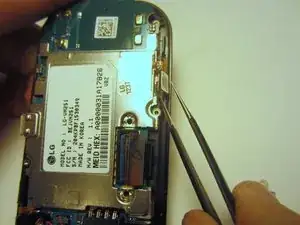
    • Rotate the phone 180 degrees and use the plastic opener to lift the metal piece that covers the ribbon cable.

  7. pRepVD5l6YPrA3aF
    pRepVD5l6YPrA3aF
    gUP1S2FTmHogwjAC
    • Use the plastic opener to disconnect the ribbon cable.

  8. eyBLfBiHQ2Q4INTG
    eyBLfBiHQ2Q4INTG
    RBVEyiIiNfTWGrtU
    • Use tweezers to disconnect the two cables that attach the motherboard to the case.

    • Note: Pull on the cables gently to prevent damage for future use.

  9. LQm1WBjx4MsVrA1Y
    • Remove the motherboard from the front case.

  10. yQtNGaFrycD2UexY
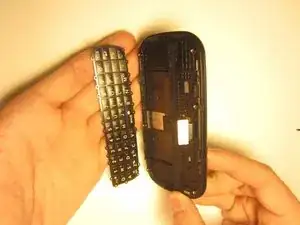
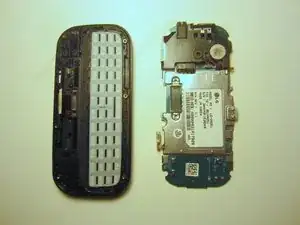
    • Flip the front case over. If the keyboard doesn't fall out, push it through the front case.

Abschluss

To reassemble your device, follow these instructions in reverse order.

Nick White

Mitglied seit: 18/10/13

851 Reputation

0 Kommentare