Einleitung

Use this guide to replace the rotor position sensor in your LG front load washing machine.

The rotor position sensor is a Hall effect sensor that detects the primary motor's position, direction, and speed.

This guide will work for most LG front load washing machines. This guide is written with a model WM3050CW washer. If you have a different model, you may encounter some minor disassembly differences, but the overall repair process will be the same.

  1. IWjgsUtZOIuShVqa
    IWjgsUtZOIuShVqa
    cmisDLhhQ1ZspJJT
    • Before you begin your repair, perform the following:

    • Turn off the main water supply

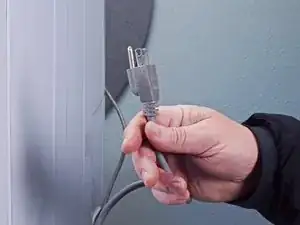
    • Unplug your washer

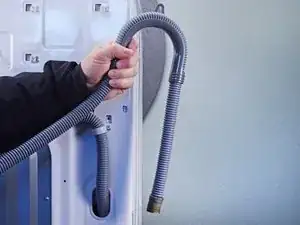
    • Disconnect all water connections at the rear of your washer

  2. a1CEVEuZVuhsJs3v
    a1CEVEuZVuhsJs3v
    s1Dx6pURHR66tbUG
    WMesicEUoODuO1DI
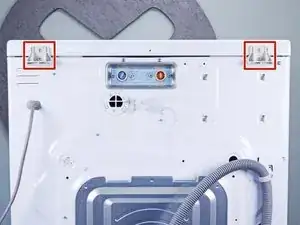
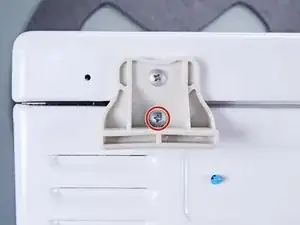
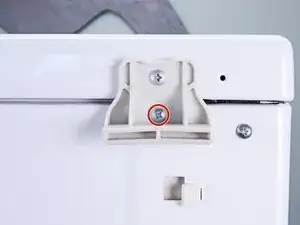
    • Remove the screw(s) securing the top panel brackets to the back panel.

    • You don't need to remove the screws securing the brackets to the top panel.

  3. MXS5aiRAHxRbjTgD
    MXS5aiRAHxRbjTgD
    BqIF6FiMQVaOIZZQ
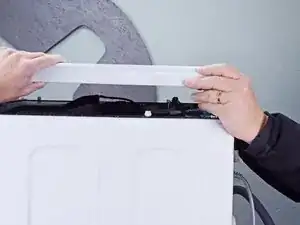
    • Slide the top panel towards the rear of the device to disconnect its clips.

  4. vk2XTwmpQAn5SSnW
    vk2XTwmpQAn5SSnW
    mKqTwIkkot2M6aDA
    • Tilt the top panel upward to completely disconnect it from the chassis.

    • Remove the top panel.

  5. UbPISVaNbMZCSqrJ
    UbPISVaNbMZCSqrJ
    rIhahTuBa2tFG6Ud
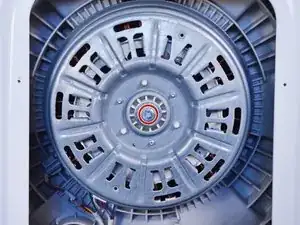
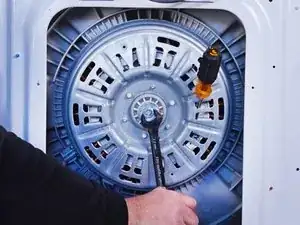
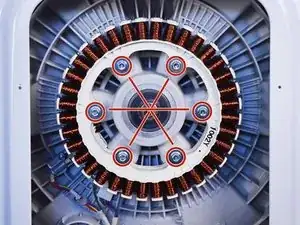
    • Use an impact driver to remove the 17 mm nut securing the rotor.

    • Alternatively, you can use a wrench and a hammer to loosen the nut.

    • To secure the rotor, you can insert a screwdriver, or a similar tool, between the rotor and the stator. Make sure to brace the tool against one of the screw bosses on the stator.

  6. Xu4qysZjHOMpmEyC
    Xu4qysZjHOMpmEyC
    II5u5VTQ1Wi56w2V
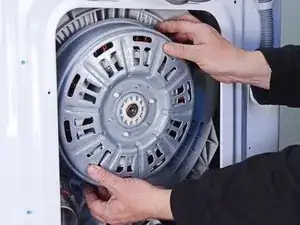
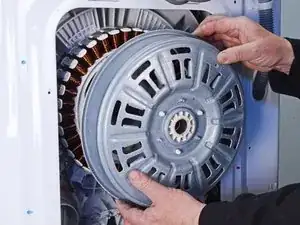
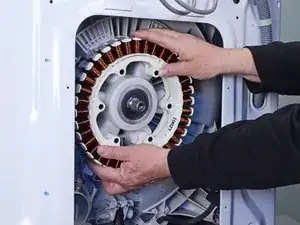
    • The rotor is magnetically attracted to the stator.

    • Pull the rotor straight off the stator and drive shaft splines to remove it.

    • Wiggle the rotor as you pull to help disconnect it.

    • This may require significant force.

    • During reassembly, watch your fingers when aligning the rotor over the stator, as the rotor gets sucked in easily.

  7. 22JcVTLtF5WEjc62
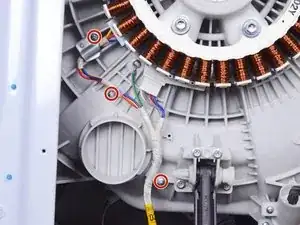
    • Remove the screw(s) securing the motor harness clamps.

  8. mMdGZi2SYCHnZ2id
    mMdGZi2SYCHnZ2id
    hh1AUNHuVNqRYROs
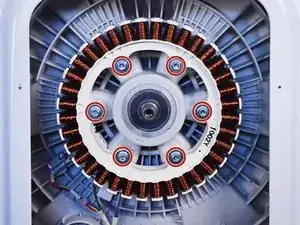
    • Hold the stator up as you unfasten the last few bolts, as it can fall over unexpectedly.

    • Remove the bolt(s) securing the stator.

    • During reassembly, refasten the screws in a "star" pattern.

  9. srsQ1jEspNEVEUCD
    srsQ1jEspNEVEUCD
    MhPqemWPVZhEUe5s
    V2vkxaT6ACwSIZuU
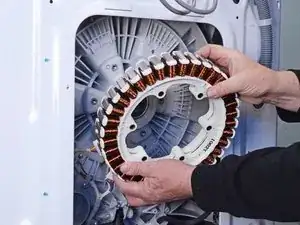
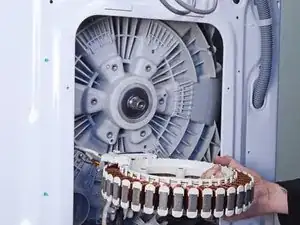
    • Don't pull the stator too far away from the device, as it's still connected by wires.

    • Pull the stator off of the drum and flip it so its rear is facing upward.

    • Note the position of the stator before continuing, as you will need it face the proper direction during reassembly.

  10. OR2Z1PnkOIHsFhoY
    OR2Z1PnkOIHsFhoY
    sPnKKvv5KCJgwBjJ
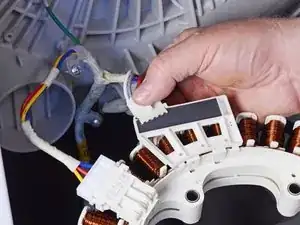
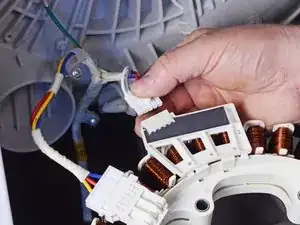
    • Pull the rotor position sensor connector straight out of its socket to disconnect it.

  11. DFG1HejLTHnoM1kc
    DFG1HejLTHnoM1kc
    DrCioQwJOPb4KefM
    G2NeeoFIvkbRQCP2
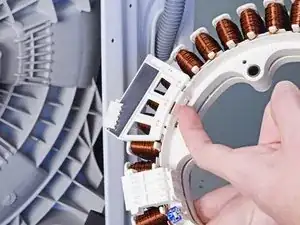
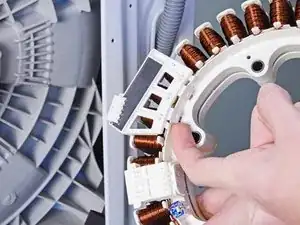
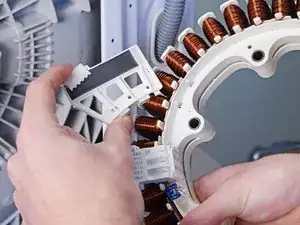
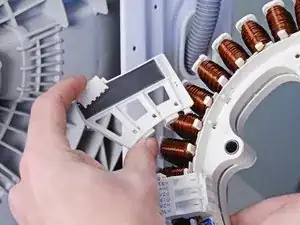
    • Use your fingers to unclip the rotor position sensor from the stator.

    • Pull the sensor away from the stator to completely unclip it.

    • Remove the rotor position sensor.

Abschluss

To reassemble your device, follow these instructions in reverse order.

Take your e-waste to an R2 or e-Stewards certified recycler.

Repair didn’t go as planned? Ask our Answers community for help.
Bill Gilbert

Mitglied seit: 30/06/22

6491 Reputation

0 Kommentare