Einleitung

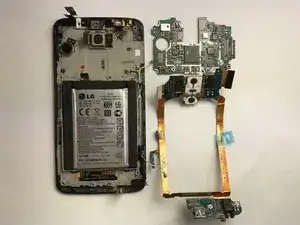
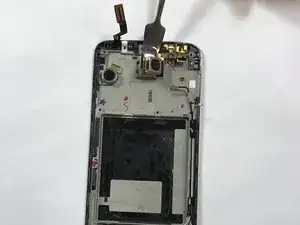
The Camera requires almost all of the phone to be dissected. Make sure to keep all screws and parts in a safe place to be easily reinstalled.

  1. sBbug2ferfXIMXPg
    sBbug2ferfXIMXPg
    T2SlEUfCQ4RSBSDb
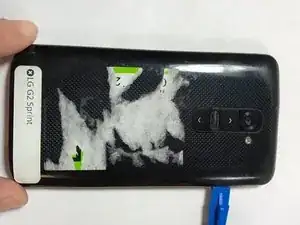
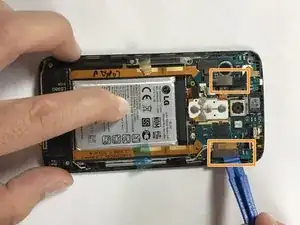
    • Use a plastic opening tool to pry open your phone case. Flip the phone over and start by sliding your tool between the two sides of your phone case. Work the tool towards the bottom of the phone case, gently prying the case open. There is a clip that will pop open after applying gentle but consistent pressure.

    • Make sure to release the clip on the top left corner of the phone case carefully. This is usually the most difficult clip to release.

  2. SBRZaDfBPSFwRwed
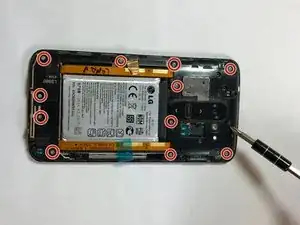
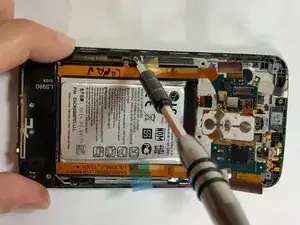
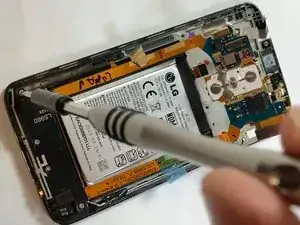
    • After removing the outer phone case, you will need two Phillips head bits. One J0 and one J000 size.

    • There are 11 silver screws for which you have to use J0 head bits, and 1 small black screw for which you have to use a J000 head bit.

    I used a PH 00 for all 12 screws, not one bit of problem.

    Greta Schmidt -

  3. At24jYZ3GhgIAiWD
    At24jYZ3GhgIAiWD
    ehR4NwWArN5iHbgd
    JpPUdKQlHF12bi3V
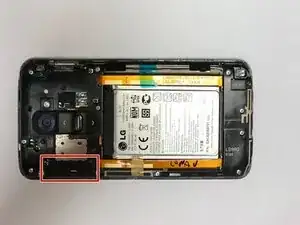
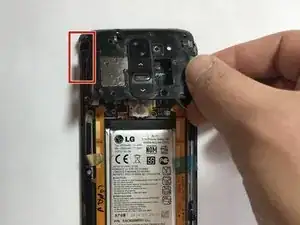
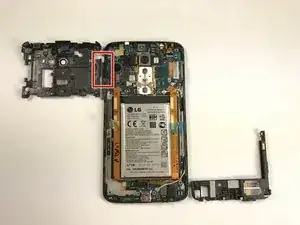
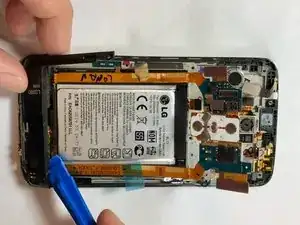
    • There is a clip on the upper left side of the upper panel. Use the plastic opening tool to pry the clip off of the phone.

    • The upper inside panel flips up easily off of the phone case once all the clips and screws are removed. If the panel does not pull off easily, check that you have removed all of the screws.

    • There are ribbons that need to be removed as well. Be sure to carefully pry them off of the board

    The second image here should be duplicated and added at the end of Step 4 (where removing the bottom panel is discussed).

    Greta Schmidt -

  4. NBII45eYaCIwsJHo
    NBII45eYaCIwsJHo
    pQxXfZusSacwpLVF
    N4CqY5YTvwQ5mAd5
    • The bottom inside panel should pry back easily after you take out the screws. Again, if the panel does not pull off easily, you may have missed a screw.

  5. MLjCnHSo4NHLO5RC
    MLjCnHSo4NHLO5RC
    6XBZF4ybTtC456SV
    lXCfYrLXuXiCTxVU
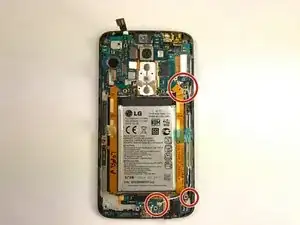
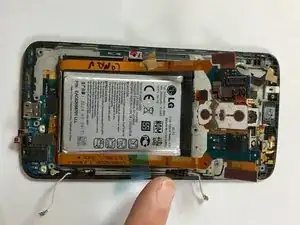
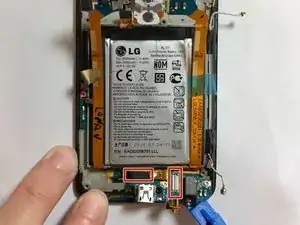
    • There are several clips and circuits that need to be released. They are circled in the images above. Be careful not to break any of the attached ribbon or wires. (circle ribbons etc.)

    • Be careful to use your tools to disconnect the cables at the connectors and not along the wire.

    These images are missing at least four (that’s off the top of my head—my phone’s closed now) more clips/contacts that need to be released, and a couple of adhesive strips that need to be unattached, which should all be circled as well.

    Greta Schmidt -

  6. YUmupZOjbXumjayX
    YUmupZOjbXumjayX
    2VZPRJHajsuhb14u
    fYblSqofqsECBedQ
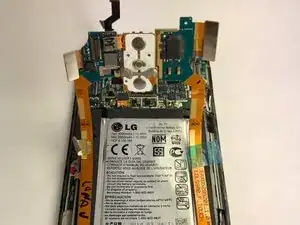
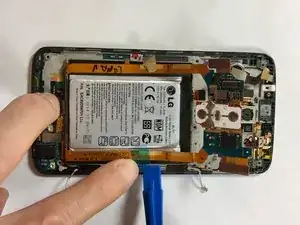
    • There are several clips and circuits that need to be released. They are circled in the images above. Be careful not to break any of the attached ribbon or wires.

    • The orange materials is meant to bend along the dotted line labeled “bend.” Try to make the bend as close to this line as possible.

    The first image above (with the top board bent up) should be moved to the last spot.

    Greta Schmidt -

  7. RT2VXkLjDIDEOA6v
    RT2VXkLjDIDEOA6v
    ejMPxMCWYXYYZBkL
    JpTTRAWSEwMJqFTE
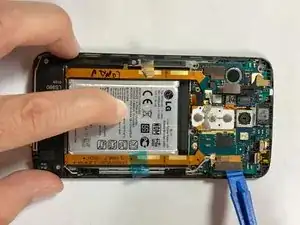
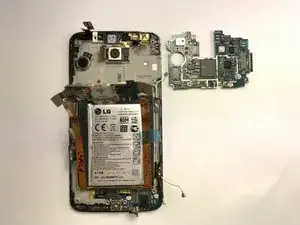
    • After you have disconnected all of the ribbon and antennae connections, you can remove the board. Gently pry the board up from the bottom of the case and slide it back out.

    • Make sure to remove all ribbon connectors from the board prior to removing the board.

    In the first image, over on the left about half an inch above the top finger, there’s a small bit of board that needs to be pried up (it’s attached via a small ribbon) before this can be properly bent up and lifted out.

    —-

    I didn’t need to remove the board and ribbons as seen in the third image. I just slid the top and tiny side bit of board out and bent it up and back, and the bottom board bit stayed in the phone while I removed/replaced the battery.

    Greta Schmidt -

  8. FYRj2XYEEdAymGbN
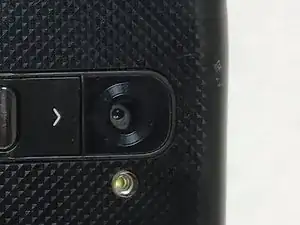
    • The rear facing camera is attached to the phone case with adhesive. Make sure to use your plastic prying tool to softly remove the camera from the case.

    • Only use a plastic or ESD safe tool when removing components such as the camera.

Abschluss

To reassemble your device, follow these instructions in reverse order.
Matthew Kowalczyk

Mitglied seit: 06/10/16

322 Reputation

0 Kommentare