Einleitung
Werkzeuge
Ersatzteile
-
-
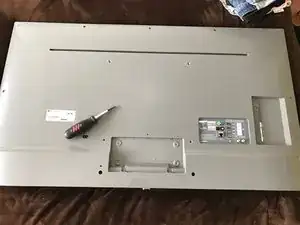
Place the display on a soft surface in order to help prevent scratches and/or breaking the display.
-
Remove the 4 Phillips screws that hold the stand in place (if installed).
-
Remove all screws from the rear panel.
-
There are two screws near to the input and output connectors.
-
On the lower part of the TV (next to the speakers) there are two additional screws that need to be removed.
-
-
-
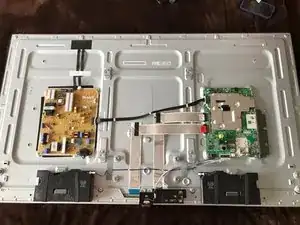
With the panel removed, its possible to visualize the boards and its connections.
-
To the left, there is the power supply, which supplies power to the TV.
-
To the right, there is the logic board.
-
On the lower section you can locate both speakers.
-
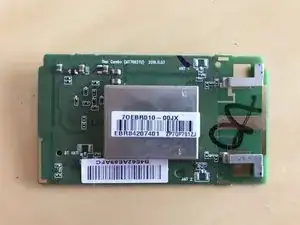
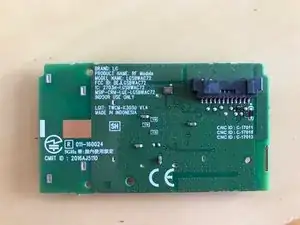
Between both speakers you can find the Wi-Fi and Bluetooth module.
-
-
-
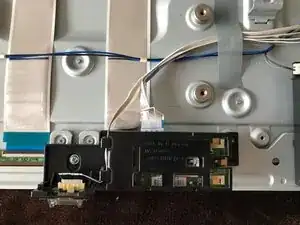
To remove the Wi-Fi and Bluetooth module, there is only one screw holding the entirety of the structure.
-
-
-
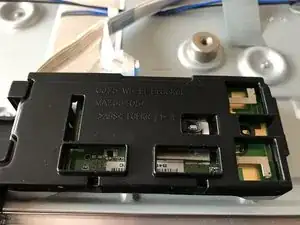
Wi-Fi module removed.
-
If your TV shows the message Device Connected/Device Disconnected, Wi-Fi not working or Magic remote not working, its possible that there is a bad connection on the module.
-
Remove the flex cables carefully and install them once again.
-
In order to remove the flex cable, there is a little tab that needs to be lifted.
-
To reassemble your device, follow this instructions in inverse order.