Einleitung
I've repaired many modern consumer electronics items by simply 're-capping' them. The capacitors used here cost $15 in total including some extras and shipping. There seem to be a lot of people having failures of these units just after five years (the warranty term). Replacing this unit with an Ecobee or Nest is possible but may require new thermostat wiring among your various HVAC units for the extra wires needed.
Werkzeuge
Ersatzteile
-
-
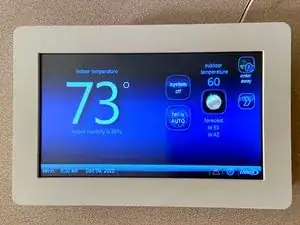
You're here because your early-model iComfort screen is blank! The newer Lennox S30 thermostat is the factory replacement for this iComfort, but it cost $1000-$1500 installed (!), so I decided to have a go at a fix.
-
-
-
The failure symptoms for my unit included the screen going blank for increasing periods of time over a few weeks before going blank permanently. I could always still control the iComfort via the Lennox iComfort app.
-
-
-
Others have reported an all-white screen, lines or odd colors, and since failing capacitors are a common cause of malfunctioning electronics you may have luck with this fix with those types of issues.
-
-
-
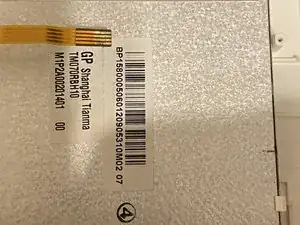
A physically damaged or badly burned-in screen will require a new display panel, around $80 on eBay. I further disassembled my iComfort to get the screen part number. You don't need to do this for just the capacitor repair.
-
-
-
Lightly press anywhere on the screen to make sure the screen saver is not active. Is the top of the thermostat slightly warm? Is your heating/cooling still working normally? If so, power is likely present and the iComfort itself may still be operating correctly.
-
-
-
Hopefully, you or your installer have previously registered your iComfort with Lennox, and you have the iComfort app installed on your cell phone. If so, can you still access and control your iComfort via your cell phone? Good chance of a fix if so. If not, the screen used to work and now it doesn't, so little to lose...
-
-
-
First, turn off the circuit breaker to the indoor unit (also called ventilator, heater, fan). Grasp the iComfort and tilt it downwards to unsnap it from the wall mount. Place the iComfort face-down on a smooth surface.
-
-
-
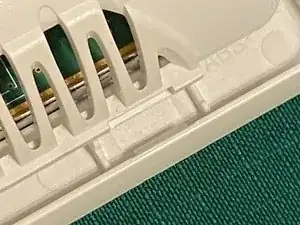
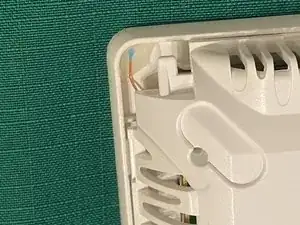
Using the guitar pick or small flat screwdriver, gently pry the bezel rim away from the back plate to free the locking tabs. Take note of the small sensor glued into one corner and start your prying opposite to it. There are 10 tabs, but after you get the first 3 or 4 free the rest are easier. Just don't pry beyond what is needed to clear the tabs!
-
-
-
There is nothing attached to the back plate so just set it aside. The capacitors may have some glue stuck to their bases. Just pick this off; it was used to hold them in place during assembly and need not be replaced.
-
-
-
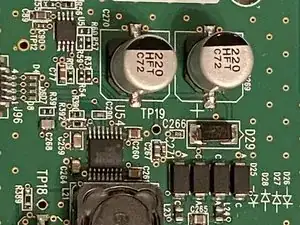
Dab some flux onto each of the capacitor terminals; this helps the solder melt and flushes away any oxides. Apply your soldering iron to the capacitor solder tabs; gently pull up on that side as the solder melts and the capacitor should lift up. Repeat for the other side and remove the capacitor.
-
-
-
If you just can't get the capacitor free, gently rocking and twisting it will eventually break the leads, and you can then easily de-solder the ends still stuck to the circuit board. Proceed at your own risk!
-
-
-
Remove any pieces of leads, and clean up the circuit board solder pads by just running your soldering iron over them. Apply some flux to the pads, and position the new capacitor.
-
-
-
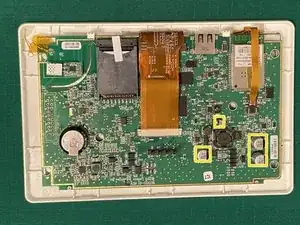
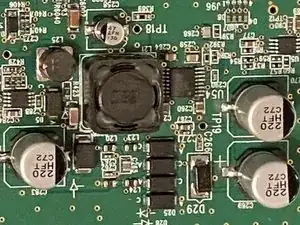
PLEASE observe the proper polarities or else damage will occur; look at the pictures; the three large caps all face the same way; the single small cap faces opposite. The white outlines on the circuit board nicely match the shapes of the capacitors' black plastic bases - note that one side has beveled corners.
-
-
-
C283 is a bit of a tight fit on one side; you can move the new capacitor slightly away from the adjacent component to give yourself more soldering room, as long as you can still get solder onto the circuit board pads.
-
-
-
Apply your soldering iron and some solder to each capacitor tab, heating for long enough that the flux boils and solder flows onto and between the circuit board pad and capacitor lead. The joint should be shiny. Do the other side, and give the capacitor a gentle wiggle to insure the solder joints are good.
-
-
-
Repeat for the remaining capacitors and you're done! They will have a tiny bit of play when you nudge them. Optionally, you can remove any excess flux using alcohol wipes or isopropyl alcohol and Q-tips. Look for any stray balls or pieces of solder and remove those.
-
-
-
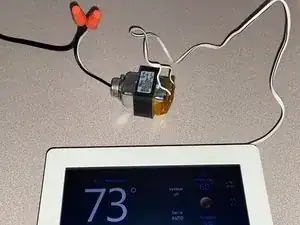
Optional: I used an old doorbell transformer to supply 24VAC to the 'R' and 'C' terminals of the iComfort; it works fine without being connected to the wall plate. I tested it in this state for a week before re-installing it.
-
-
-
Replace the back cover plate by carefully snapping the tabs back into place. Hook the bottom of the iComfort onto the small tabs on the wall plate, and swing the top of the iComfort back into the wall plate until it snaps into place. Turn the interior unit circuit breaker back on.
-
-
-
It may take a minute or two for the iComfort screen to illuminate even if the repair was successful. I would leave it on overnight before giving up.
-
-
-
If successful, the iComfort screen will be on and may show some error warnings. 'X' out of those and the screen should revert to its normal appearance showing temperature, etc. Now, IMPORTANT, SET THE DATE & TIME by pressing on the clock display at lower left. Getting within a few minutes is OK.
-
-
-
The iComfort WILL NOT re-establish its WiFi link to the Lennox iComfort server unless the time/date is pretty close. This is not mentioned in the user manual! This step is required if you use the iComfort app, and/or you want your local weather to appear on the display.
-
I recommend going through any custom iComfort settings to verify they survived (mine did, for 8 months), and I also turned down the screen brightness to the lowest setting of 20%.
