Einleitung

  1. HSB1xKHDYVmKCctX
    • Turn off the computer.

    • Set the computer upside down with the back facing up.

  2. B5wgDJOISGBOURFt
    B5wgDJOISGBOURFt
    LiCDuuNSmWoXikYM
    • Located directly below the bottom plate will be two switches near where the battery is located.

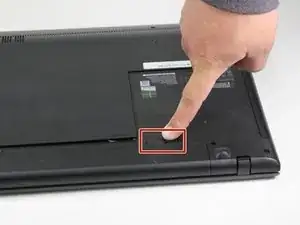
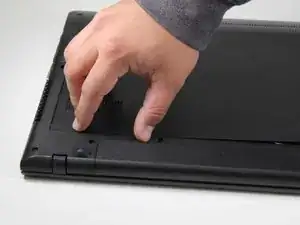
    • With the battery facing you, slide the battery switch on the right side of the laptop towards the right.

    • To ensure the switch on the right is unlocked, look for a red indicator next to the switch.

  3. hIPGrx6KuGLvTcId
    hIPGrx6KuGLvTcId
    JFjYr6iiQQZDfVZb
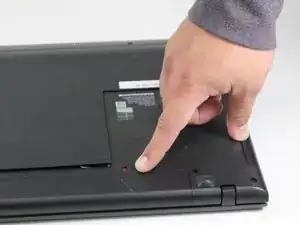
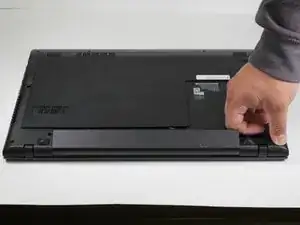
    • Slide the left battery release switch to the left.

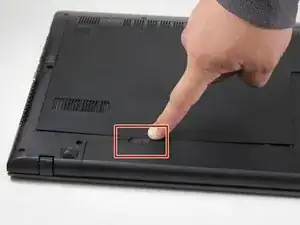
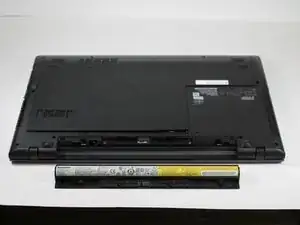
    • While holding the switch to the left, lift the battery to remove it from the computer.

  4. GXAlxBoAY5EcKAG1
    GXAlxBoAY5EcKAG1
    iAofRP3HwI6SCAE1
    • Remove the battery.

  5. pVuoX2SBCGxRrgIb
    • Open the laptop to face the screen.

  6. 3bdTSQ2jPEbfMmsG
    3bdTSQ2jPEbfMmsG
    hnGAK2qNcib6Mf6M
    OKprGGrvVgZZM25Y
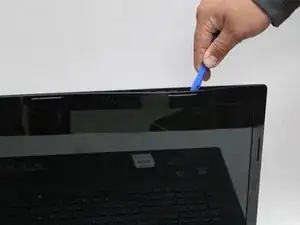
    • Use a plastic opening tool to pull the bezel forward and release it from the top of the LCD panel.

    • The bezel is the plastic frame around the laptop screen.

  7. 4U1XGF1MTjcDYj3K
    4U1XGF1MTjcDYj3K
    Uw33OwoKmEFswNLF
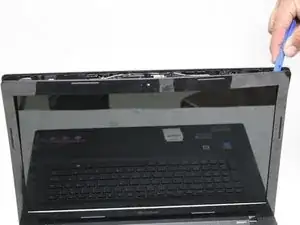
    • After the top part of the bezel is released, use the plastic opening tool to completely remove the bezel.

    • If you are having trouble removing the bezel from the LCD panel, pull both sides of the bezel towards you with your hands.

  8. NeqAFHMZPYKU353e
    NeqAFHMZPYKU353e
    WLiGHagOJ4GXQKG5
    DX44wK6HhpttqE3t
    • Use a screwdriver to remove the screws that secure the LCD panel to the computer.

    • Once the bezel is removed, you will see eight screws around the screen that secure the LCD panel to the computer.

  9. TeBGgyOwyK3AADIe
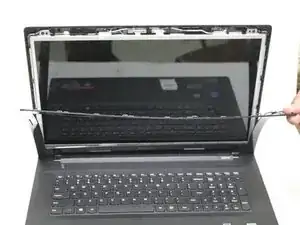
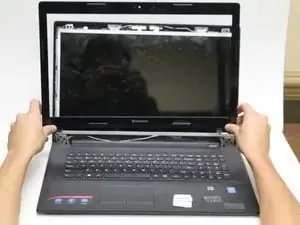
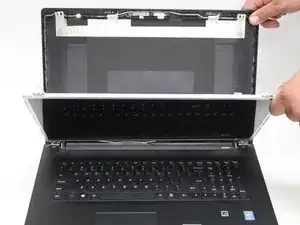
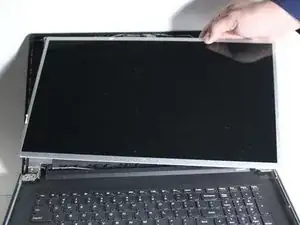
    • Carefully separate the LCD panel from the plastic cover, placing it face down on the keyboard

  10. LfBGHM5n2hVDDgY6
    • Disconnect the LCD panel from the computer by peeling the connector off.

  11. GSg16HOtGDYUKlbD
    GSg16HOtGDYUKlbD
    rItA5RuI2ooSxnI4
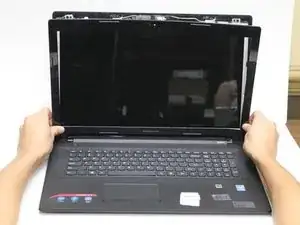
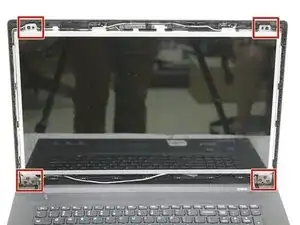
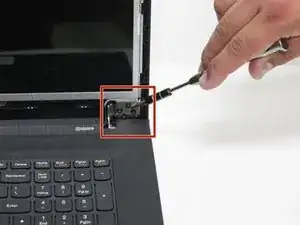
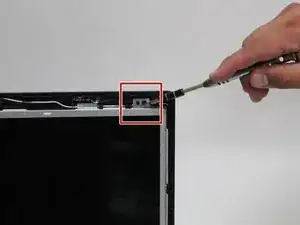
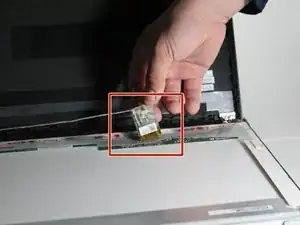
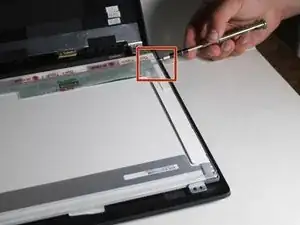
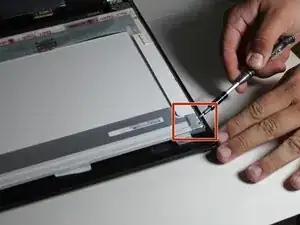
    • With a screwdriver, remove the four screws that mount the LCD panel onto the mounting arms.

    • There is one screw on each corner that connects to the mounting arms.

  12. RlD2nFQTkLPpkVPg
    • Remove the LCD panel.

Abschluss

To reassemble your device, follow these instructions in reverse order.

Alexis Buford

Mitglied seit: 28/02/17

665 Reputation

Ein Kommentar

how do you repair a whitescreen effect for a lenovo110 ideapad

sidney ifedha -