Einleitung
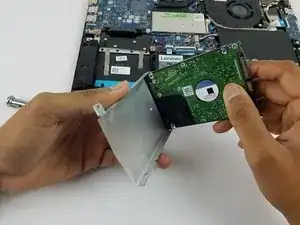
This guide will show you how to remove and replace the hard drive for this device.
Your hard drive may be failing if you're experiencing frequent crashes, frequent and cryptic error messages while performing typical activities, file names changing, or disappearing files.
Werkzeuge
Ersatzteile
-
-
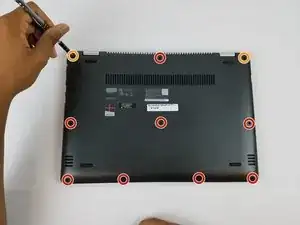
Remove the eight 6 mm screws using a Phillips #0 screwdriver.
-
Remove the two 11 mm screws using a Phillips #0 screwdriver.
-
-
-
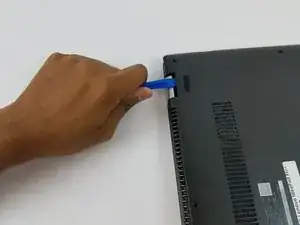
Pry the back cover off by inserting the plastic opening tool at the hinges and wedging it between the Back cover and the body.
-
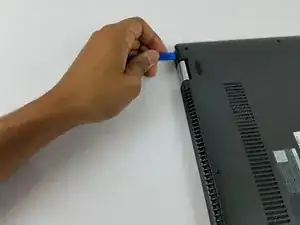
Follow along the back edge with the plastic opening tool, lifting the cover off as you go. It is normal to hear snapping/clicking sounds as the back cover is held on by clips.
-
Remove the cover.
-
-
-
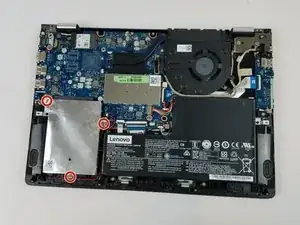
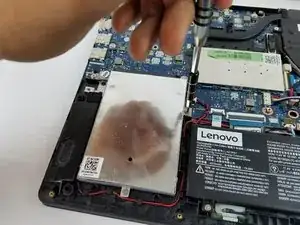
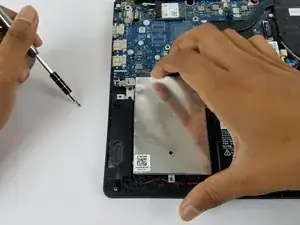
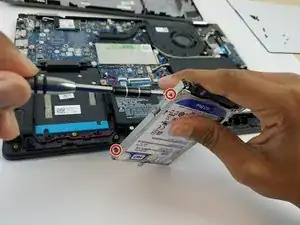
Remove the three 4 mm Phillips #0 screws holding the hard drive in place.
-
Note: A security sticker is normally affixed to the upper-right screw that helps hold the drive in the machine.
-
To reassemble your device, follow these instructions in reverse order.
2 Kommentare
Thanks for posting! Any suggestions on the best means to transfer (mirror) the old to new drive?
This guide comes up when I click on “keyboard replacement.” Is there a guide for keyboard replacement? A search does not find one.
I have to know how long the pins are in the clips that hold the hinges in place. I don’t want to destroy my tablet.
otlerelron -
Mine had ten tiny little star screws. Not Phillips.
Justen Hansen -