Einleitung

This guide shows a step by step process to replace the screen on a Lenovo Ideatab S6000. The part being replaced is the screen and the digitizer. They are both included in one assembly. This part would need to be replaced if the display is not working properly or the touch screen display is faulty. If the screen is cracked or shattered, be sure to wear proper protective equipment and make sure device is turned off before any repair is started.

  1. xsP6PPjEBF6lPwih
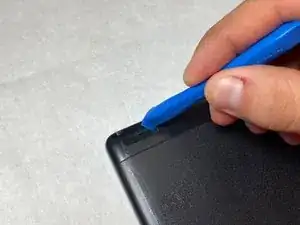
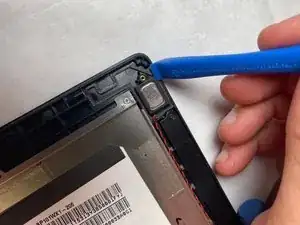
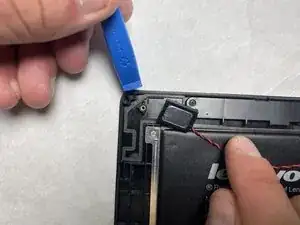
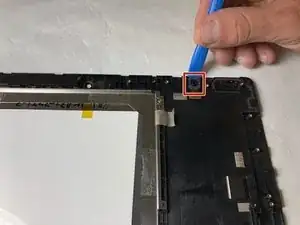
    • Remove the speaker screens by working them loose with a plastic opening tool. You may need to first loosen them with tweezers or a spudger.

    • These screens are held in place by glue that is hard to remove. Please take your time to ensure that that this step is done correctly.

  2. Mj6AjiHOvBYlwIsi
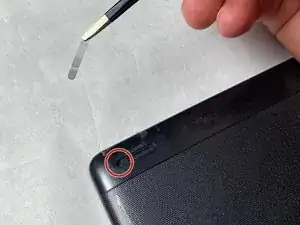
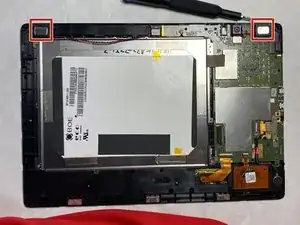
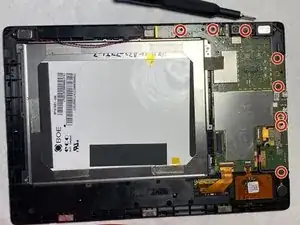
    • Remove the screws from both of the spots that were covered with a Phillips #000 screwdriver.

  3. HjPP5G3XFNvjVomd
    • Go all around the casing, prying the screen away from the backing with the spudger.

    • It will make a popping sound each time one of the lock tabs is disconnected.

    • Take your time as you move all around the device when prying the backing off.

    • Do not use a metal tool for this.

  4. f4WqRubjPTTHySIS
    f4WqRubjPTTHySIS
    bHrAWWjCVNDNCAj6
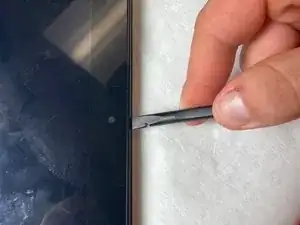
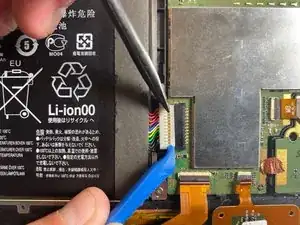
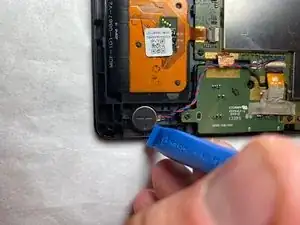
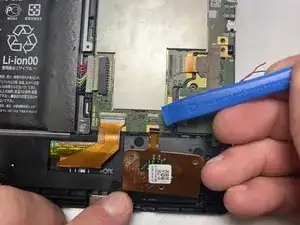
    • Using either the plastic opening tool or your fingers, gently pull on both sides of the plug to release it.

  5. 43SbLXAQNJFxH56E
    • Remove the battery by grabbing the tab shown and pulling up.

    • The battery is held to the device by adhesive. Pull the battery up from the tab and it will lift out with a bit of effort.

  6. rF23M1TD2DuFZGlZ
    rF23M1TD2DuFZGlZ
    YrPUGHqIRlX3ATb2
    MLAe1pgEMM3xEOiB
    • Use an opening tool to pry the speakers out of the tablet.

    • The speakers are connected to the tablet by glue and require a lot of prying to remove.

  7. DHp1wAHiMCB24TwB
    • Use the plastic opening tool to pry up the vibration motor.

  8. 2RX6euBujXao5YWE
    • Remove the 3.2mm screws using a Phillips #000 screwdriver.

  9. ZR4qITJCSWbrP16o
    ZR4qITJCSWbrP16o
    6IBXn4VfOhPVFse5
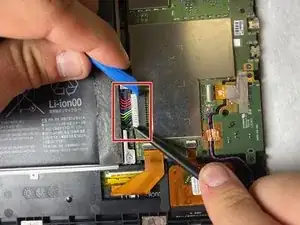
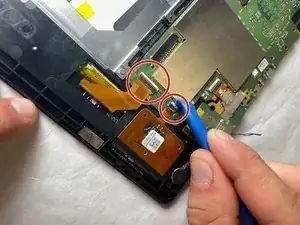
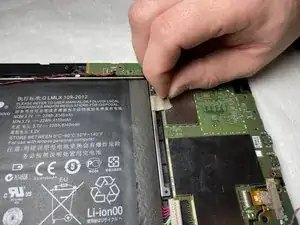
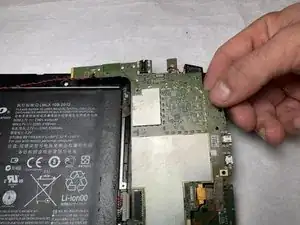
    • Flip up the black tab on each connector.

    • Pull the ribbon cables out using a plastic opening tool.

  10. o1Z1cRDELcHsGakT
    • Remove the piece of tape by pulling up with your fingers.

  11. P2Uuco3uCvXXUg5t
    P2Uuco3uCvXXUg5t
    vmtrS6I3GncQlKjl
    • Gently pull up on motherboard with fingers and remove.

  12. ZkOYSa52qQGmFEEX
    • Gently pry the rear camera out of the tablet with the plastic opening tool.

  13. tbZQssRou2SsFBW3
    tbZQssRou2SsFBW3
    JEEoDml4TMdIEsJL
    • You are left with the bare screen at this point. This is what will need to be replaced.

Abschluss

To reassemble your device, follow these instructions in reverse order.

Dalton Sholders

Mitglied seit: 07/11/19

469 Reputation

0 Kommentare